MapReduce Tutorial with sample code WordCount.java

  1. git pull https://github.com/zhuby1973/python/blob/master/WordCount.java to hadoop VM
  2. add environment variables:
    export PATH=${JAVA_HOME}/bin:${PATH}
    export HADOOP_CLASSPATH=${JAVA_HOME}/lib/tools.jar
  3. compile
    $ hadoop com.sun.tools.javac.Main WordCount.java
    $ jar cf wc.jar WordCount*.class
  4. create input directory in HDFS
    hdfs dfs -mkdir /wordcount
    hdfs dfs -mkdir /wordcount/input
    echo "Hello World Bye World" > file01
    echo "Hello Hadoop Goodbye Hadoop" > file02
    hadoop fs -put file0* /wordcount/input
    hadoop fs -ls /wordcount/input
    hadoop fs -cat /wordcount/input/file01
  5. edit "~/hadoop-3.1.3/etc/hadoop/yarn-site.xml" as below:
<configuration>
  <property>
   <name>mapreduceyarn.nodemanager.aux-services</name>
   <value>mapreduce_shuffle</value>
  </property>
  <property>
    <name>yarn.nodemanager.aux-services</name>
    <value>mapreduce_shuffle</value>
  </property>
  <property>
    <name>yarn.nodemanager.aux-services.mapreduce_shuffle.class</name>
    <value>org.apache.hadoop.mapred.ShuffleHandler</value>
  </property>
  <property>
    <name>yarn.nodemanager.vmem-check-enabled</name>
    <value>false</value>
  </property>
</configuration>
  1. edit ~/hadoop-3.1.3/etc/hadoop/mapred-site.xml as below:
<configuration>
 <property>
   <name>mapreduce.framework.name</name>
   <value>yarn</value>
 </property>
 <property>
   <name>yarn.app.mapreduce.am.env</name>
   <value>HADOOP_MAPRED_HOME=${HADOOP_HOME}</value>
 </property>
 <property>
   <name>mapreduce.map.env</name>
   <value>HADOOP_MAPRED_HOME=${HADOOP_HOME}</value>
 </property>
 <property>
   <name>mapreduce.reduce.env</name>
   <value>HADOOP_MAPRED_HOME=${HADOOP_HOME}</value>
 </property>
 <property>
   <name>yarn.app.mapreduce.am.env</name>
   <value>HADOOP_MAPRED_HOME=${HADOOP_HOME}</value>
 </property>
 <property>
   <name>mapreduce.map.env</name>
   <value>HADOOP_MAPRED_HOME=${HADOOP_HOME}</value>
 </property>
 <property>
   <name>mapreduce.reduce.env</name>
   <value>HADOOP_MAPRED_HOME=${HADOOP_HOME}</value>
 </property>
</configuration>

you need stop-all.sh and start-all.sh to restart hadoop after changes.

  1. Run the application:
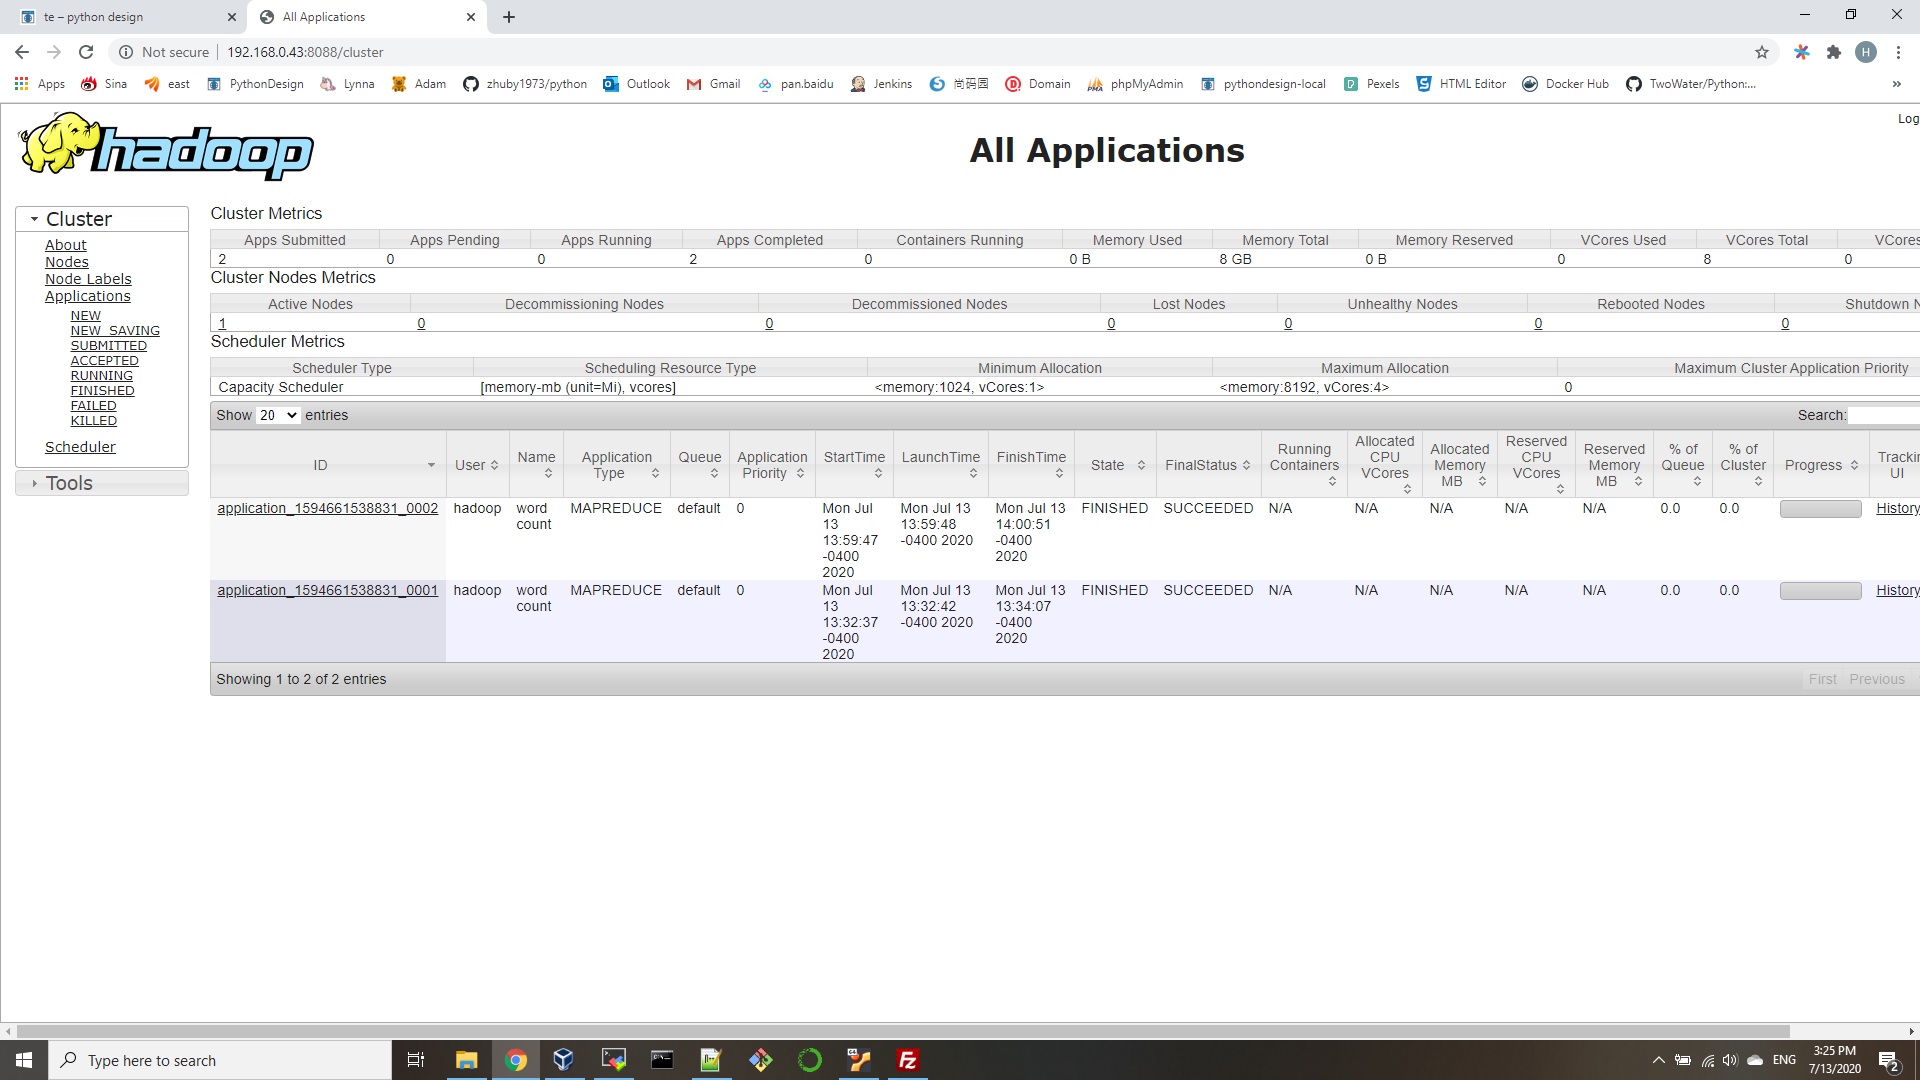
    $ hadoop jar wc.jar WordCount /wordcount/input /wordcount/output
    verify the output:
    hadoop@ubunu2004:~$ hadoop fs -ls /wordcount/output
    Found 2 items
    -rw-r–r– 1 hadoop supergroup 0 2020-07-13 13:34 /wordcount/output/_SUCCESS
    -rw-r–r– 1 hadoop supergroup 41 2020-07-13 13:34 /wordcount/output/part-r-00000
    you need delete /wordcount/output if you need run it again:
    hadoop fs -rm -r -f /wordcount/output

Ubuntu 20.04 Hadoop

  1. Create user for Hadoop environment
    $ sudo adduser hadoop
  2. Install the Java prerequisite
    $ sudo apt update
    $ sudo apt install openjdk-8-jdk openjdk-8-jre
  3. Configure passwordless SSH
    $ sudo apt install openssh-server openssh-client
    $ su hadoop
    $ ssh-keygen -t rsa
    $ cat ~/.ssh/id_rsa.pub >> ~/.ssh/authorized_keys
    You can make sure that the configuration was successful by SSHing into localhost. If you are able to do it without being prompted for a password, you’re good to go.
  4. Install Hadoop and configure related XML files
    Head over to Apache’s website to download Hadoop.
    $ wget https://downloads.apache.org/hadoop/common/hadoop-3.1.3/hadoop-3.1.3.tar.gz
    $ tar -xzvf hadoop-3.1.3.tar.gz -C /home/hadoop
    4.1. Setting up the environment variable
    add below lines into ~/.bashrc
    export HADOOP_HOME=/home/hadoop/hadoop-3.1.3
    export HADOOP_INSTALL=$HADOOP_HOME
    export HADOOP_MAPRED_HOME=$HADOOP_HOME
    export HADOOP_COMMON_HOME=$HADOOP_HOME
    export HADOOP_HDFS_HOME=$HADOOP_HOME
    export YARN_HOME=$HADOOP_HOME
    export HADOOP_COMMON_LIB_NATIVE_DIR=$HADOOP_HOME/lib/native
    export PATH=$PATH:$HADOOP_HOME/sbin:$HADOOP_HOME/bin
    export HADOOP_OPTS="-Djava.library.path=$HADOOP_HOME/lib/native"
    Source the .bashrc file in current login session:
    $ source ~/.bashrc
    vi ~/hadoop-3.1.3/etc/hadoop/hadoop-env.sh
    add below to the end:
    export JAVA_HOME=/usr/lib/jvm/java-8-openjdk-amd64
    4.2. Configuration changes in core-site.xml file
    mkdir ~/hadooptmpdata
    vi ~/hadoop-3.1.3/etc/hadoop/core-site.xml
<configuration>
 <property>
   <name>fs.defaultFS</name>
   <value>hdfs://localhost:9000</value>
 </property>
 <property>
   <name>hadoop.tmp.dir</name>
   <value>/home/hadoop/hadooptmpdata</value>
 </property>
</configuration>

4.3. Configuration changes in hdfs-site.xml file
$ mkdir -p ~/hdfs/namenode ~/hdfs/datanode
vi ~/hadoop-3.1.3/etc/hadoop/hdfs-site.xml

<configuration>
 <property>
   <name>dfs.replication</name>
   <value>1</value>
 </property>
 <property>
   <name>dfs.name.dir</name>
   <value>file:///home/hadoop/hdfs/namenode</value>
 </property>
 <property>
   <name>dfs.data.dir</name>
   <value>file:///home/hadoop/hdfs/datanode</value>
 </property>
</configuration>

4.4. Configuration changes in mapred-site.xml file
vi ~/hadoop-3.1.3/etc/hadoop/mapred-site.xml

<configuration>
 <property>
   <name>mapreduce.framework.name</name>
   <value>yarn</value>
 </property>
</configuration>

4.5. Configuration changes in yarn-site.xml file
vi ~/hadoop-3.1.3/etc/hadoop/yarn-site.xml

<configuration>
 <property>
   <name>mapreduceyarn.nodemanager.aux-services</name>
   <value>mapreduce_shuffle</value>
 </property>
</configuration>
  1. Starting the Hadoop cluster
    Before using the cluster for the first time, we need to format the namenode. You can do that with the following command:
    $ hdfs namenode -format
    Next, start the HDFS by using the start-dfs.sh script:
    $ start-dfs.sh
    Now, start the YARN services via the start-yarn.sh script:
    $ start-yarn.sh
    To verify all the Hadoop services/daemons are started successfully you can use the jps command.
    hadoop@ubunu2004:~$ jps
    10898 NodeManager
    12850 Jps
    10342 DataNode
    10761 ResourceManager
    10525 SecondaryNameNode
    10223 NameNode
    hadoop@ubunu2004:~$ hadoop version
    Hadoop 3.1.3
  2. HDFS Command Line Interface
    $ hdfs dfs -mkdir /test
    $ hdfs dfs -mkdir /hadooponubuntu
    $ hdfs dfs -ls /
  3. Access the Namenode and YARN from browser
    http://192.168.0.43:9870/

http://192.168.0.43:8088/

  1. Conclusion
    In this article, we saw how to install Hadoop on a single node cluster in Ubuntu 20.04 Focal Fossa. Hadoop provides us a wieldy solution to dealing with big data, enabling us to utilize clusters for storage and processing of our data. It makes our life easier when working with large sets of data with its flexible configuration and convenient web interface.