baiyun@Azure:~$ version=$(az aks get-versions -l eastus --query 'orchestrators[-1].orchestratorVersion' -o tsv)
baiyun@Azure:~$ az group create --name akshandsonlab2 --location eastus
baiyun@Azure:~$ az aks create --resource-group akshandsonlab --name hansakscluster20201 --enable-addons monitoring --kubernetes-version $version --generate-ssh-keys --location eastus
baiyun@Azure:~$ az acr create --resource-group akshandsonlab --name hansacr2020 --sku Standard --location eastus
baiyun@Azure:~$ AKS_RESOURCE_GROUP="akshandsonlab"
baiyun@Azure:~$ AKS_CLUSTER_NAME="hansakscluster2020"
baiyun@Azure:~$ ACR_RESOURCE_GROUP="akshandsonlab"
baiyun@Azure:~$ ACR_NAME="hansacr2020"
baiyun@Azure:~$ CLIENT_ID=$(az aks show --resource-group $AKS_RESOURCE_GROUP --name $AKS_CLUSTER_NAME --query "servicePrincipalProfile.clientId" --output tsv)
baiyun@Azure:~$ ACR_ID=$(az acr show --name $ACR_NAME --resource-group $ACR_RESOURCE_GROUP --query "id" --output tsv)
baiyun@Azure:~$ az role assignment create --assignee $CLIENT_ID --role acrpull --scope $ACR_ID
baiyun@Azure:~$ az sql server create -l eastus -g akshandsonlab -n hanssqlserver2020 -u sqladmin -p P2ssw0rd1234
baiyun@Azure:~$ az sql db create -g akshandsonlab -s hanssqlserver2020 -n mhcdb --service-objective S0

check names on https://portal.azure.com/:
Server name: hanssqlserver2020.database.windows.net
Login server: hansacr2020.azurecr.io


baiyun@Azure:~$ az aks get-credentials --resource-group akshandsonlab --name hansakscluster2020
Merged "hansakscluster2020" as current context in /home/baiyun/.kube/config
baiyun@Azure:~$ kubectl get nodes
NAME                                STATUS   ROLES   AGE   VERSION
aks-nodepool1-32402993-vmss000000   Ready    agent   31m   v1.19.0
aks-nodepool1-32402993-vmss000001   Ready    agent   31m   v1.19.0
aks-nodepool1-32402993-vmss000002   Ready    agent   31m   v1.19.0
How to use File Storage transfer files to Azure clouddrive
- create a Azure Storage Account and File Storage first, then click “Connect” to get connection Credential
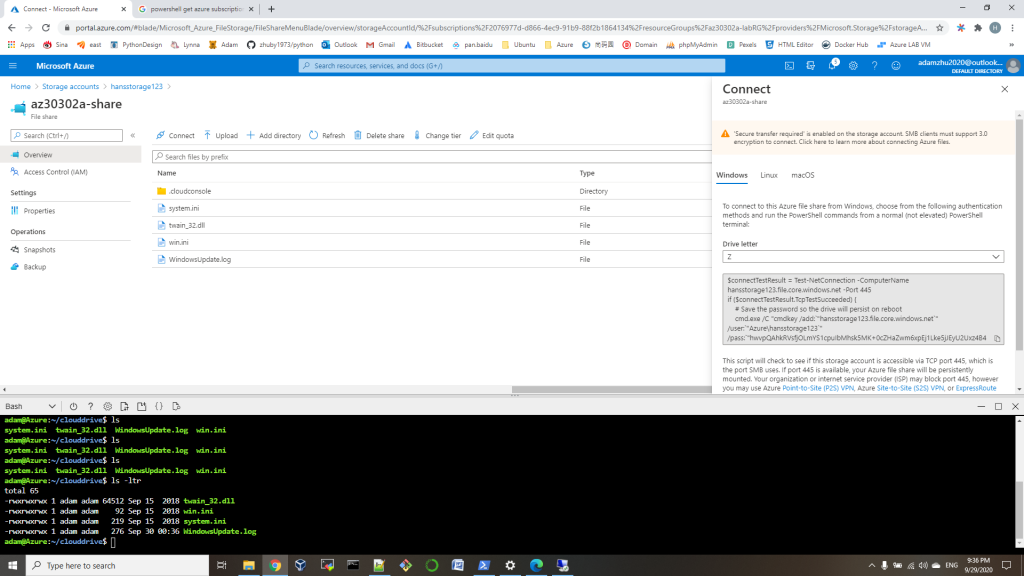
2. open a PowerShell on local computer, run the commands copied from first step:
# Save the password so the drive will persist on rebootcmd.exe /C "cmdkey /add:`"hansstorage123.file.core.windows.net`" /user:`"Azure\hansstorage123`" /pass:`"hwvpQAhkRVsfjOLmYS1cpuIbMhsk5MK+0cZHaZwm6xpEj1Lke5jJEyU2Uxz4B4QKFLLaMcgyUQvQE0VzkxtGxA==`""# Mount the driveNew-PSDrive -Name Z -PSProvider FileSystem -Root "\\hansstorage123.file.core.windows.net\az30302a-share" -Persist
3. then you can copy files to Z: driver
4. run below command on Azure PowerShell window, you will find all the files in Z: mounted to your Azure:~/clouddrive
$subscription_id = (Get-AzContext).Subscription.id
clouddrive mount -s "$subscription_id" -g 'az30302a-labRG' -n 'hansstorage123' -f 'az30302a-share'
or you can use git clone your repository to your Azure:~/clouddrive.
List or remove Azure resources with Bash or PowerShell
Bash:
list:
az group list --query "[?starts_with(name,'az30301a-')]".name --output tsv
remove:
az group list --query "[?starts_with(name,'az30301a-')]".name --output tsv | xargs -L1 bash -c 'az group delete --name $0 --no-wait --yes'
PowerShell:
list:
Get-AzResourceGroup -Name ‘*’
remove:
Get-AzResourceGroup -Name ‘*’ | Remove-AzResourceGroup -Force -AsJob
Deploy with template and parameters file:
az deployment group create \
--resource-group az30301b-testRG \
--template-file azuredeploy30301rgb.json \
--parameters @azuredeploy30301rgb.parameters.json
Azure Template deployment and RGs clean
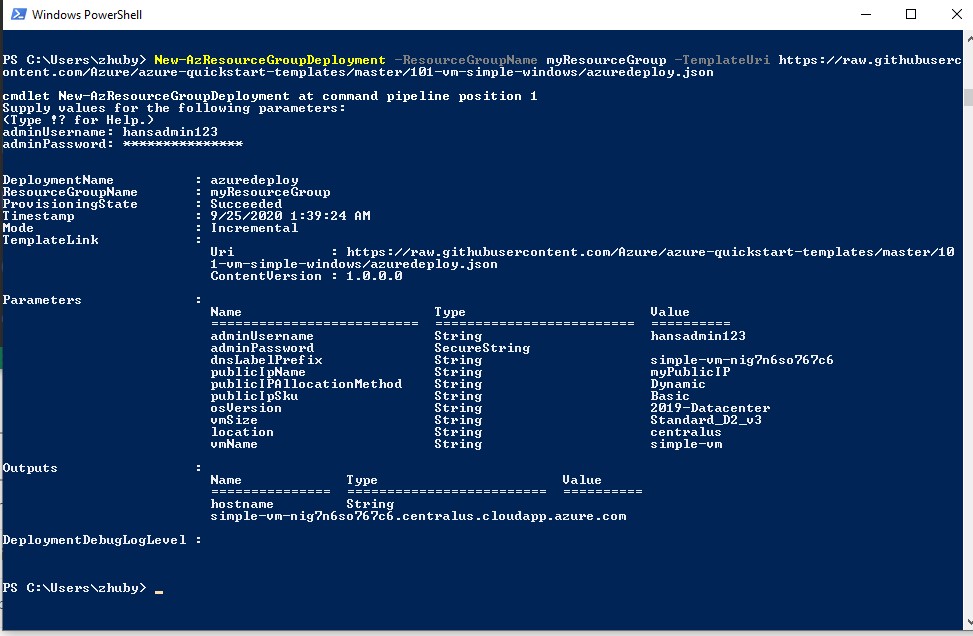
- we can create a VM with a simple template:
New-AzResourceGroupDeployment -ResourceGroupName myResourceGroup -TemplateUri https://raw.githubusercontent.com/Azure/azure-quickstart-templates/master/101-vm-simple-windows/azuredeploy.json
2. we can try to create our own template file azuredeploy.json:
{
    "$schema": "https://schema.management.azure.com/schemas/2019-04-01/deploymentTemplate.json#",
    "contentVersion": "1.0.0.0",
    "resources": [
      {
        "type": "Microsoft.Storage/storageAccounts",
        "apiVersion": "2019-04-01",
        "name": "{provide-unique-name}",
        "location": "eastus",
        "sku": {
          "name": "Standard_LRS"
        },
        "kind": "StorageV2",
        "properties": {
          "supportsHttpsTrafficOnly": true
        }
      }
    ]
  }
create resource with commands:
1. create a new ResourceGroup
New-AzResourceGroup `
  -Name myResourceGroup `
  -Location "Central US"

2. addstorage
 $templateFile = "azuredeploy.json"
New-AzResourceGroupDeployment `
  -Name addstorage `
  -ResourceGroupName myResourceGroup `
  -TemplateFile $templateFile
3. you can delete ALL ResourceGroups with command:
Get-AzResourceGroup -Name ‘*’ | Remove-AzResourceGroup -Force -AsJob

install Azure PowerShell on Windows10
get steps from https://docs.microsoft.com/en-us/powershell/azure/install-az-ps?view=azps-4.7.0, Installing the module for all users on a system requires elevated privileges. Start the PowerShell session using Run as administrator in Windows or use the sudo command on macOS or Linux:
1. install the Azure PowerShell:
if ($PSVersionTable.PSEdition -eq 'Desktop' -and (Get-Module -Name AzureRM -ListAvailable)) {
    Write-Warning -Message ('Az module not installed. Having both the AzureRM and ' +
      'Az modules installed at the same time is not supported.')
} else {
    Install-Module -Name Az -AllowClobber -Scope AllUsers
}

2. run Connect-AzAccount to login
PS C:\Windows\system32> Connect-AzAccount
Connect-AzAccount : The 'Connect-AzAccount' command was found in the module 'Az.Accounts', but the module could not be
loaded. For more information, run 'Import-Module Az.Accounts'.
At line:1 char:1
+ Connect-AzAccount
+ ~~~~~~~~~~~~~~~~~
    + CategoryInfo          : ObjectNotFound: (Connect-AzAccount:String) [], CommandNotFoundException
    + FullyQualifiedErrorId : CouldNotAutoloadMatchingModule

3. run Set-ExecutionPolicy RemoteSigned to fix the issue
PS C:\Windows\system32> Set-ExecutionPolicy RemoteSigned

4. run Connect-AzAccount to login again:
PS C:\Windows\system32> Connect-AzAccount

Account               SubscriptionName         TenantId                             Environment
-------               ----------------         --------                             -----------
zhuby1973@outlook.com Azure Pass - Sponsorship 2b73972d-b7ec-4ec6-a9ae-84471a4aacd7 AzureCloud

5. run Get-AzResourceGroup to get your ResourceGroup list
PS C:\Windows\system32> Get-AzResourceGroup -Name '*'
Create a Python app in Azure App Service on Linux
make sure you have python3 and Azure CLI installed on Windows:
C:\Users\zhuby>python --version
Python 3.8.3
C:\Users\zhuby>az --version
azure-cli                         2.12.0
Then sign in to Azure through the CLI: az login
Clone the sample code, setup venv and deploy to local/Azure:
C:\Users\zhuby>git clone https://github.com/Azure-Samples/python-docs-hello-world
C:\Users\zhuby>cd python-docs-hello-world
C:\Users\zhuby\python-docs-hello-world>python -m venv venv
C:\Users\zhuby\python-docs-hello-world>venv\Scripts\activate.bat
(venv) C:\Users\zhuby\python-docs-hello-world>pip install -r requirements.txt
(venv) C:\Users\zhuby\python-docs-hello-world>flask run

(venv) C:\Users\zhuby\python-docs-hello-world>az webapp up --sku F1 -n python0508
The webapp 'python0508' doesn't exist
Creating Resource group 'zhuby1973_rg_Linux_centralus' ...
Resource group creation complete
Creating AppServicePlan 'zhuby1973_asp_Linux_centralus_0' ...
Creating webapp 'python0508' ...
Configuring default logging for the app, if not already enabled
Creating zip with contents of dir C:\Users\zhuby\python-docs-hello-world ...
Getting scm site credentials for zip deployment
Starting zip deployment. This operation can take a while to complete ...
Deployment endpoint responded with status code 202
You can launch the app at http://python0508.azurewebsites.net
{
  "URL": "http://python0508.azurewebsites.net",
  "appserviceplan": "zhuby1973_asp_Linux_centralus_0",
  "location": "centralus",
  "name": "python0508",
  "os": "Linux",
  "resourcegroup": "zhuby1973_rg_Linux_centralus",
  "runtime_version": "python|3.7",
  "runtime_version_detected": "-",
  "sku": "FREE",
  "src_path": "C:\\Users\\zhuby\\python-docs-hello-world"
}
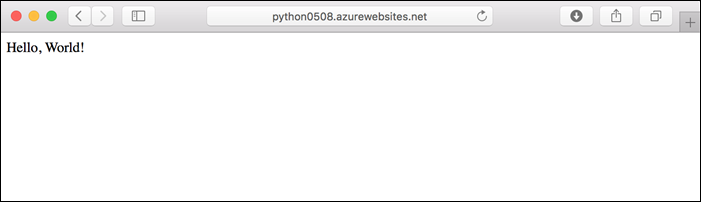
you can redeploy updates, edit the app.py with below:
def hello():
    print("Handling request to home page.")
    return "Hello, Azure!"
Redeploy the app using the az webapp up command again! you will get update the webpage.
To stream logs, run the az webapp log tail command.
create Navigation bar in Flask web application
- we will start from simple app.py, base.html and index.html first:
app.py:
from flask import Flask, redirect, render_template, request, session, url_for
app = Flask(__name__)
@app.route("/")
def home():
return render_template("index.html")
if __name__ == "__main__":
app.run("0.0.0.0", 5000, debug=True)
base.html:
<!doctype html>
<html>
<head>
<title>Home page</title>
</head>
<body>
<h1>Hans webpage</h1>
{% block content %}{% endblock %}
</body>
</html>
index.html:
{% extends "base.html" %}
{% block content %}
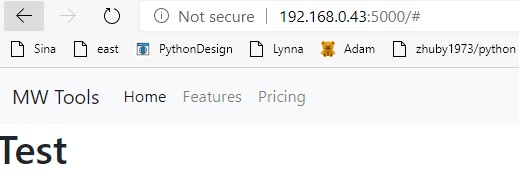
<h1>Test</h1>
{% endblock %}
2. go to https://getbootstrap.com/docs/4.3/getting-started/introduction/ copy CSS and JS into base.html
CSS:
<link rel="stylesheet" href="https://stackpath.bootstrapcdn.com/bootstrap/4.3.1/css/bootstrap.min.css" integrity="sha384-ggOyR0iXCbMQv3Xipma34MD+dH/1fQ784/j6cY/iJTQUOhcWr7x9JvoRxT2MZw1T" crossorigin="anonymous">
JS:
<script src="https://code.jquery.com/jquery-3.3.1.slim.min.js" integrity="sha384-q8i/X+965DzO0rT7abK41JStQIAqVgRVzpbzo5smXKp4YfRvH+8abtTE1Pi6jizo" crossorigin="anonymous"></script>
<script src="https://cdnjs.cloudflare.com/ajax/libs/popper.js/1.14.7/umd/popper.min.js" integrity="sha384-UO2eT0CpHqdSJQ6hJty5KVphtPhzWj9WO1clHTMGa3JDZwrnQq4sF86dIHNDz0W1" crossorigin="anonymous"></script>
<script src="https://stackpath.bootstrapcdn.com/bootstrap/4.3.1/js/bootstrap.min.js" integrity="sha384-JjSmVgyd0p3pXB1rRibZUAYoIIy6OrQ6VrjIEaFf/nJGzIxFDsf4x0xIM+B07jRM" crossorigin="anonymous"></script>
3. go to https://getbootstrap.com/docs/4.3/components/navbar/ to pick one style and copy the code into base.html:
<!doctype html>
<html>
    <head>
        <link rel="stylesheet" href="https://stackpath.bootstrapcdn.com/bootstrap/4.3.1/css/bootstrap.min.css" integrity="sha384-ggOyR0iXCbMQv3Xipma34MD+dH/1fQ784/j6cY/iJTQUOhcWr7x9JvoRxT2MZw1T" crossorigin="anonymous">
        <title>Home page</title>
    </head>
    <body>
                <nav class="navbar navbar-expand-lg navbar-light bg-light">
                  <a class="navbar-brand" href="#">MW Tools</a>
                  <button class="navbar-toggler" type="button" data-toggle="collapse" data-target="#navbarNav" aria-controls="navbarNav" aria-expanded="false" aria-label="Toggle navigation">
                        <span class="navbar-toggler-icon"></span>
                  </button>
                  <div class="collapse navbar-collapse" id="navbarNav">
                        <ul class="navbar-nav">
                          <li class="nav-item active">
                                <a class="nav-link" href="#">Home <span class="sr-only">(current)</span></a>
                          </li>
                          <li class="nav-item">
                                <a class="nav-link" href="#">Features</a>
                          </li>
                          <li class="nav-item">
                                <a class="nav-link" href="#">Pricing</a>
                          </li>
                        </ul>
                  </div>
                </nav>
        {% block content %}{% endblock %}
        <script src="https://code.jquery.com/jquery-3.3.1.slim.min.js" integrity="sha384-q8i/X+965DzO0rT7abK41JStQIAqVgRVzpbzo5smXKp4YfRvH+8abtTE1Pi6jizo" crossorigin="anonymous"></script>
        <script src="https://cdnjs.cloudflare.com/ajax/libs/popper.js/1.14.7/umd/popper.min.js" integrity="sha384-UO2eT0CpHqdSJQ6hJty5KVphtPhzWj9WO1clHTMGa3JDZwrnQq4sF86dIHNDz0W1" crossorigin="anonymous"></script>
        <script src="https://stackpath.bootstrapcdn.com/bootstrap/4.3.1/js/bootstrap.min.js" integrity="sha384-JjSmVgyd0p3pXB1rRibZUAYoIIy6OrQ6VrjIEaFf/nJGzIxFDsf4x0xIM+B07jRM" crossorigin="anonymous"></script>
    </body>
</html>
4. start app.py, you will get your web app:
remote manage VM with Flask web application
We will use waitress as WSGI to serve the Flask web application, to start it with:
waitress-serve –port=8080 main:app
(in our case, we have main.py with app = Flask(name) inside)
Or you can edit main.py, so it can run with waitress directly, only need two changes:
1. add from waitress import serve at beginning
2. update the last line to serve(app, host=’0.0.0.0′, port=8080)
Here is main.py:
from flask import Flask, redirect, render_template, request, session, url_for
import subprocess
app = Flask(__name__)
def api(cmd):
    p = subprocess.Popen(cmd, shell=True, stdout=subprocess.PIPE,
    stderr=subprocess.PIPE, universal_newlines=True)
    stdout, stderr = p.communicate()
    return stdout
@app.route("/", methods = ["POST", "GET"])
def login():
    if request.method == "POST":
        user = request.form["name"]
        return redirect(url_for("success", name=user))
    else:
        return render_template("login.html")

@app.route("/success", methods = ["POST", "GET"])
def success():
    ip_addr = request.form.get('ip_addr')
    cmd = request.form.get('name')
    print(cmd)
    full_cmd = "/home/zhuby/sshpass -p my_password ssh " + ip_addr + " -o ConnectTimeout=2 -o StrictHostKeyChecking=no -o LogLevel=Error " + cmd
    print(full_cmd)
    return render_template("success.html", subprocess_output=api(full_cmd))

if __name__ == "__main__":
    app.run("0.0.0.0", 8080)
and login.html:
html>
   <body>
      <form action="{{ url_for('success') }}" method="post">
         <p>Enter the external hostname or IP:</p>
         <p><input type = "text" name = "ip_addr" /></p>
         <p>Enter Command:</p>
         <p><input type = "text" name = "name" /></p>
         <p><input type = "submit" value = "submit" /></p>
      </form>
   </body>
</html>
and success.html
<html>
    <body>
        {% block content %}
         <pre>{{ subprocess_output }}</pre>
        {% endblock %}
    </body>
</html>
How to setup Jenkins pipeline upload to nexus?
- Install “Nexus Artifact Uploader” and “Pipeline Utility Steps” Plugins
- Create Valid Jenkins Credentials to Authenticate To Nexus OSS
In this step, we should add a Jenkins Crendential of kind “Username with password” with a valid login to our Nexus instance and let’s give it an Id of “nexus-credentials.”
Go to: http://localhost:8080/credentials/

3. Set Up Maven as A Managed Tool, in our case, name is “maven”
4. Publishing Artifacts Using Jenkins Pipelines
pipeline {
    agent {
        label "master"
    }
    tools {
        // Note: this should match with the tool name configured in your jenkins instance (JENKINS_URL/configureTools/)
        maven "maven"
    }
    environment {
        // This can be nexus3 or nexus2
        NEXUS_VERSION = "nexus3"
        // This can be http or https
        NEXUS_PROTOCOL = "http"
        // Where your Nexus is running
        NEXUS_URL = "192.168.0.43:8081"
        // Repository where we will upload the artifact
        NEXUS_REPOSITORY = "maven-snapshots"
        // Jenkins credential id to authenticate to Nexus OSS
        NEXUS_CREDENTIAL_ID = "nexus-credentials"
    }
    stages {
        stage("clone code") {
            steps {
                script {
                    // Let's clone the source
                    git 'https://github.com/zhuby1973/myapp.git';
                }
            }
        }
        stage("mvn build") {
            steps {
                script {
                    // If you are using Windows then you should use "bat" step
                    // Since unit testing is out of the scope we skip them
                    sh "mvn package -DskipTests=true"
                }
            }
        }
        stage("publish to nexus") {
            steps {
                script {
                    // Read POM xml file using 'readMavenPom' step , this step 'readMavenPom' is included in: https://plugins.jenkins.io/pipeline-utility-steps
                    pom = readMavenPom file: "pom.xml";
                    // Find built artifact under target folder
                    filesByGlob = findFiles(glob: "target/*.${pom.packaging}");
                    // Print some info from the artifact found
                    echo "${filesByGlob[0].name} ${filesByGlob[0].path} ${filesByGlob[0].directory} ${filesByGlob[0].length} ${filesByGlob[0].lastModified}"
                    // Extract the path from the File found
                    artifactPath = filesByGlob[0].path;
                    // Assign to a boolean response verifying If the artifact name exists
                    artifactExists = fileExists artifactPath;
                    if(artifactExists) {
                        echo "*** File: ${artifactPath}, group: ${pom.groupId}, packaging: ${pom.packaging}, version ${pom.version}";
                        nexusArtifactUploader(
                            nexusVersion: NEXUS_VERSION,
                            protocol: NEXUS_PROTOCOL,
                            nexusUrl: NEXUS_URL,
                            groupId: pom.groupId,
                            version: pom.version,
                            repository: NEXUS_REPOSITORY,
                            credentialsId: NEXUS_CREDENTIAL_ID,
                            artifacts: [
                                // Artifact generated such as .jar, .ear and .war files.
                                [artifactId: pom.artifactId,
                                classifier: '',
                                file: artifactPath,
                                type: pom.packaging],
                                // Lets upload the pom.xml file for additional information for Transitive dependencies
                                [artifactId: pom.artifactId,
                                classifier: '',
                                file: "pom.xml",
                                type: "pom"]
                            ]
                        );
                    } else {
                        error "*** File: ${artifactPath}, could not be found";
                    }
                }
            }
        }
    }
}
(base) ubuntu@ubunu2004:/tmp/myapp$ cat pom.xml
<project xmlns="http://maven.apache.org/POM/4.0.0" xmlns:xsi="http://www.w3.org/2001/XMLSchema-instance"
        xsi:schemaLocation="http://maven.apache.org/POM/4.0.0 http://maven.apache.org/maven-v4_0_0.xsd">
        <modelVersion>4.0.0</modelVersion>
        <groupId>in.javahome</groupId>
        <artifactId>myweb</artifactId>
        <packaging>war</packaging>
        <version>0.0.9-SNAPSHOT</version>
        <name>my-app</name>
        <url>http://maven.apache.org</url>

        <dependencies>
                <dependency>
                    <groupId>org.apache.poi</groupId>
                    <artifactId>poi</artifactId>
                    <version>3.7</version>
                </dependency>

                <dependency>
                        <groupId>javax.servlet</groupId>
                        <artifactId>javax.servlet-api</artifactId>
                        <version>3.0.1</version>
                        <!-- <scope>provided</scope> -->
                </dependency>
                <dependency>
                        <groupId>junit</groupId>
                        <artifactId>junit</artifactId>
                        <version>3.8.1</version>
                        <scope>test</scope>
                </dependency>

        </dependencies>
        <distributionManagement>
                 <snapshotRepository>
                    <id>nexus</id>
                    <url>http://192.168.0.43:8081/repository/maven-snapshots/</url>
                 </snapshotRepository>

                <repository>
                    <id>nexus</id>
                    <url>http://192.168.0.43:8081/repository/maven-releases/</url>
                </repository>
        </distributionManagement>

<build>
    <plugins>
        <plugin>
            <groupId>org.apache.maven.plugins</groupId>
            <artifactId>maven-compiler-plugin</artifactId>
            <version>3.6.1</version>
            <configuration>
                <source>1.7</source>
                <target>1.7</target>
            </configuration>
        </plugin>
        <plugin>
            <groupId>org.apache.maven.plugins</groupId>
            <artifactId>maven-surefire-plugin</artifactId>
            <version>2.19</version>
        </plugin>
    </plugins>
</build>

</project>
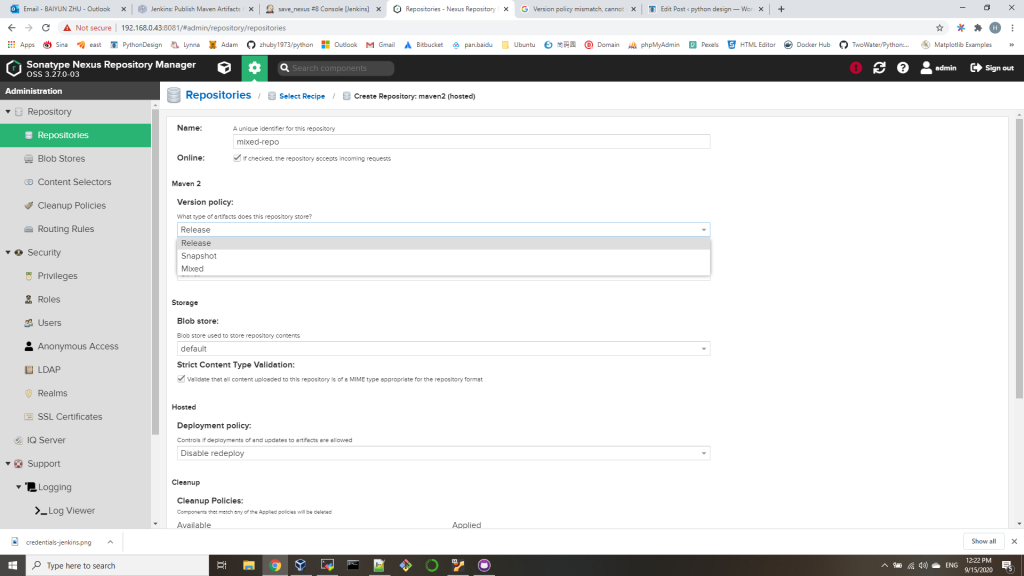
NOTE: if you failed to upload, then you can try to manually upload, you may got error:
Version policy mismatch, cannot upload SNAPSHOT content to RELEASE repositories…
which means you are trying to upload SNAPSHOT content to RELEASE repositories, you can delete the repositories, and recreate it with Mixed in “Version Policy”
How to create Jenkins job for git/maven/nexus upload
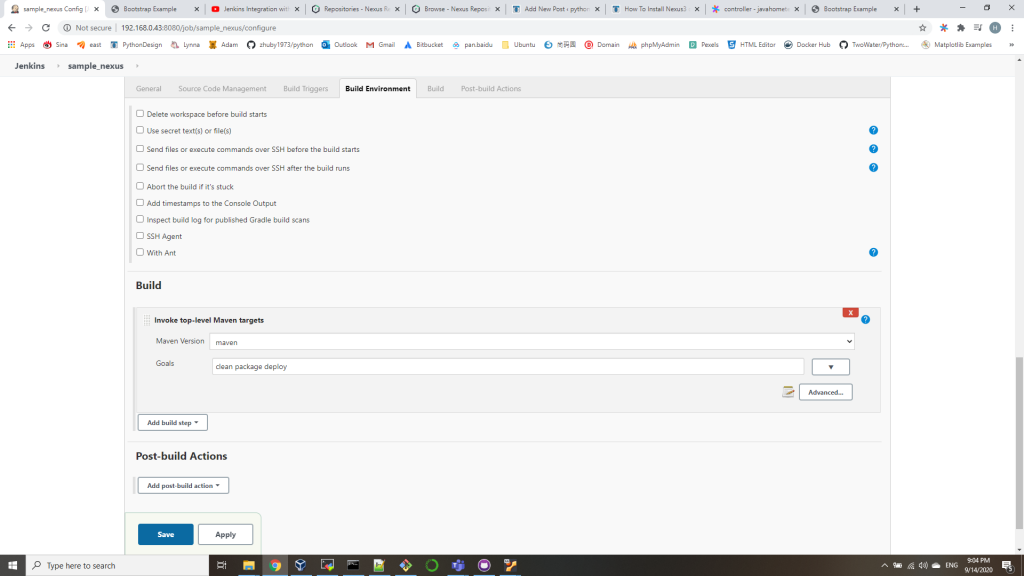
- create a freestyle job sample_nexus, use https://github.com/zhuby1973/myapp.git as SCM

2. in Build section, select “Invoke top-level Maven targets” with Goals: clean package deploy
3. vi /etc/maven/settings.xml, add admin id for nexus:
    <server>
      <id>deployment</id>
      <username>admin</username>
      <password>pas8word</password>
    </server>
4. update pom.xml in GIT and commit the changes
from:
        <distributionManagement>
                 <snapshotRepository>
                    <id>nexus</id>
                    <url>http://172.31.15.236:8081/repository/maven-snapshots/</url>
                 </snapshotRepository>

                <repository>
                    <id>nexus</id>
                    <url>http://172.31.15.236:8081/repository/maven-releases/</url>
                </repository>
        </distributionManagement>

to:
        <distributionManagement>
                 <snapshotRepository>
                    <id>deployment</id>
                    <url>http://192.168.0.43:8081/repository/maven-snapshots/</url>
                 </snapshotRepository>

                <repository>
                    <id>deployment</id>
                    <url>http://192.168.0.43:8081/repository/maven-releases/</url>
                </repository>
        </distributionManagement>
5. run the job, you will get output:
...............................
Uploaded to deployment: http://192.168.0.43:8081/repository/maven-snapshots/in/javahome/myweb/0.0.7-SNAPSHOT/myweb-0.0.7-20200915.005745-1.war (1.6 MB at 248 kB/s)
Uploading to deployment: http://192.168.0.43:8081/repository/maven-snapshots/in/javahome/myweb/0.0.7-SNAPSHOT/myweb-0.0.7-20200915.005745-1.pom
Progress (1): 1.8 kB
Uploaded to deployment: http://192.168.0.43:8081/repository/maven-snapshots/in/javahome/myweb/0.0.7-SNAPSHOT/myweb-0.0.7-20200915.005745-1.pom (1.8 kB at 583 B/s)
Downloading from deployment: http://192.168.0.43:8081/repository/maven-snapshots/in/javahome/myweb/maven-metadata.xml
Uploading to deployment: http://192.168.0.43:8081/repository/maven-snapshots/in/javahome/myweb/0.0.7-SNAPSHOT/maven-metadata.xml
Progress (1): 766 B
Uploaded to deployment: http://192.168.0.43:8081/repository/maven-snapshots/in/javahome/myweb/0.0.7-SNAPSHOT/maven-metadata.xml (766 B at 339 B/s)
Uploading to deployment: http://192.168.0.43:8081/repository/maven-snapshots/in/javahome/myweb/maven-metadata.xml
Progress (1): 276 B
Uploaded to deployment: http://192.168.0.43:8081/repository/maven-snapshots/in/javahome/myweb/maven-metadata.xml (276 B at 17 B/s)
[[1;34mINFO[m] [1m------------------------------------------------------------------------[m
[[1;34mINFO[m] [1;32mBUILD SUCCESS[m
[[1;34mINFO[m] [1m------------------------------------------------------------------------[m
[[1;34mINFO[m] Total time: 01:00 min
[[1;34mINFO[m] Finished at: 2020-09-14T20:58:13-04:00
[[1;34mINFO[m] [1m------------------------------------------------------------------------[m
Finished: SUCCESS
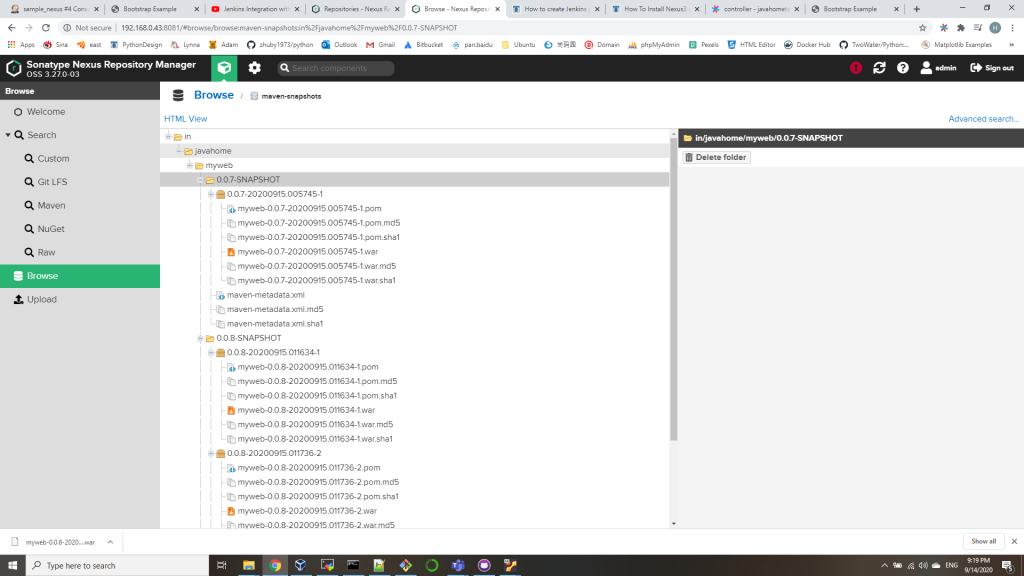
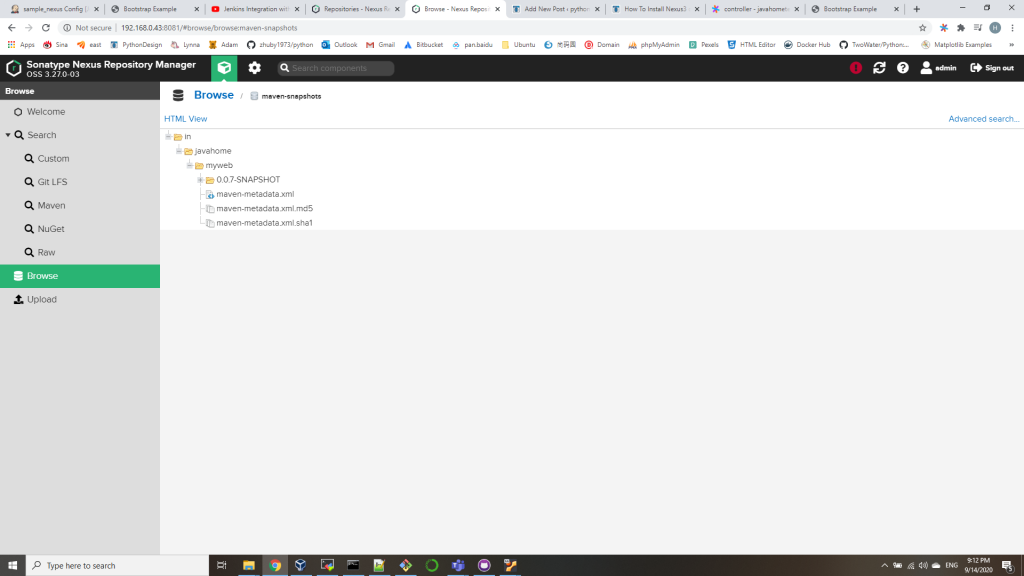
check on Nexus, you can find the war file has been uploaded:
6. you can update version number in pom.xml to upload again
        <groupId>in.javahome</groupId>
        <artifactId>myweb</artifactId>
        <packaging>war</packaging>
        <version>0.0.8-SNAPSHOT</version>
        <name>my-app</name>