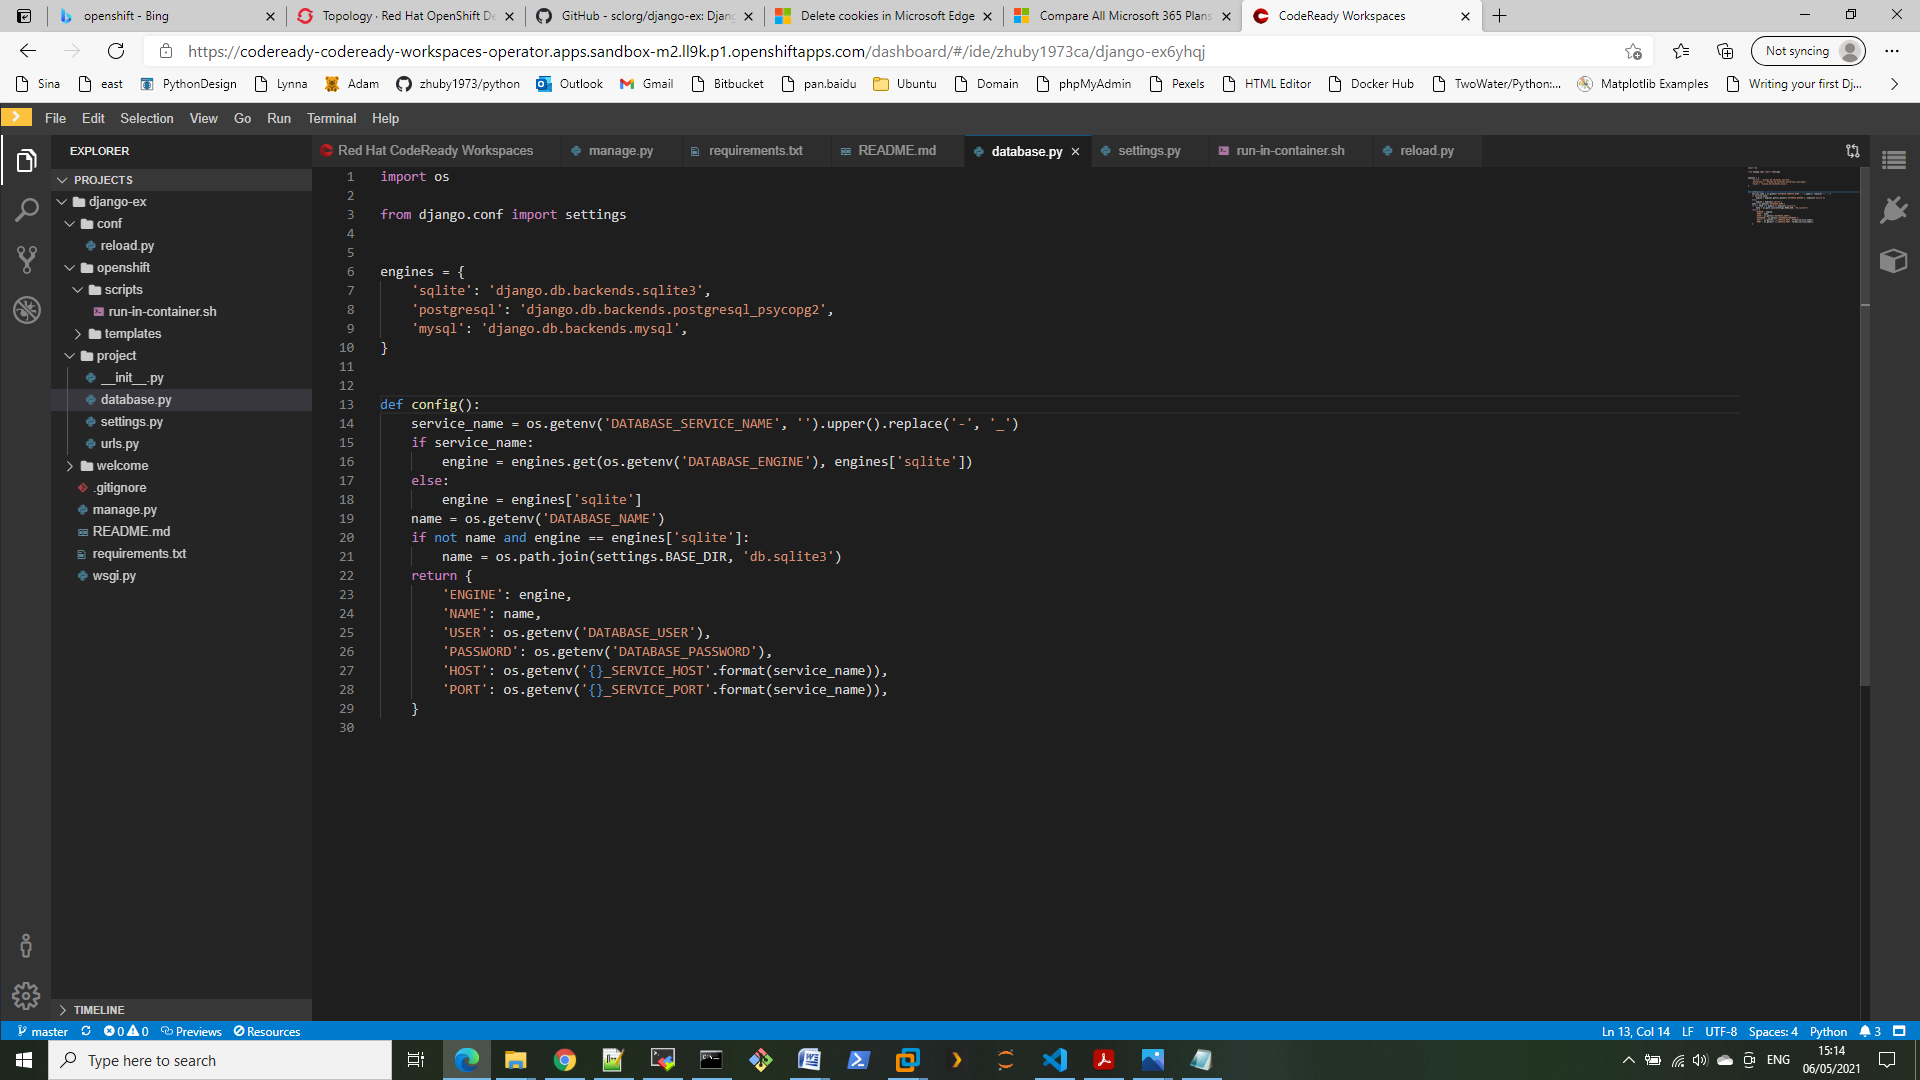
Step 1. Create Dockerfile on https://github.com/IBM/deploy-python-openshift-tutorial.git
from alpine:latest
RUN apk add --no-cache py3-pip \
    && pip3 install --upgrade pip
WORKDIR /app
COPY . /app
RUN pip3 --no-cache-dir install -r requirements.txt
EXPOSE 5000
ENTRYPOINT ["python3"]
CMD ["helloworld.py"]
Step 2. create helloworld.py in same repository
from flask import Flask  # From module flask import class Flask
app = Flask(__name__)    # Construct an instance of Flask class for our webapp

@app.route('/')   # URL '/' to be handled by main() route handler
def main():
    """Say hello"""
    return 'Hello, world!'

if __name__ == '__main__':  # Script executed directly?
    print("Hello World! Built with a Docker file.")
    app.run(host="0.0.0.0", port=5000, debug=True,use_reloader=True)
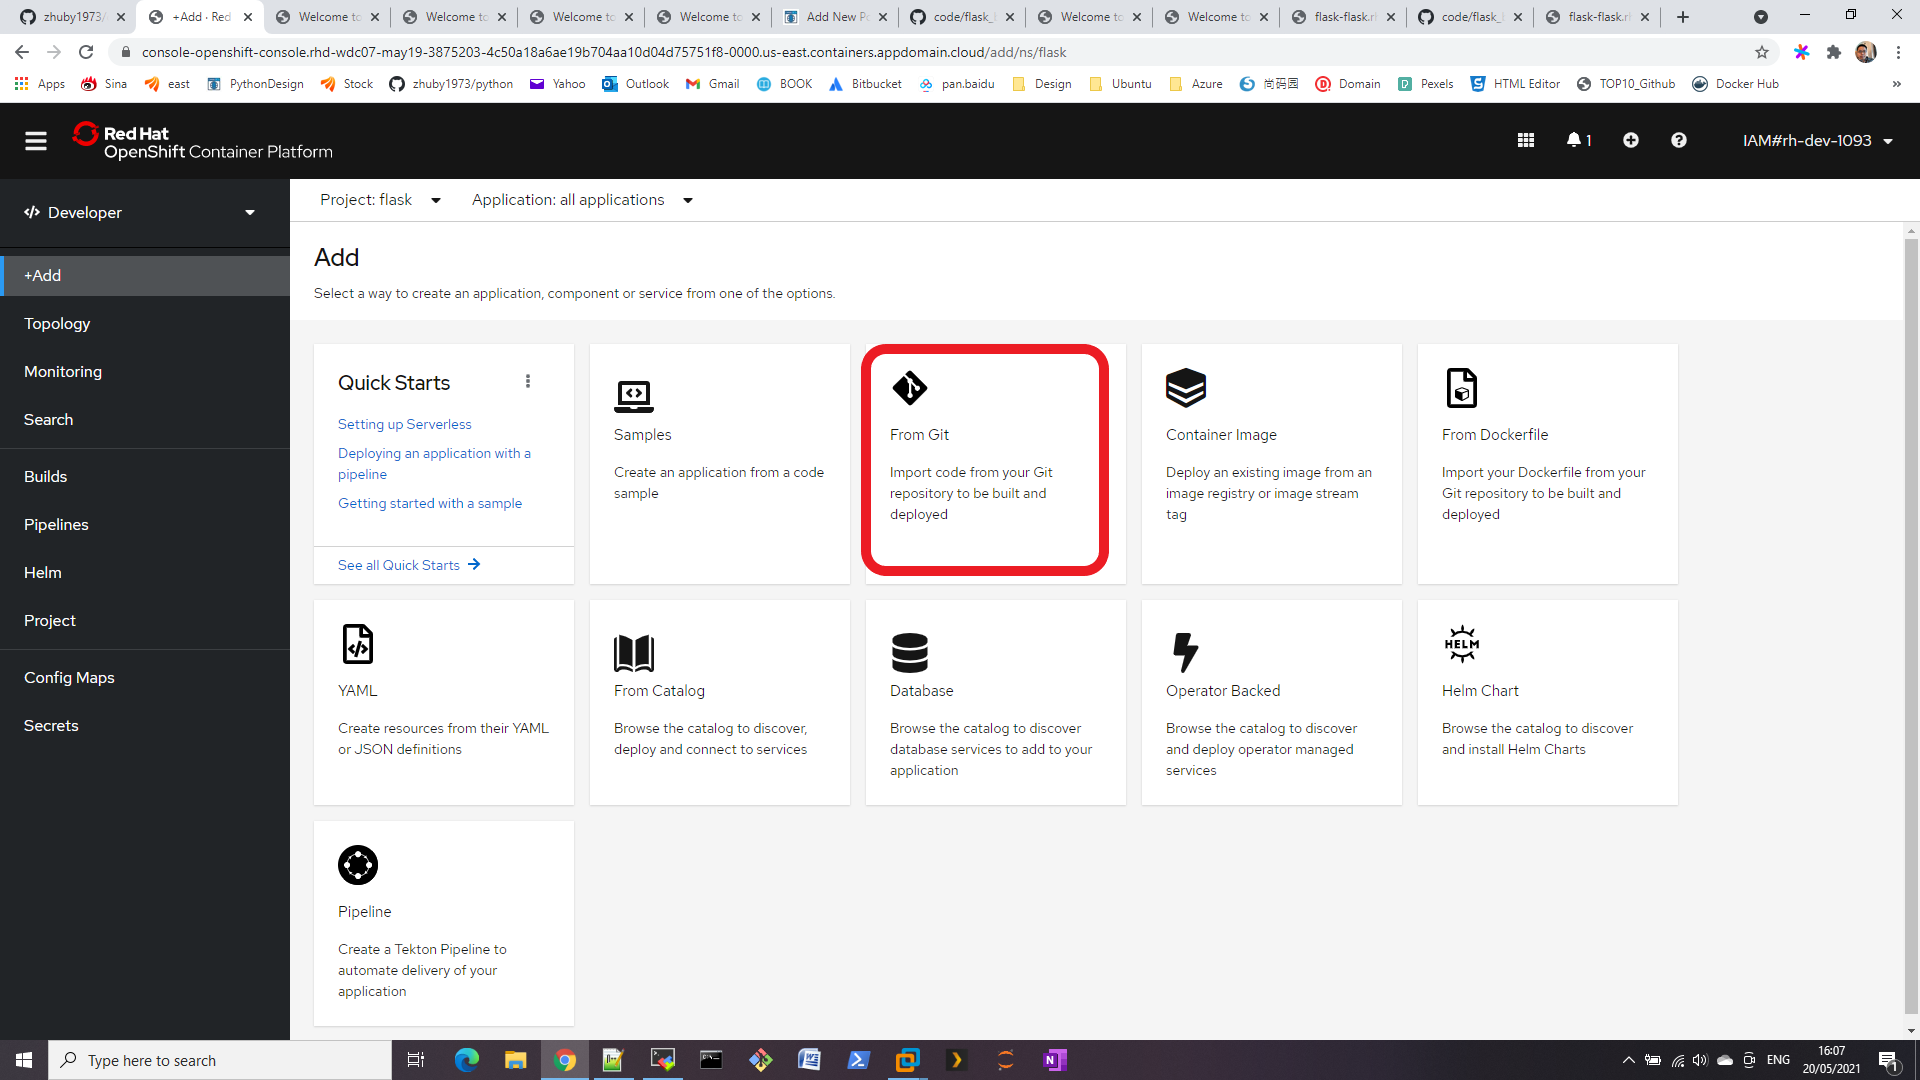
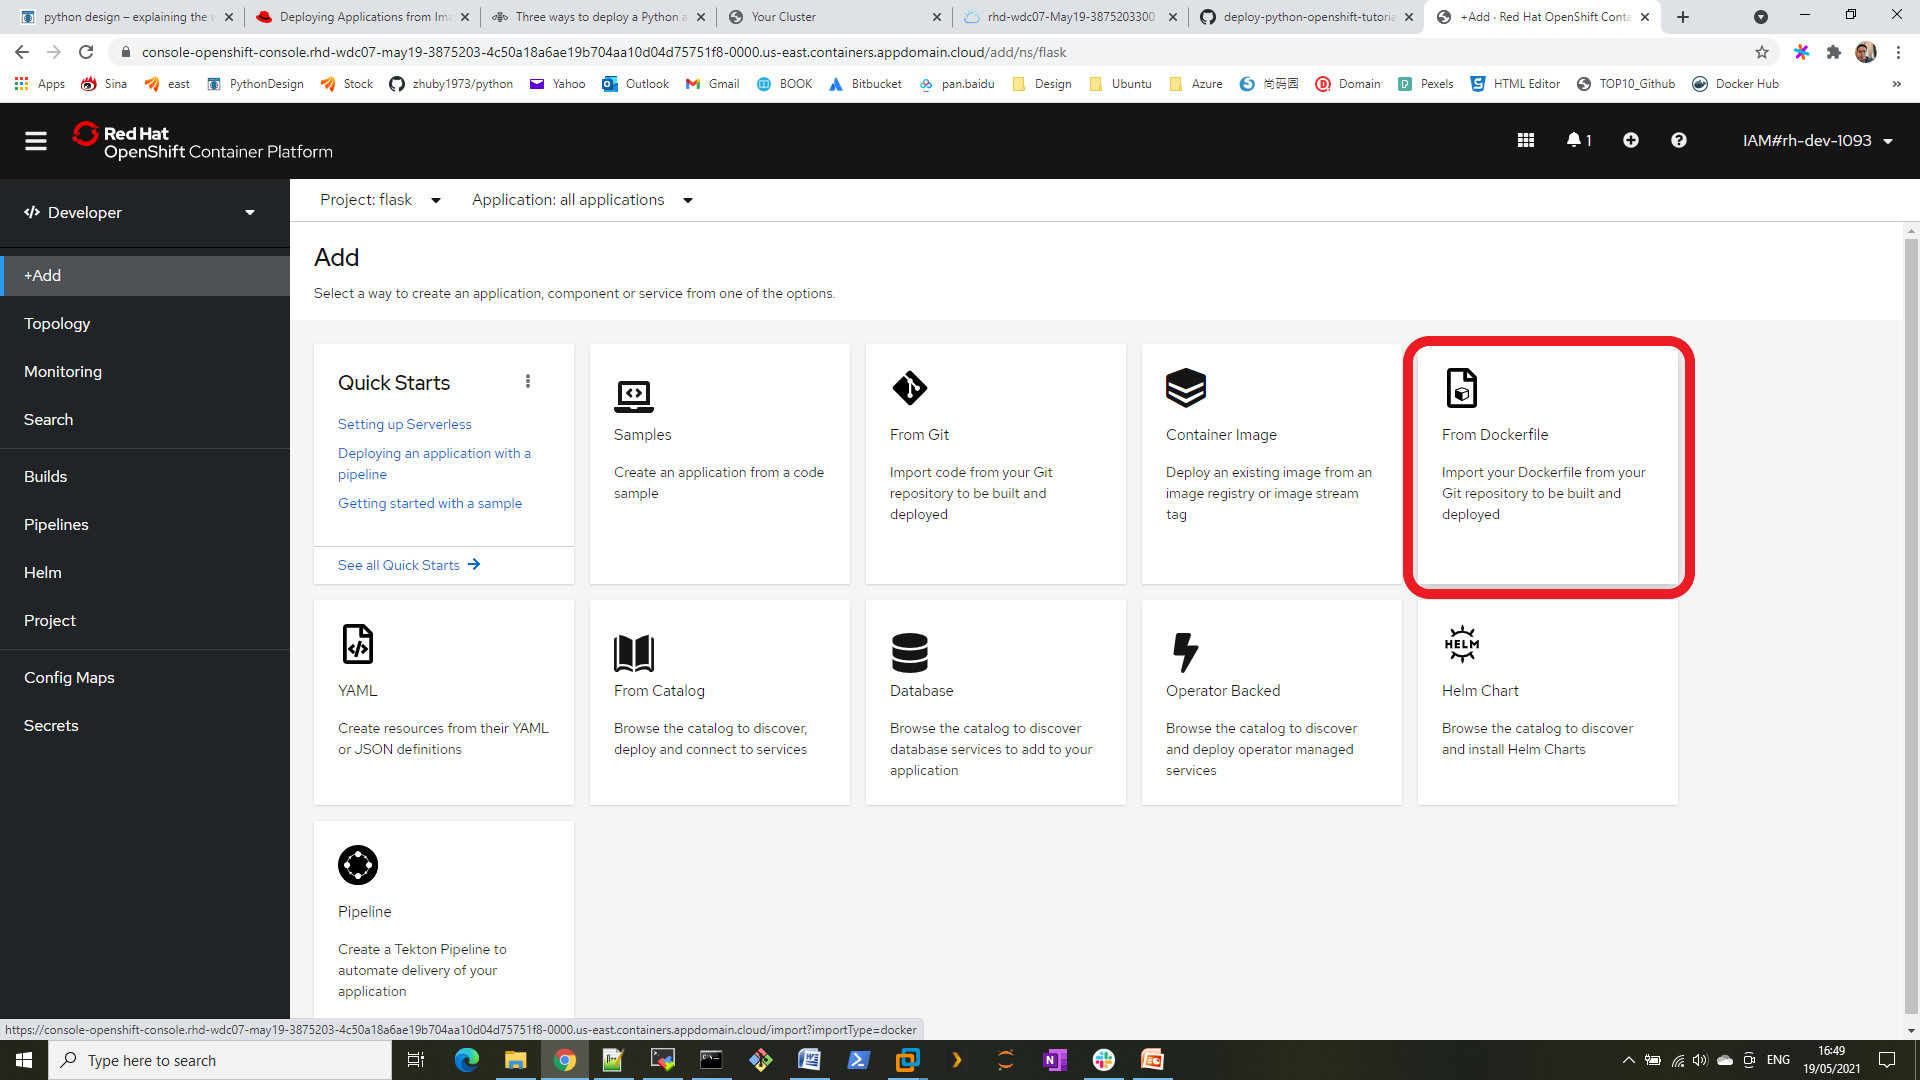
Step 3. Create a demo project on OpenShift console and create an application with “From Dockerfile”
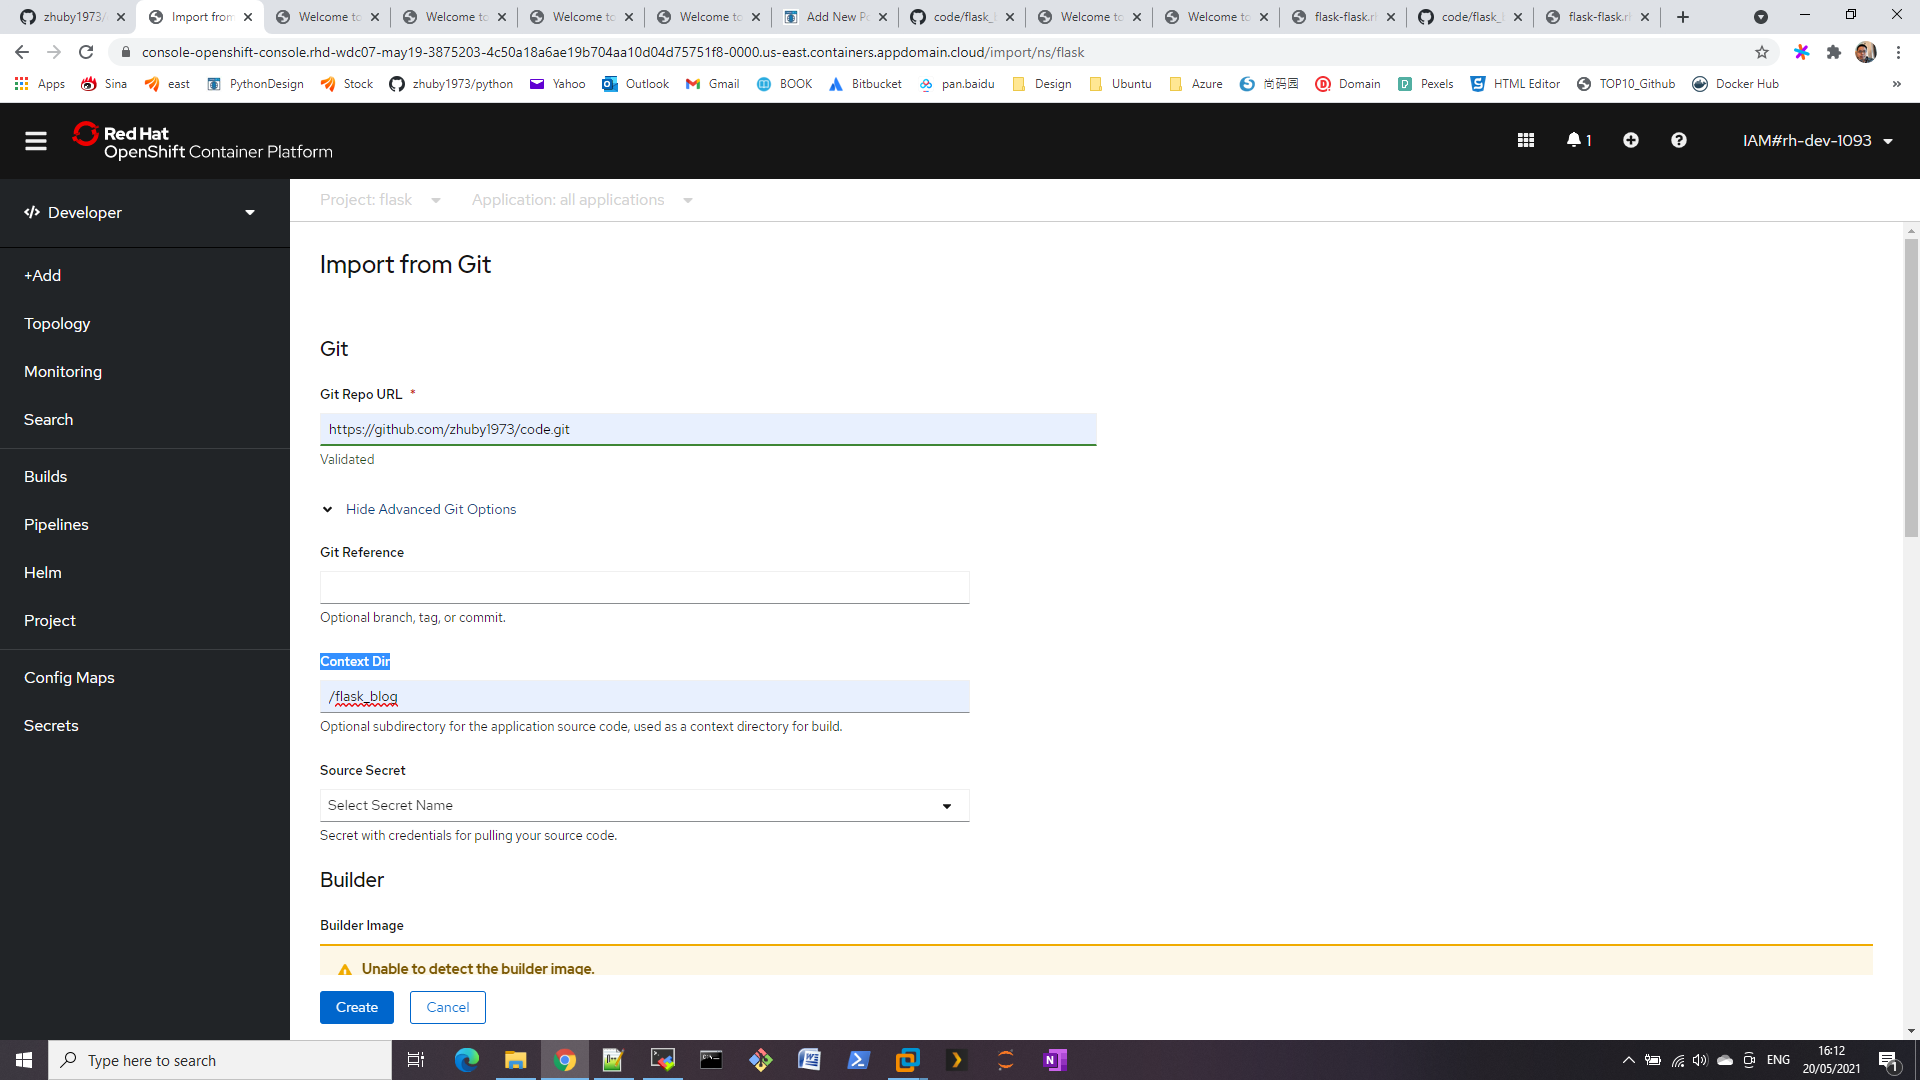
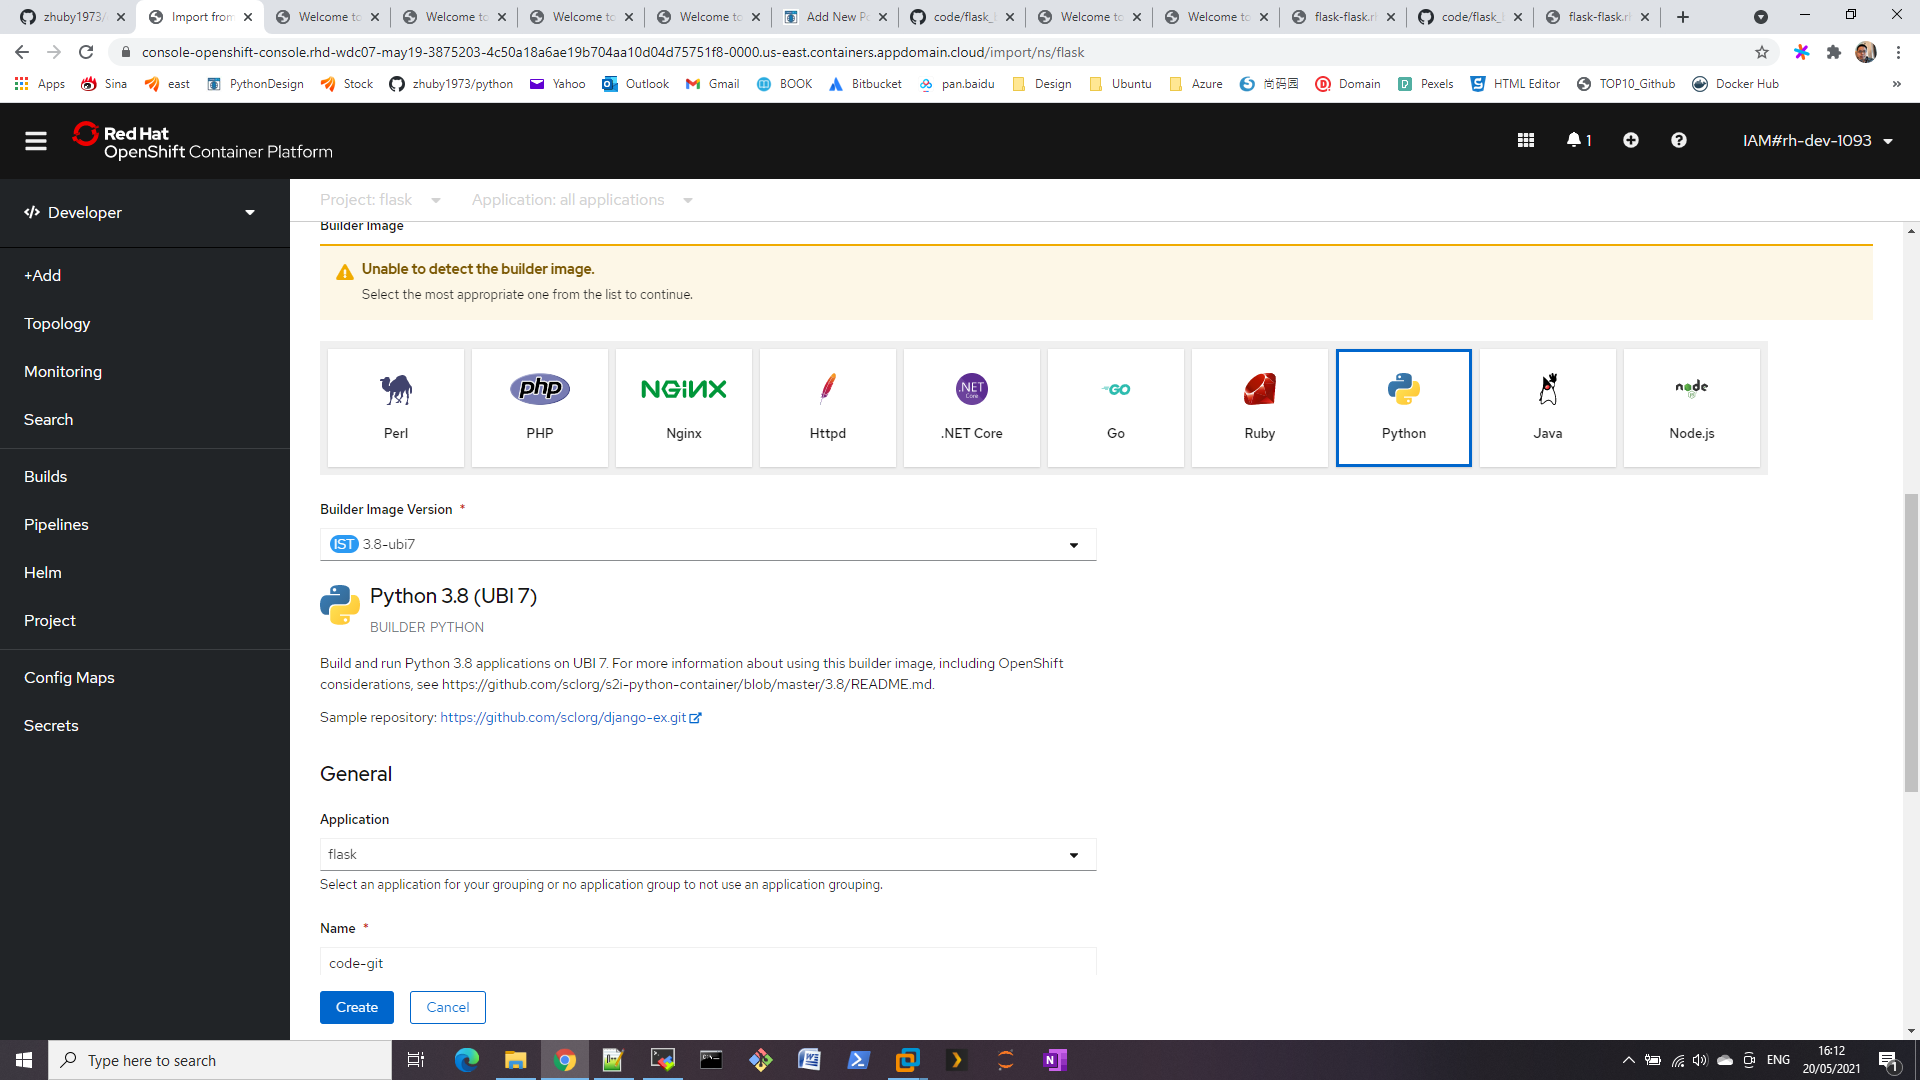
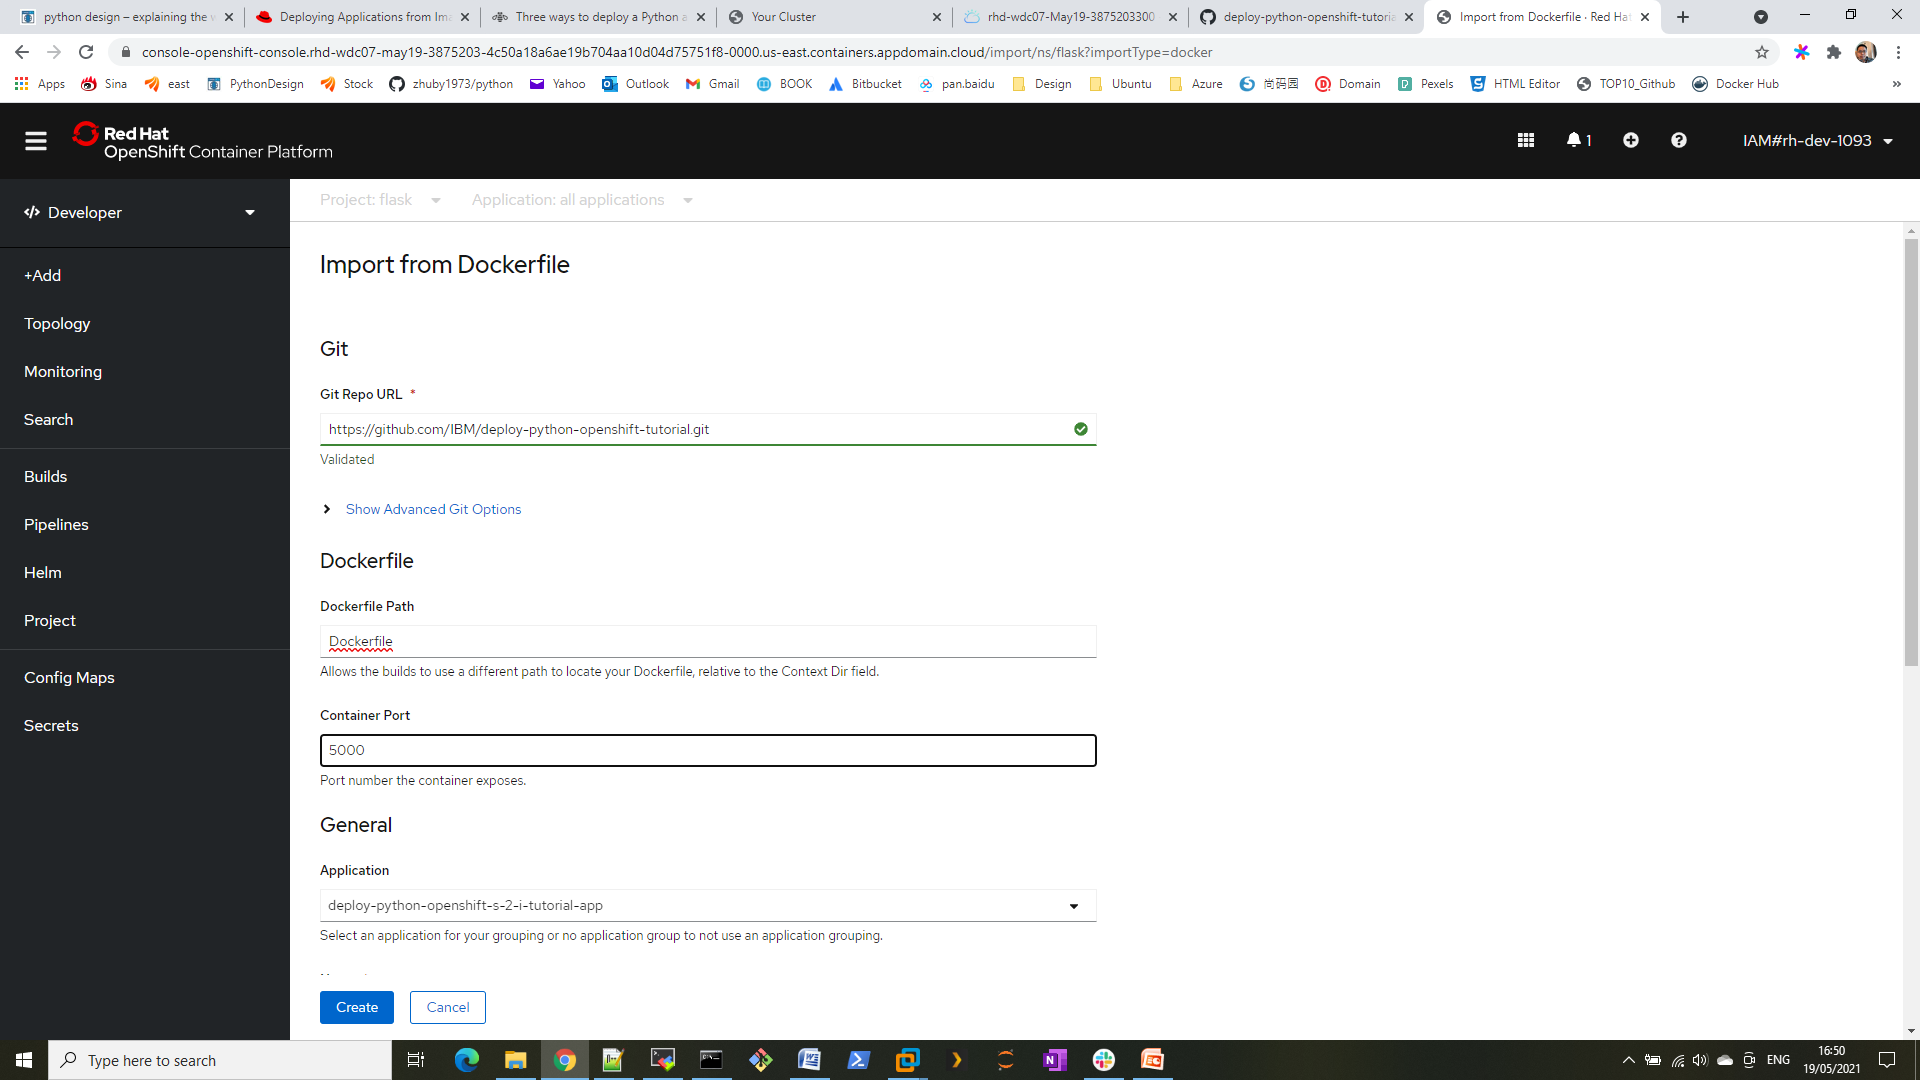
Step 4. input git url https://github.com/IBM/deploy-python-openshift-tutorial.git and port number 5000
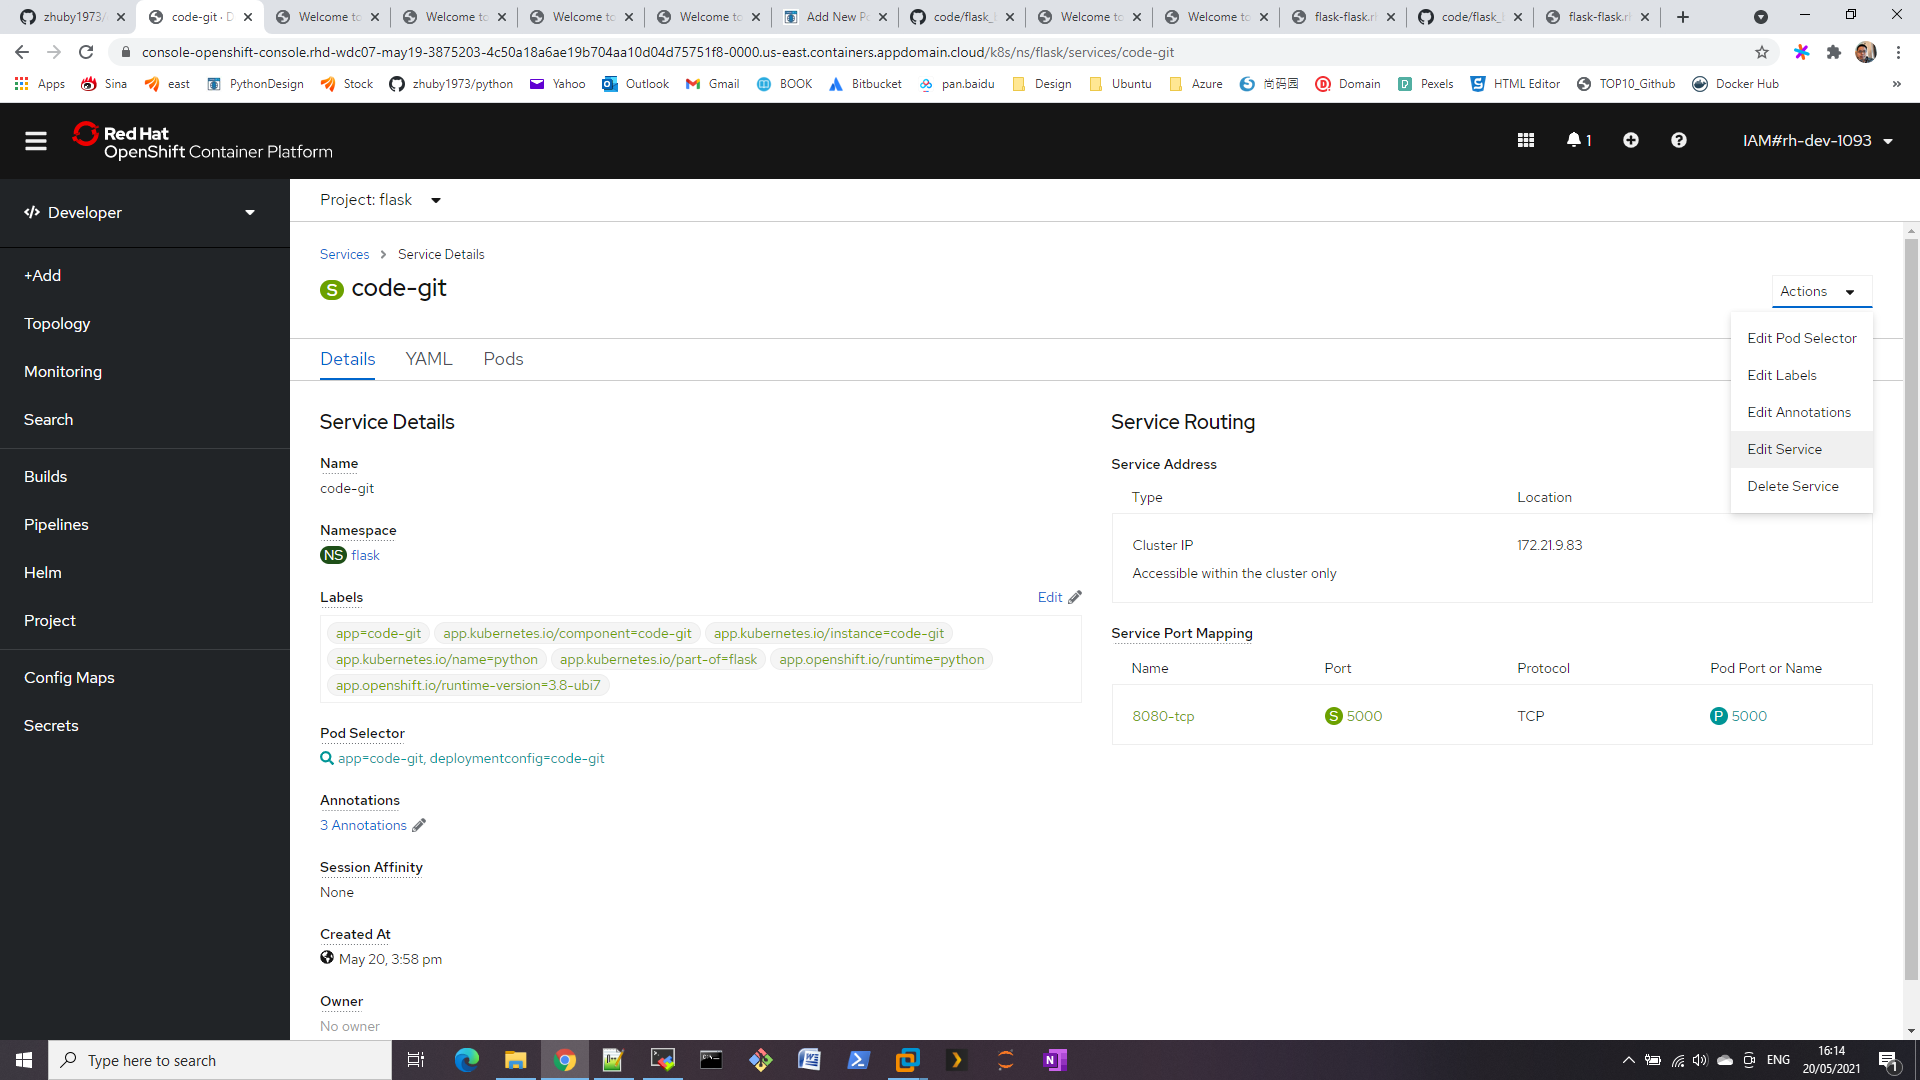
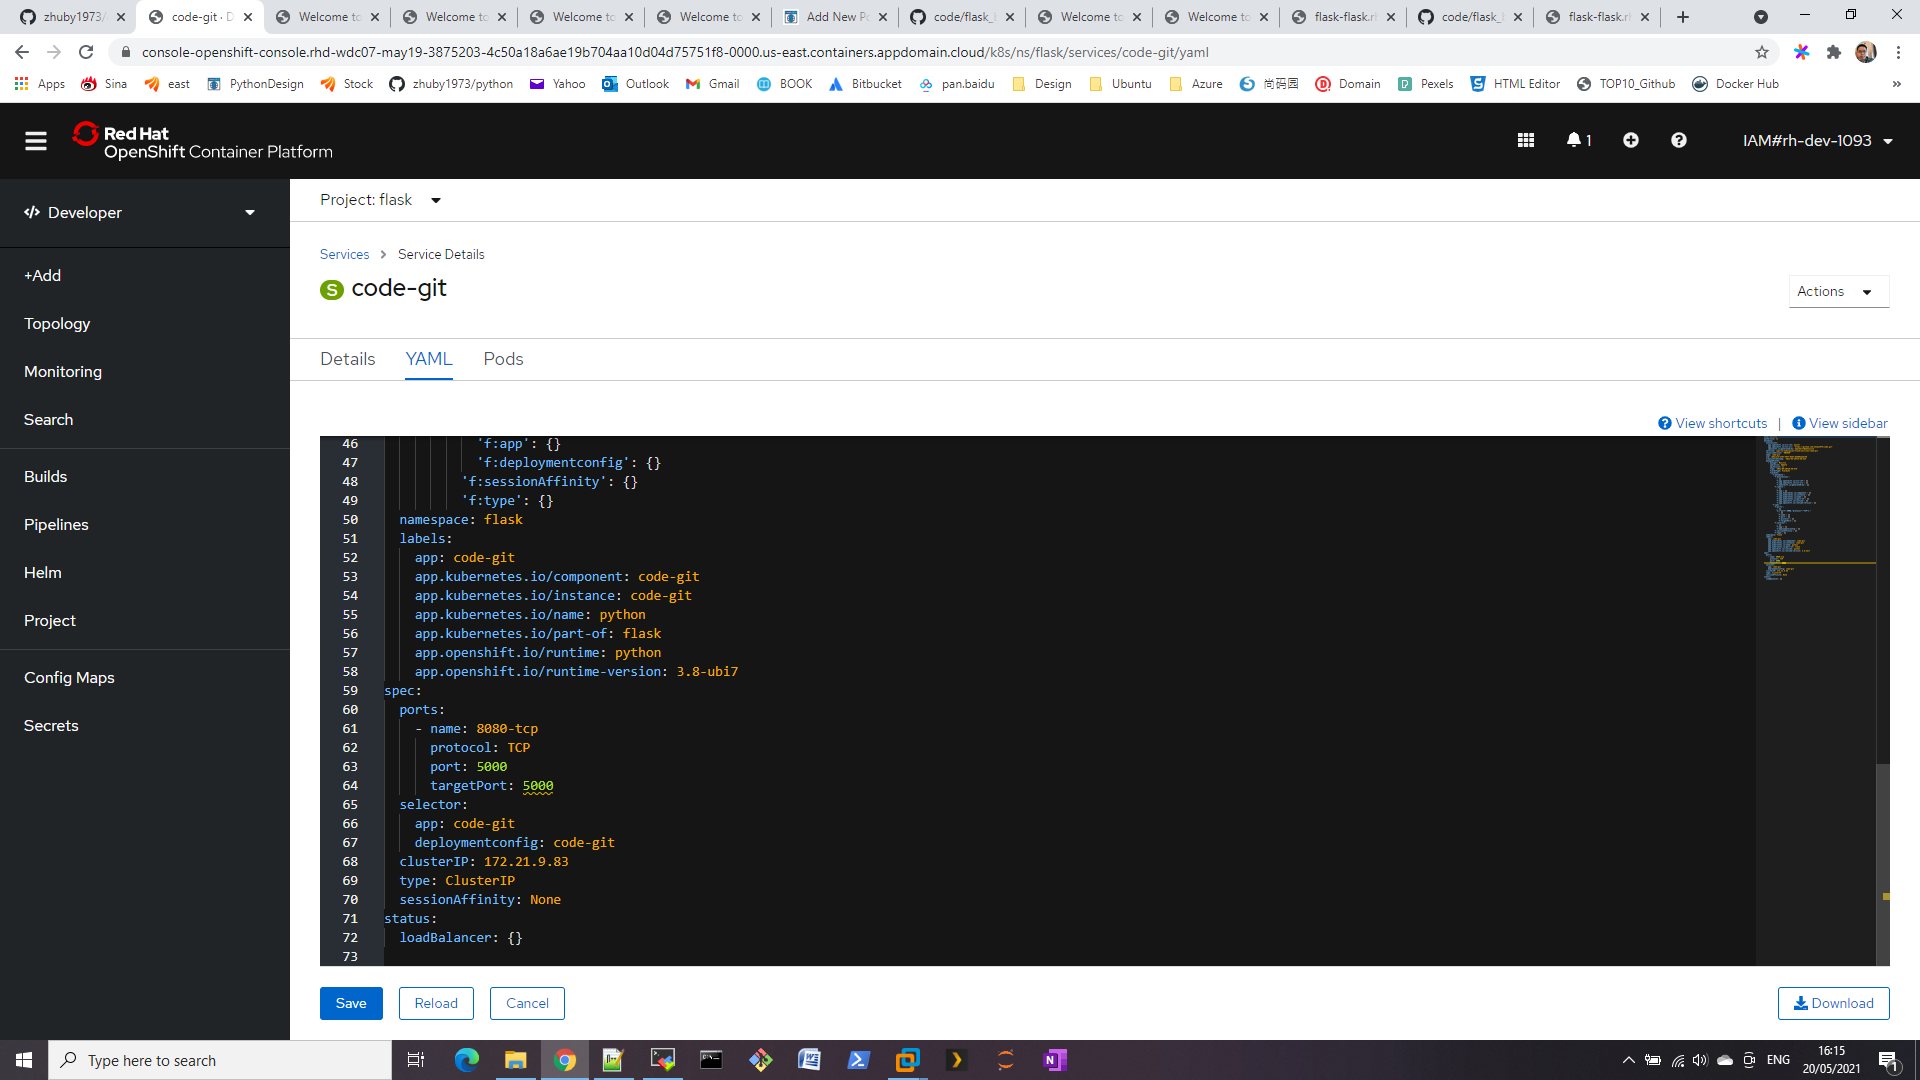
Step 5. You will find new application once build completed
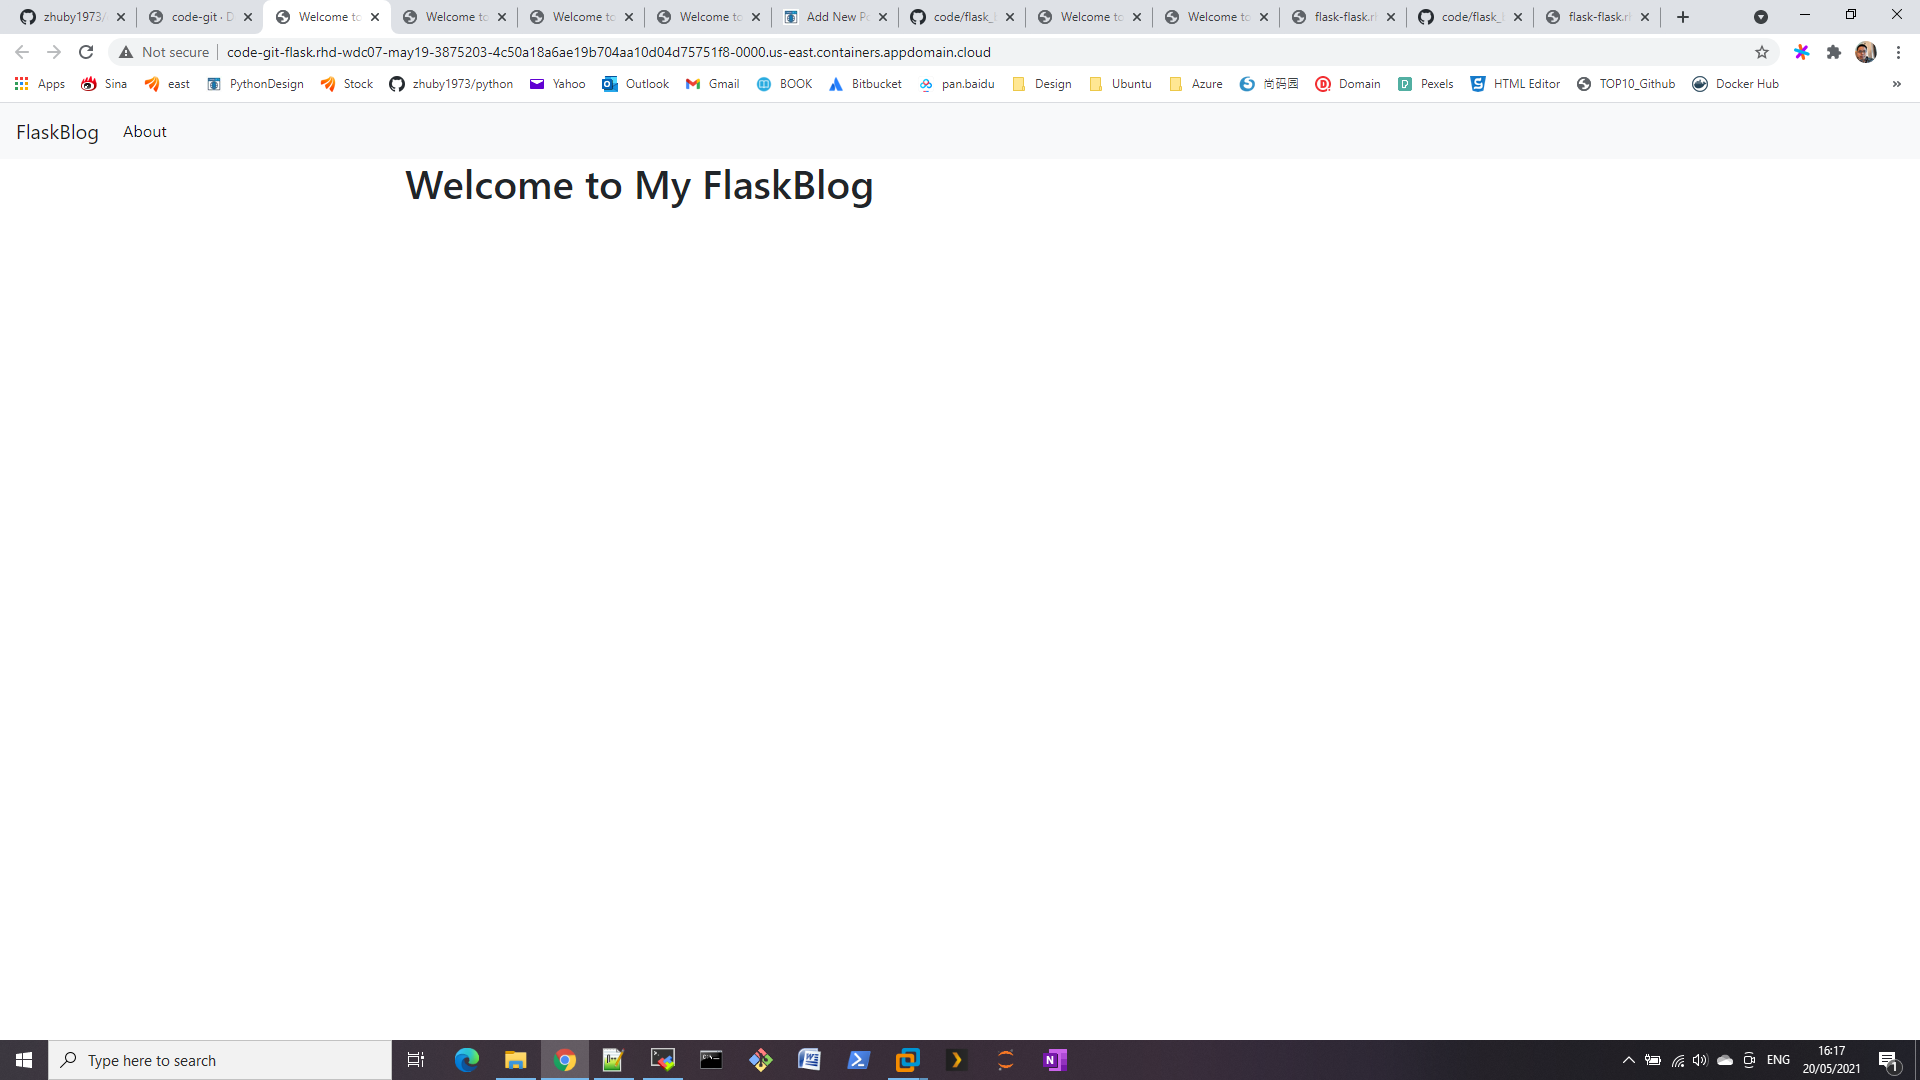
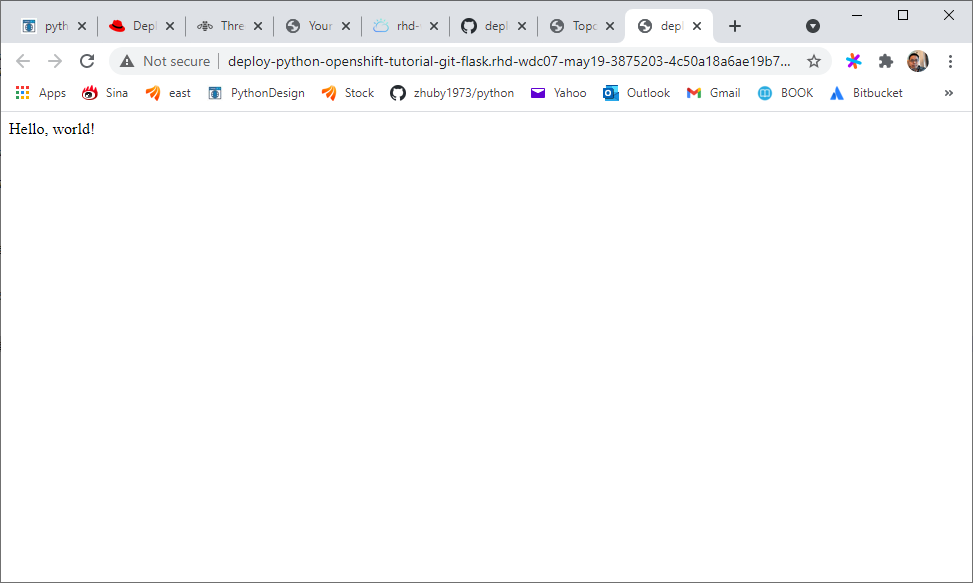
Step 6. open the url to verify the Flask web application
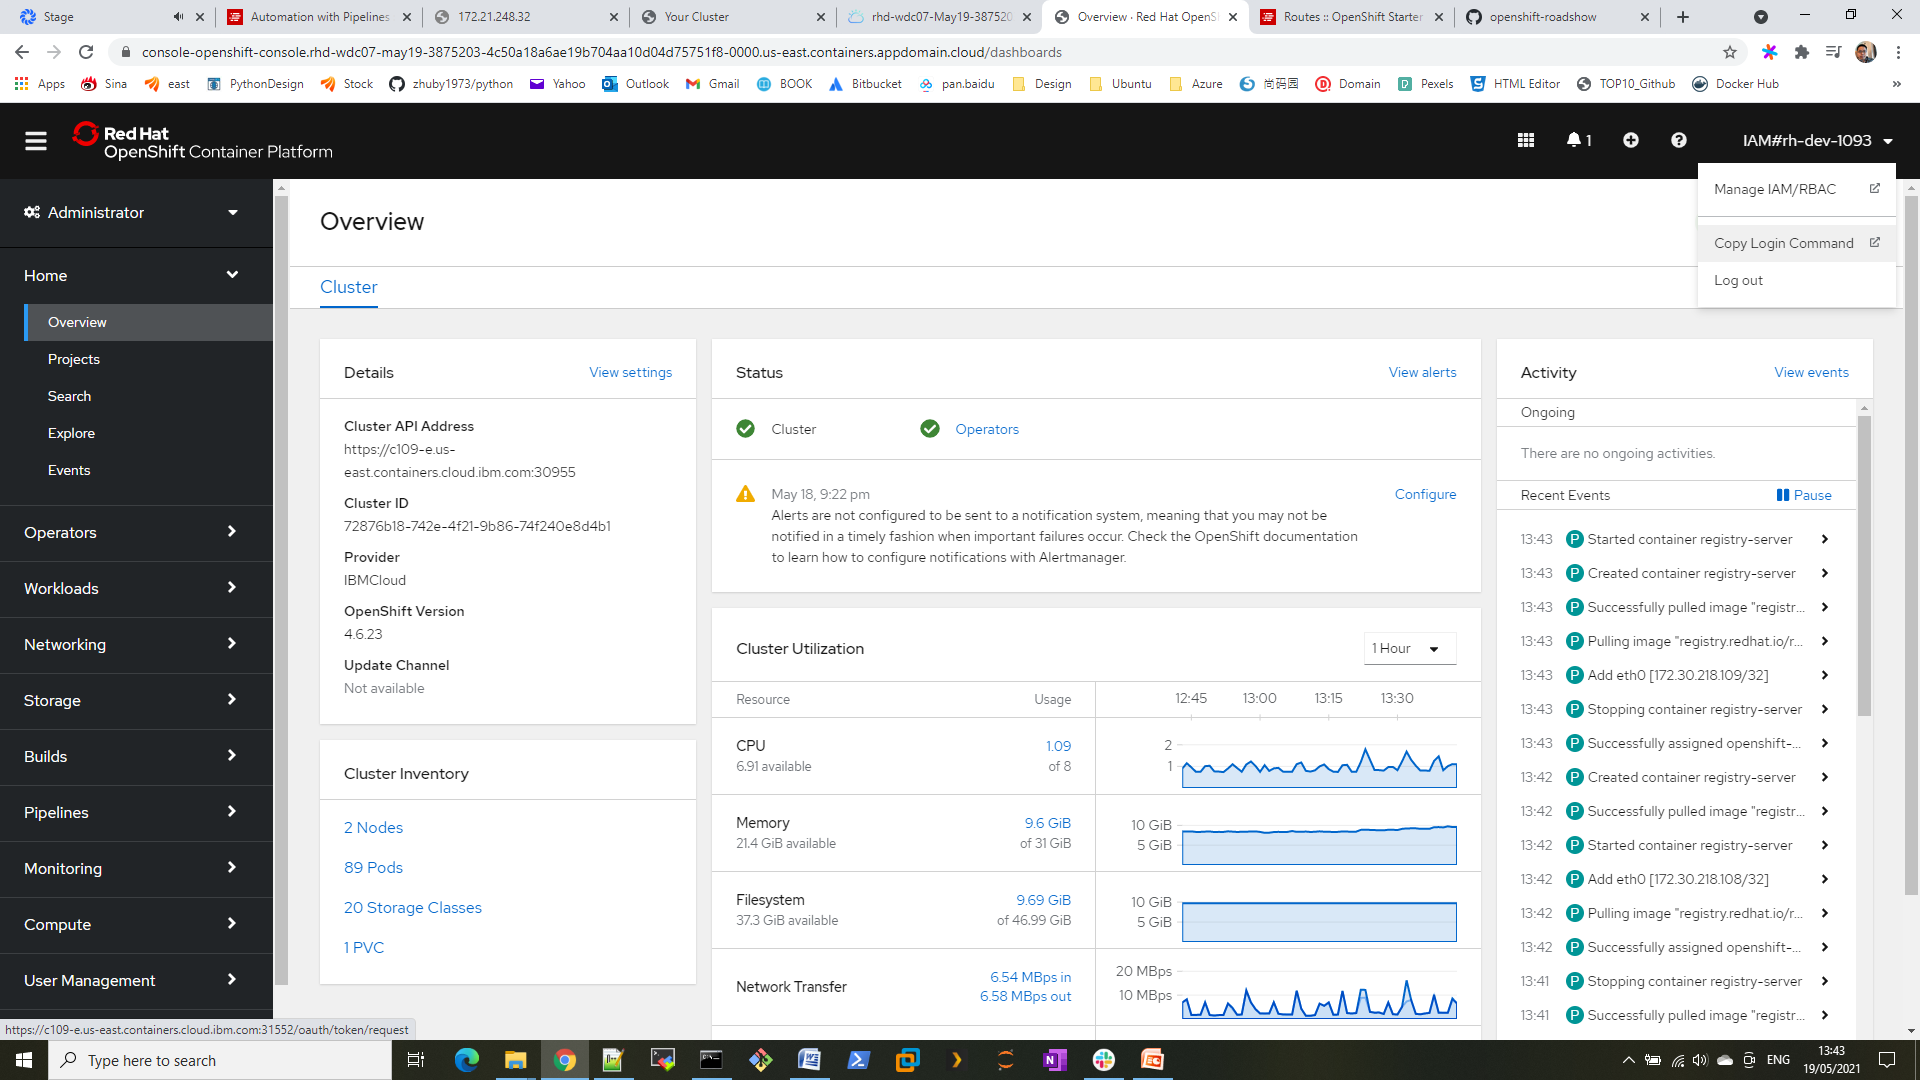
Step 1. after download oc.exe from OpenShift website, you can get the login token from web console => Copy Login Command
Step 2. oc login and work on your project
C:\Hans>oc login --token=sha256~BOkusrH7Npa5N9OWp6WomU98jox8UwjPm --server=https://c109-e.us-east.containers.cloud.ibm.com:30955
Logged into "https://c109-e.us-east.containers.cloud.ibm.com:30955" as "IAM#rh-dev-1093" using the token provided.
You have access to 63 projects, the list has been suppressed. You can list all projects with ' projects'
Using project "default".
Welcome! See 'oc help' to get started.
C:\Hans>oc project workshop
Now using project "workshop" on server "https://c109-e.us-east.containers.cloud.ibm.com:30955".
C:\Hans>oc get pods
NAME READY STATUS RESTARTS AGE
parksmap-56fcbb7db4-gqfdc 1/1 Running 0 2m25s
C:\Hans>oc get pod parksmap-56fcbb7db4-gqfdc -o yaml
apiVersion: v1
kind: Pod
metadata:
annotations:
cni.projectcalico.org/podIP: 172.30.218.69/32
cni.projectcalico.org/podIPs: 172.30.218.69/32
......
C:\Hans>oc get deployment
NAME READY UP-TO-DATE AVAILABLE AGE
parksmap 1/1 1 1 6m34s
C:\Hans>oc get rs
NAME DESIRED CURRENT READY AGE
parksmap-56fcbb7db4 1 1 1 6m43s
C:\Hans>oc scale --replicas=2 deployment/parksmap
deployment.apps/parksmap scaled
C:\Hans>oc get endpoints parksmap
NAME ENDPOINTS AGE
parksmap 172.30.134.235:8080,172.30.218.69:8080 8m27s
C:\Hans>oc delete pod parksmap-56fcbb7db4-gqfdc
pod "parksmap-56fcbb7db4-gqfdc" deleted
C:\Hans>oc rollout restart deployment/parksmap
deployment.apps/parksmap restarted
C:\Hans>oc create -f https://raw.githubusercontent.com/openshift-labs/starter-guides/ocp-4.6/mongodb-template.yaml -n workshop
template.template.openshift.io/mongodb-ephemeral created
C:\Hans>oc rsh parksmap-78c58f896-mjqnw
sh-4.2$ ls /
anaconda-post.log dev home lib64 mnt parksmap.jar root sbin sys usr
bin etc lib media opt proc run srv tmp var
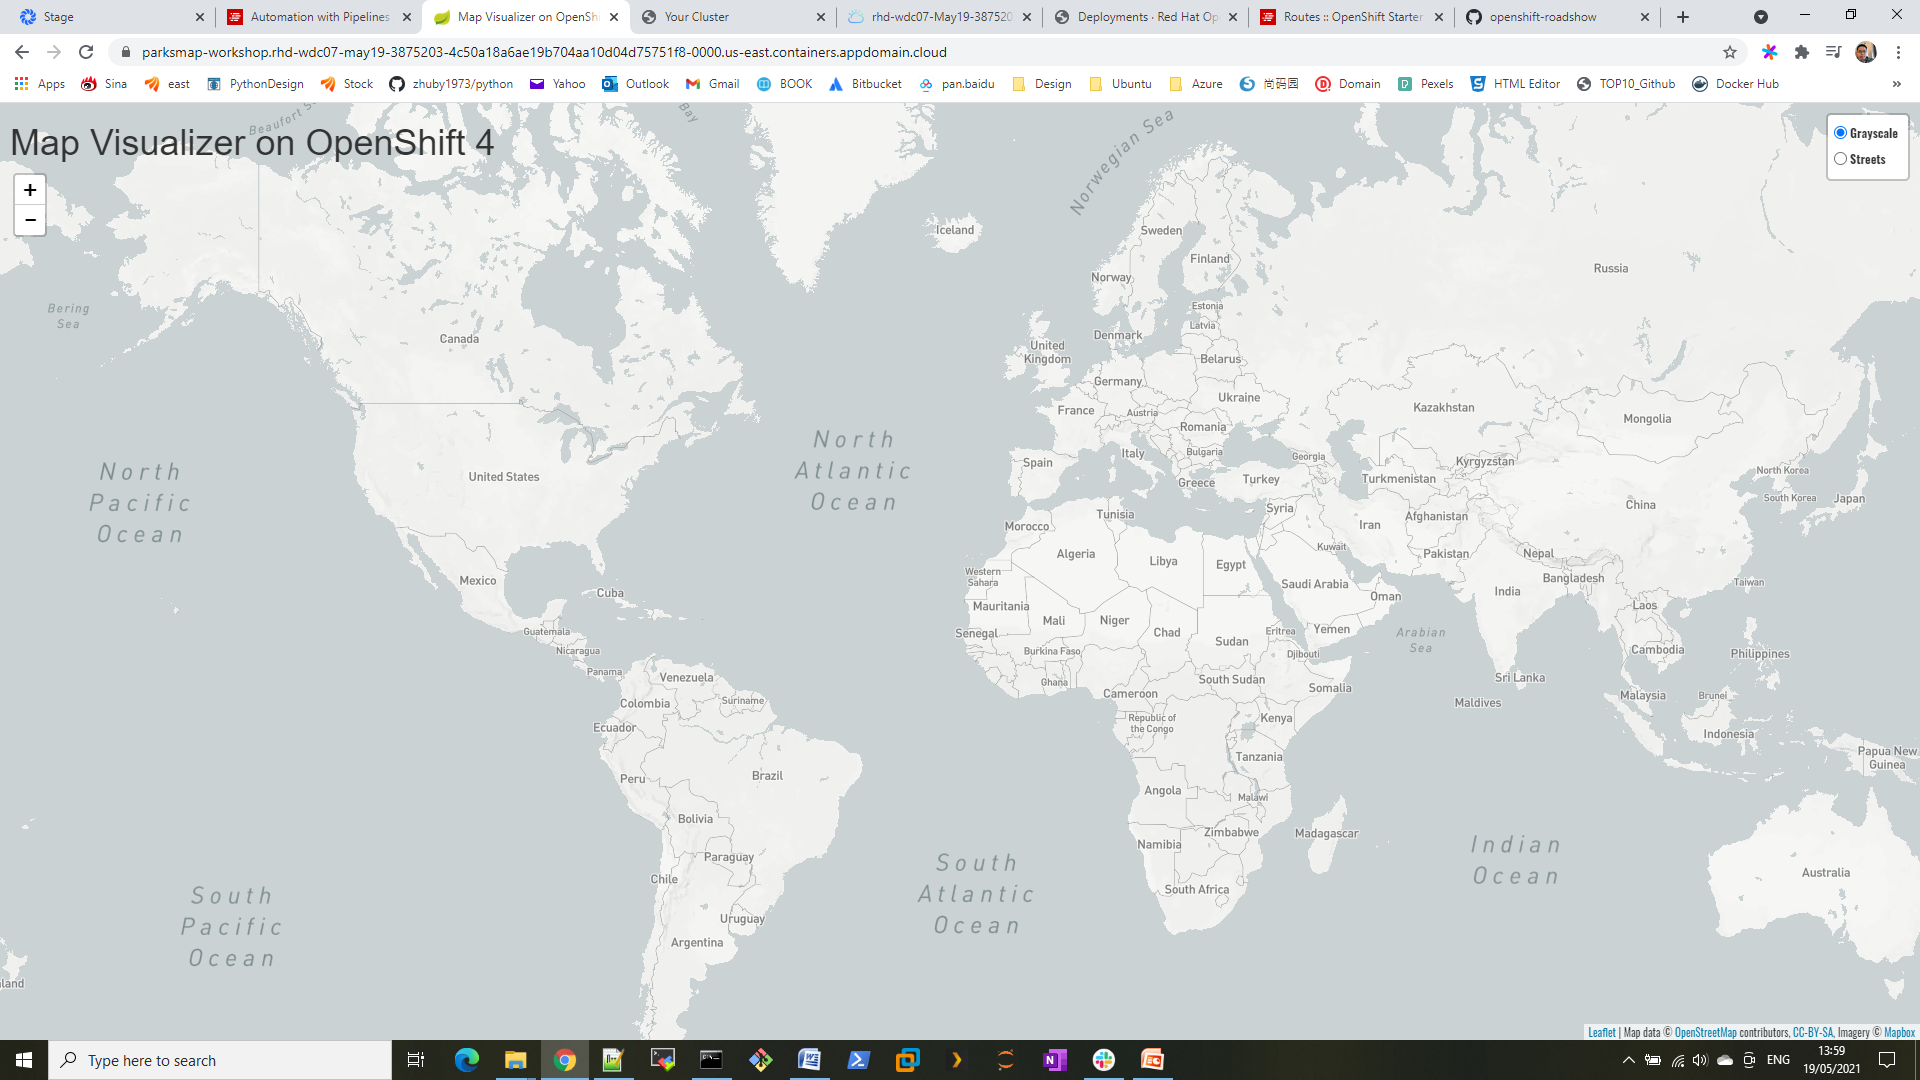
C:\Hans>oc get route
NAME HOST/PORT PATH SERVICES PORT TERMINATION WILDCARD
parksmap parksmap-workshop.rhd-wdc07-may19-3875203-4c50a18a6ae19b704aa10d04d75751f8-0000.us-east.containers.appdomain.cloud parksmap 8080-tcp edge None
OpenShift is a family of containerization software products developed by Red Hat. Its flagship product is the OpenShift Container Platform — an on-premises platform as a service built around Docker containers orchestrated and managed by Kubernetes on a foundation of Red Hat Enterprise Linux.
Step 1. Request a Developer Sandbox from Red Hat OpenShift website
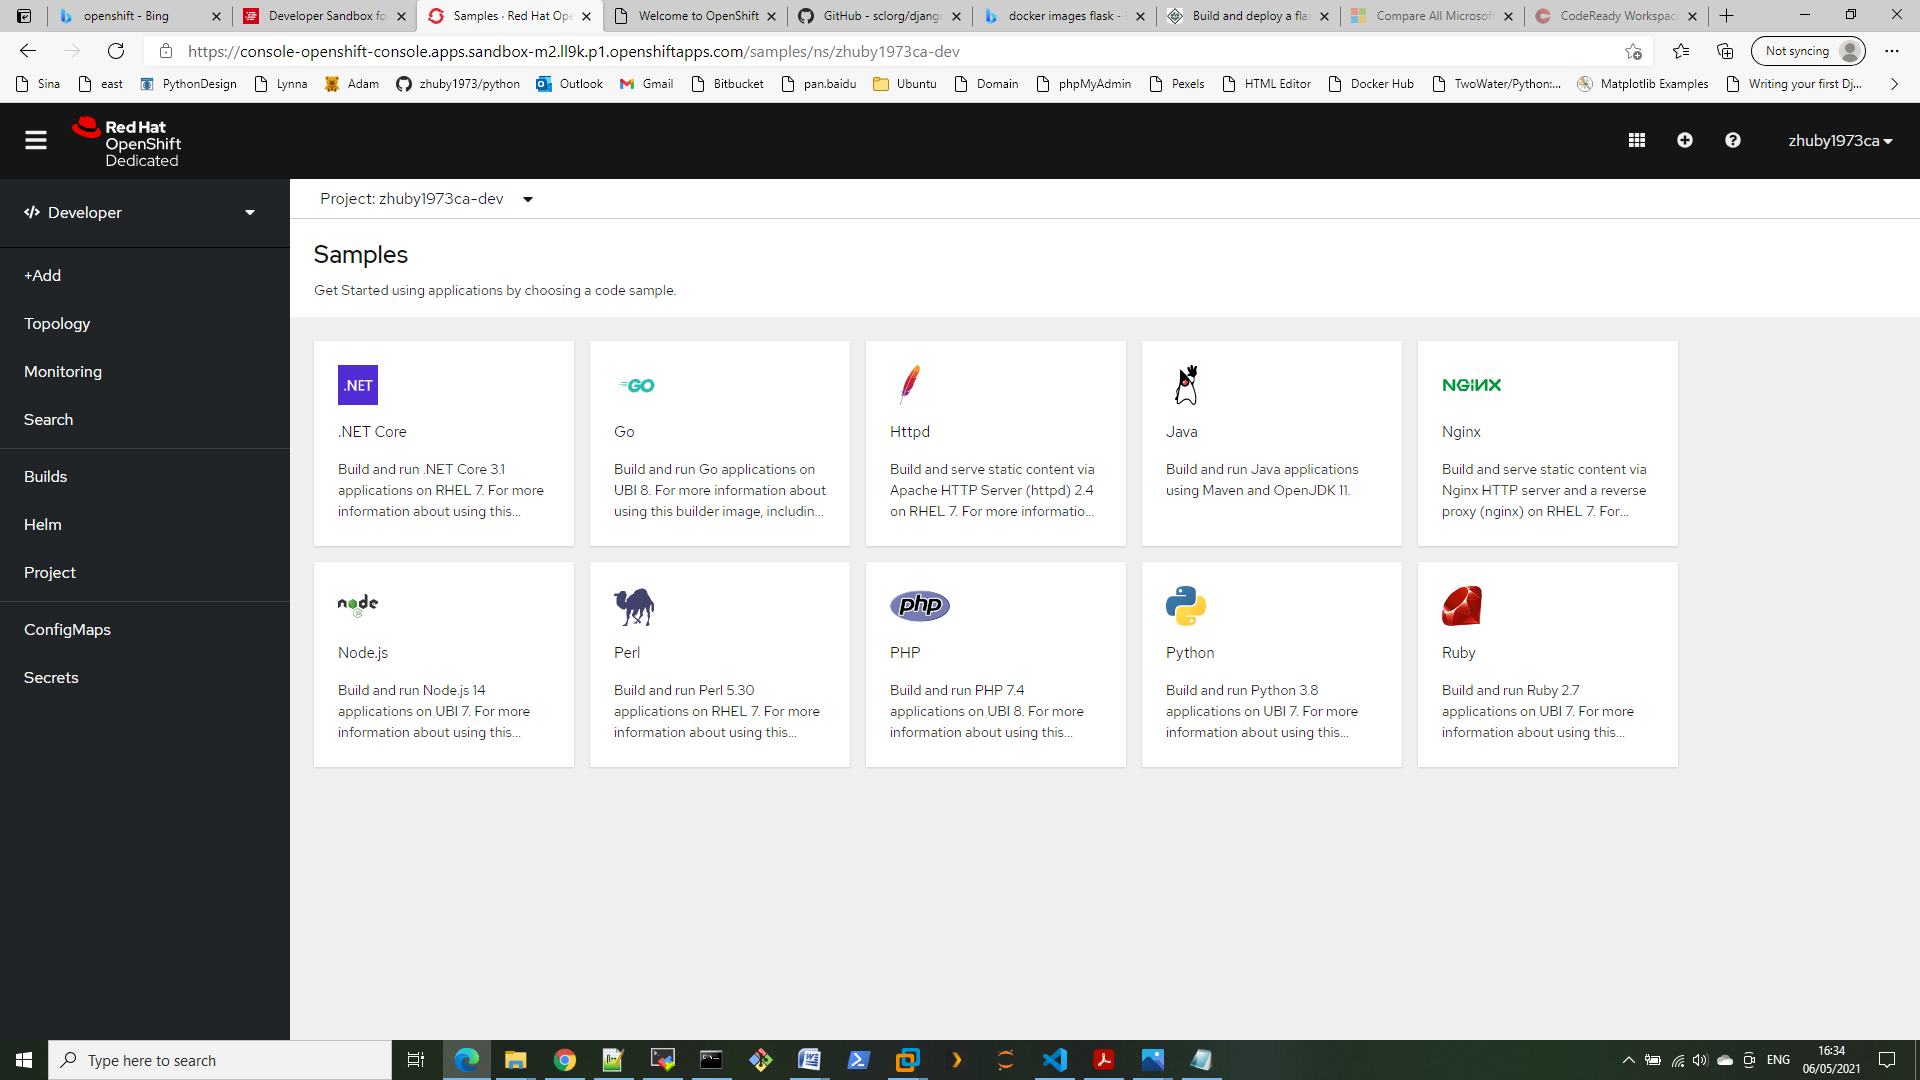
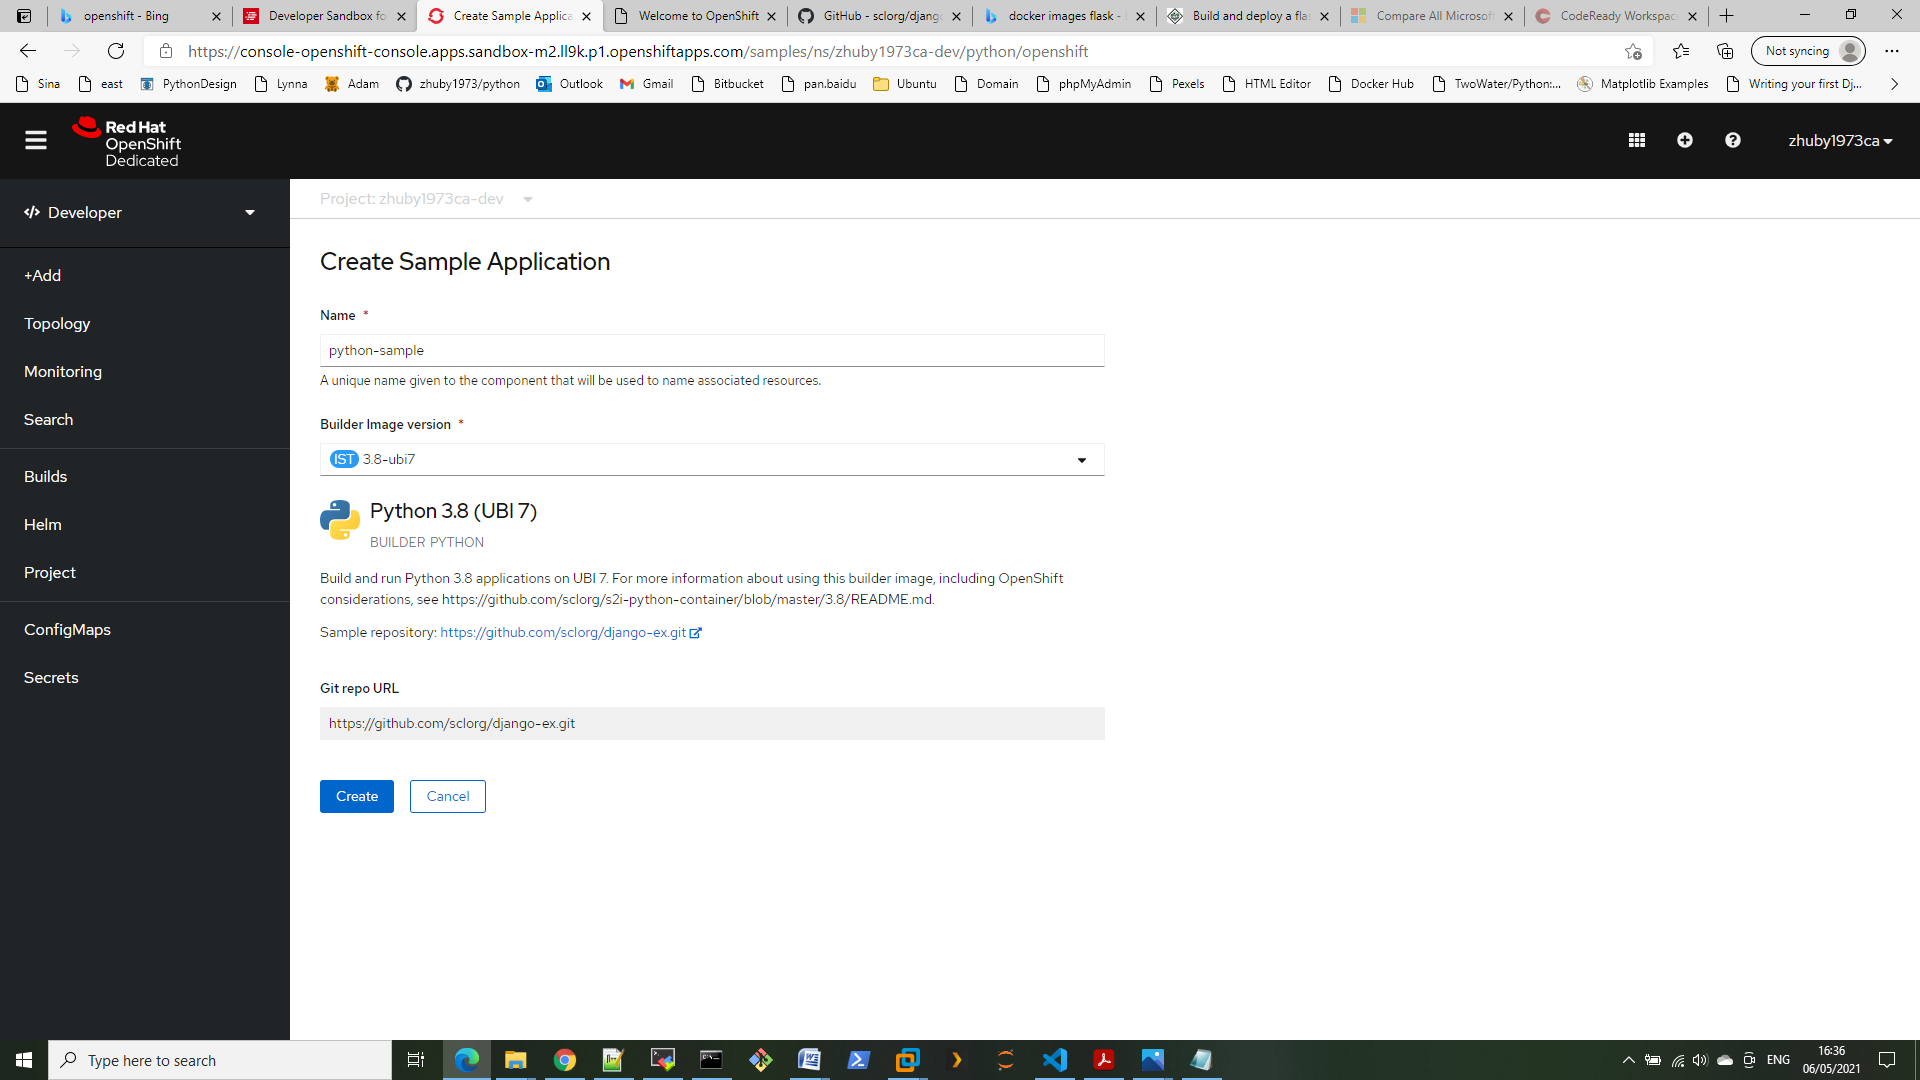
Step 2. Create an application from a code sample (choose Python)
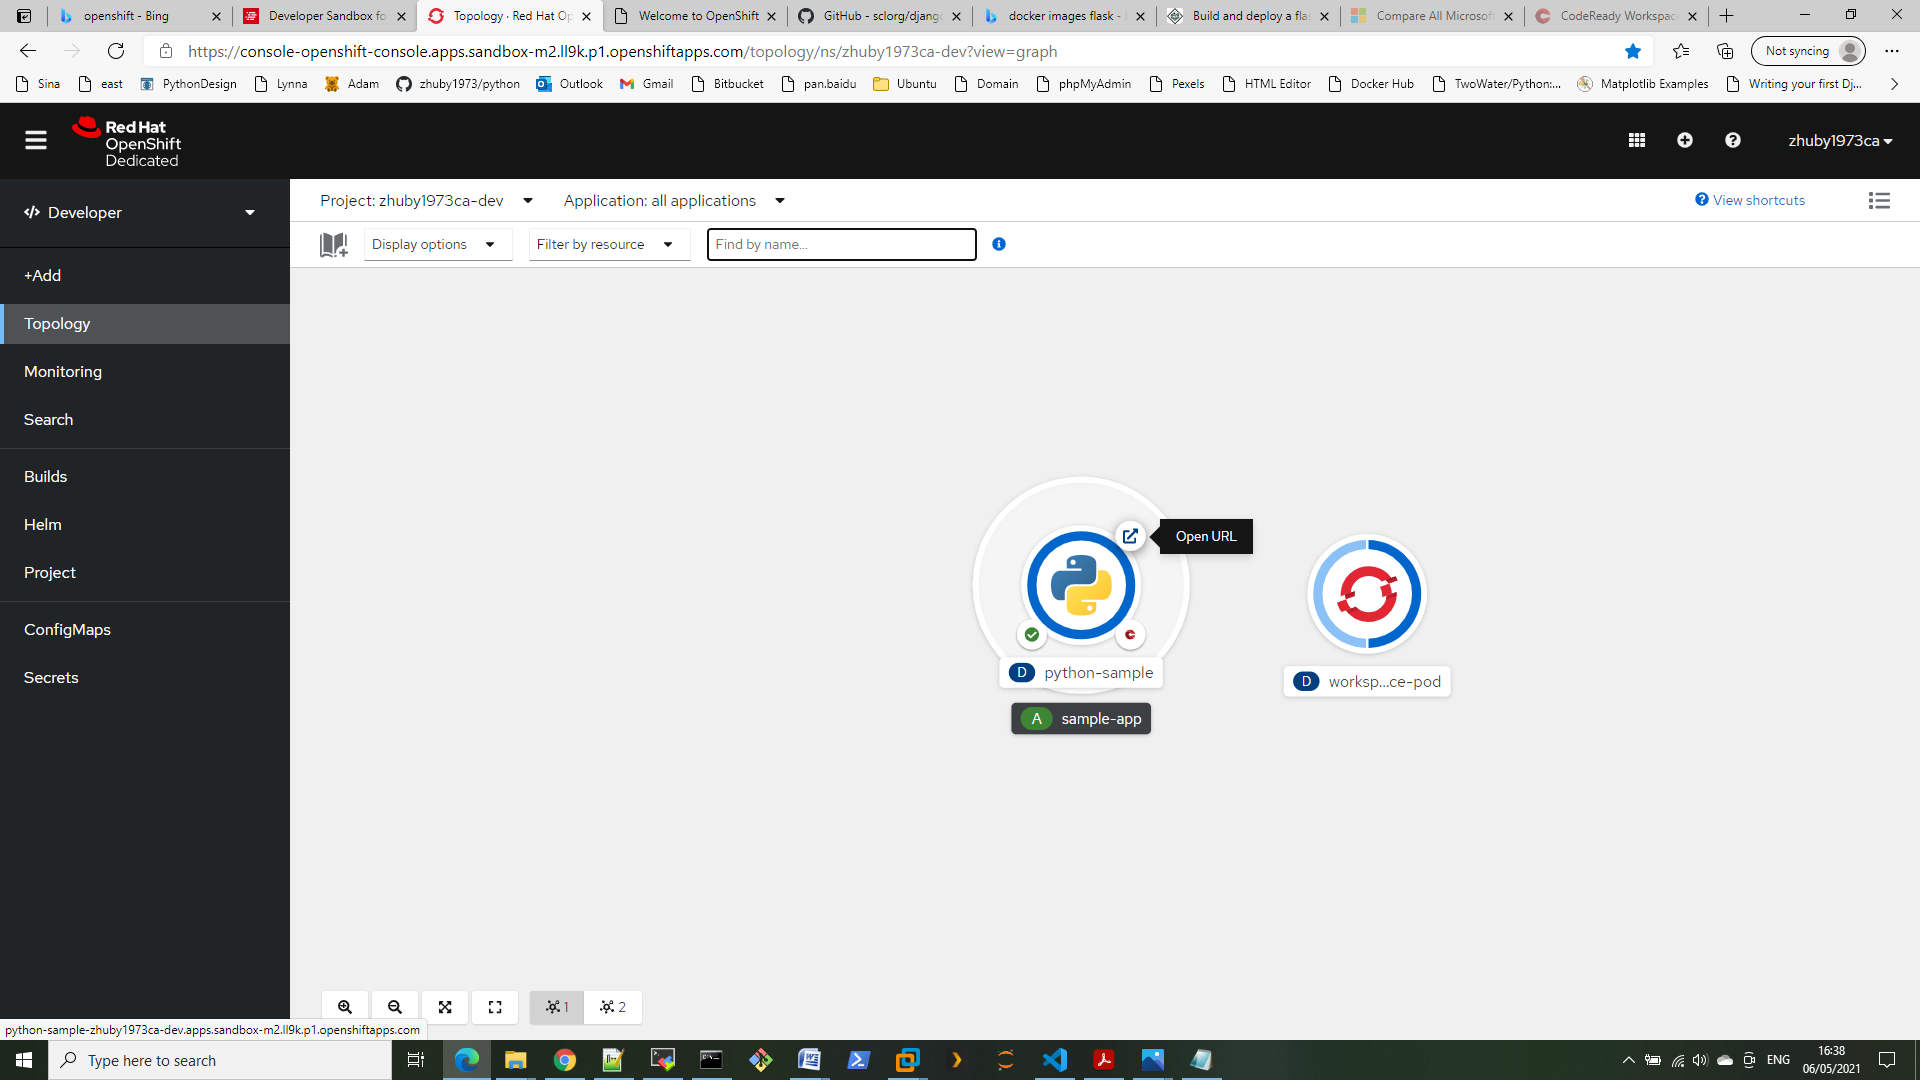
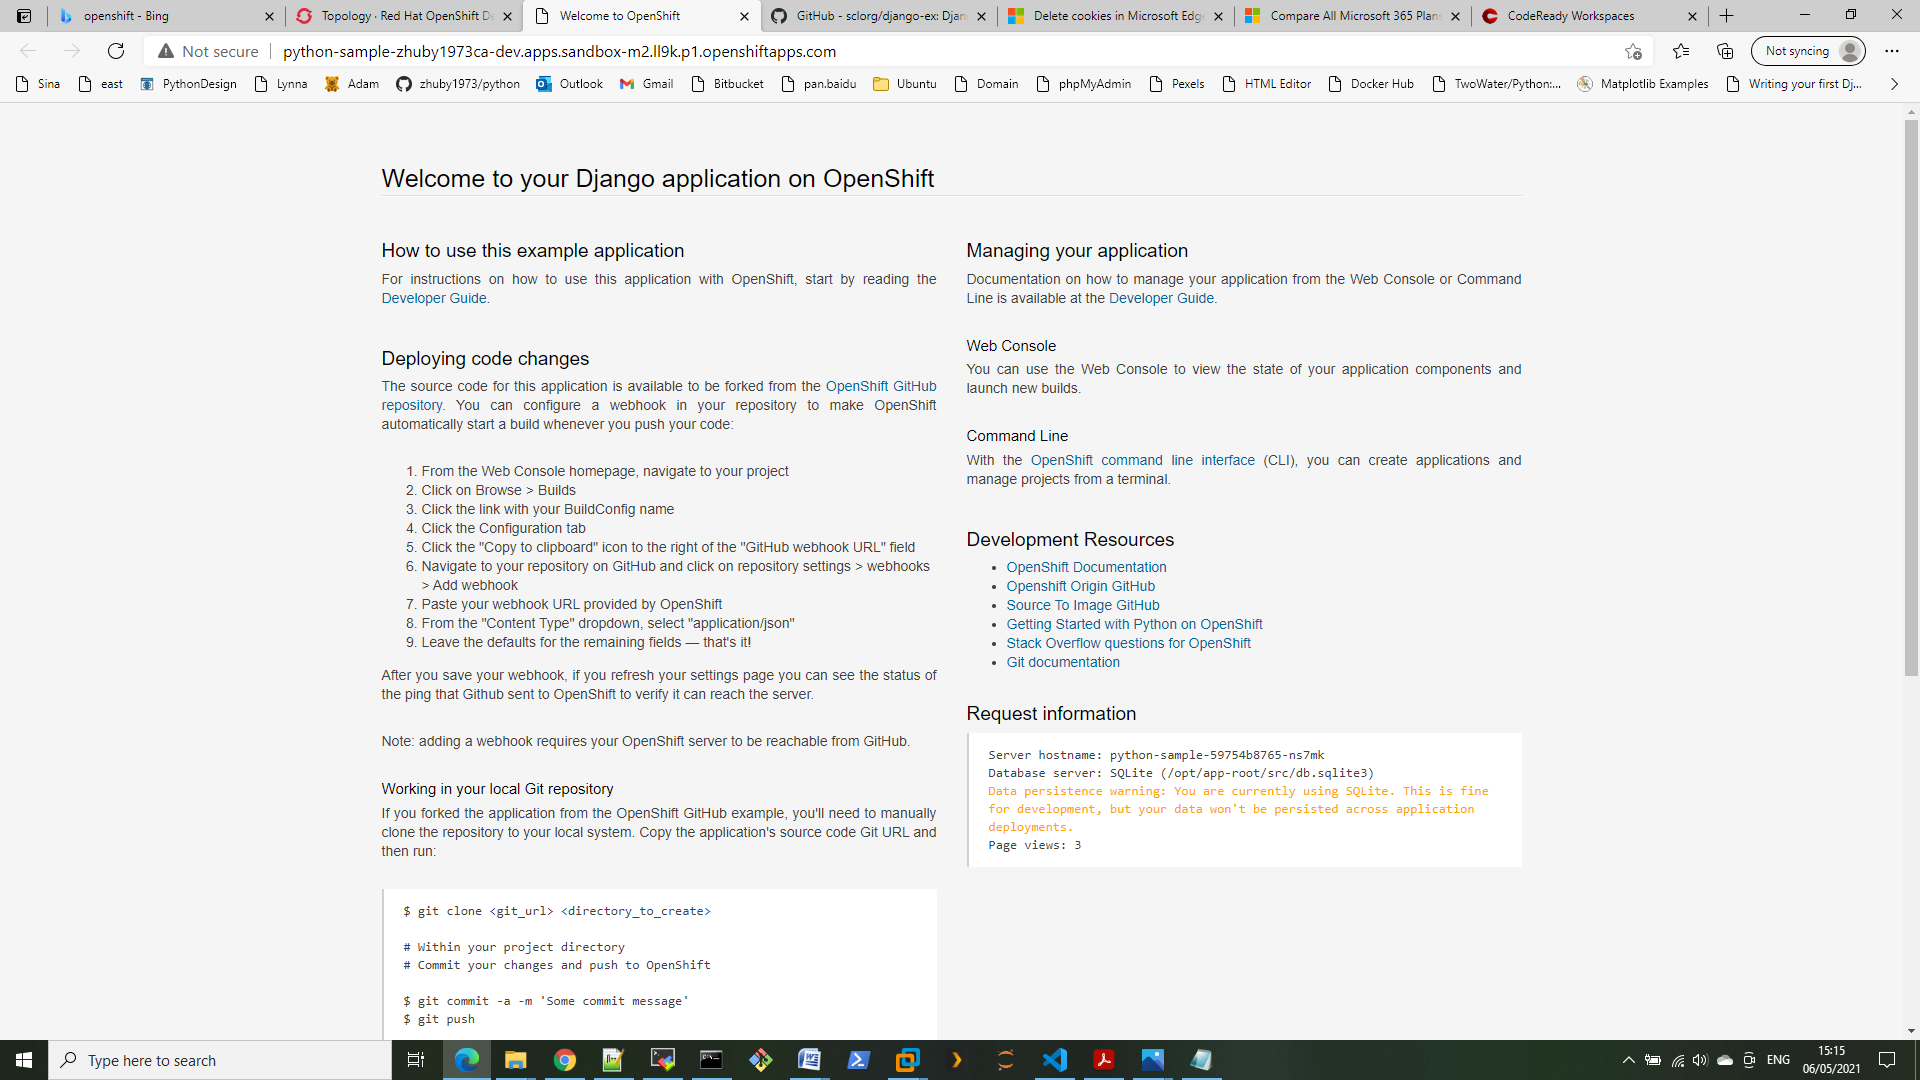
Step 3. It will deploy the python-sample app on OpenShift please try to click “Open URL” once build completed
Step 1. clone the repository https://github.com/MicrosoftLearning/AI-102-AIEngineer/21-custom-form
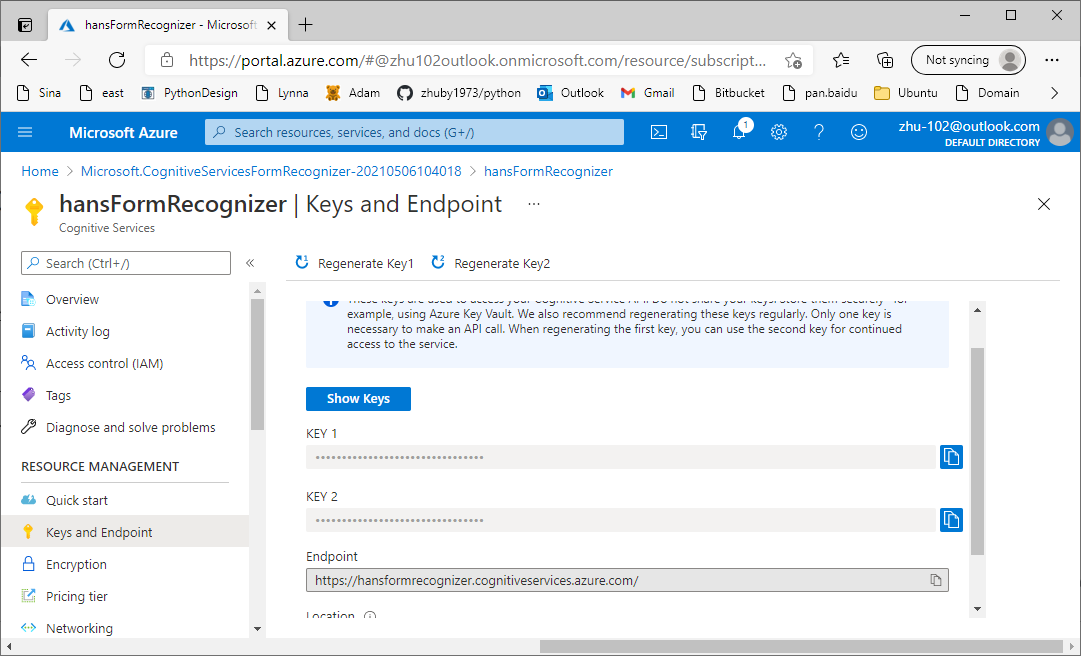
Step 2. create a Form Recognizer resource in Azure Portal
Step 3. setup python env edit C:\Hans\AI-102-AIEngineer\21-custom-form\setup.cmd with your values:
rem Set variable values
set subscription_id=YOUR_SUBSCRIPTION_ID
set resource_group=YOUR_RESOURCE_GROUP
set location=YOUR_LOCATION_NAME

Then run the command to create a SAS URI:
(base) C:\Users\Student\miniconda3\AI-102-AIEngineer\21-custom-form>az login
(base) C:\Users\Student\miniconda3\AI-102-AIEngineer\21-custom-form>setup.cmd
Creating storage...
Uploading files...
Finished[#############################################################]  100.0000%
-------------------------------------
SAS URI: https://ai102form7685119.blob.core.windows.net/sampleforms?se=2022-01-01T00%3A00%3A00Z&sp=rwl&sv=2018-11-09&sr=c&sig=Wopn1A5klioFouoyYKV57hrFIO7SbkGJmjZV%2BIe7R6I%3D
Step 4. Train a model pip install azure-ai-formrecognizer==3.0.0 edit train-model.py with your endpoint, key and SAS URI:
import os

from azure.core.exceptions import ResourceNotFoundError
from azure.ai.formrecognizer import FormRecognizerClient
from azure.ai.formrecognizer import FormTrainingClient
from azure.core.credentials import AzureKeyCredential

def main():

    try:

        # Get configuration settings
        ENDPOINT='https://hansformrecognizer.cognitiveservices.azure.com/'
        KEY='f20ca70a5497484c9f239d3431df2757'
        trainingDataUrl = 'https://ai102form2397530048.blob.core.windows.net/sampleforms?se=2022-01-01T00%3A00%3A00Z&sp=rwl&sv=2018-11-09&sr=c&sig=3LQtq9KfelRXPSf6aqVN/Z3UcIN7KE1Net76W6alTGg%3D'

        # Authenticate Form Training Client
        form_recognizer_client = FormRecognizerClient(ENDPOINT, AzureKeyCredential(KEY))
        form_training_client = FormTrainingClient(ENDPOINT, AzureKeyCredential(KEY))

        # Train model
        poller = form_training_client.begin_training(trainingDataUrl, use_training_labels=False)
        model = poller.result()

        print("Model ID: {}".format(model.model_id))
        print("Status: {}".format(model.status))
        print("Training started on: {}".format(model.training_started_on))
        print("Training completed on: {}".format(model.training_completed_on))

    except Exception as ex:
        print(ex)

if __name__ == '__main__':
    main()
PS C:\Hans\AI-102-AIEngineer\21-custom-form\Python\train-model> python .\train-model.py
Model ID: 37951e13-645e-4364-a93e-96bb1bccdb78
Status: ready
Training started on: 2021-05-06 15:48:40+00:00
Training completed on: 2021-05-06 15:48:51+00:00
Step 5. Test the model edit test-model.py with your Model ID generated in previous step:
import os
from azure.core.exceptions import ResourceNotFoundError
from azure.ai.formrecognizer import FormRecognizerClient
from azure.ai.formrecognizer import FormTrainingClient
from azure.core.credentials import AzureKeyCredential
def main():
try:
# Get configuration settings
ENDPOINT='https://hansformrecognizer.cognitiveservices.azure.com/'
KEY='f20ca70a5497484c9f239d3431df2757'
# Create client using endpoint and key
form_recognizer_client = FormRecognizerClient(ENDPOINT, AzureKeyCredential(KEY))
form_training_client = FormTrainingClient(ENDPOINT, AzureKeyCredential(KEY))
# Model ID from when you trained your model.
model_id = '37951e13-645e-4364-a93e-96bb1bccdb78'
# Test trained model with a new form
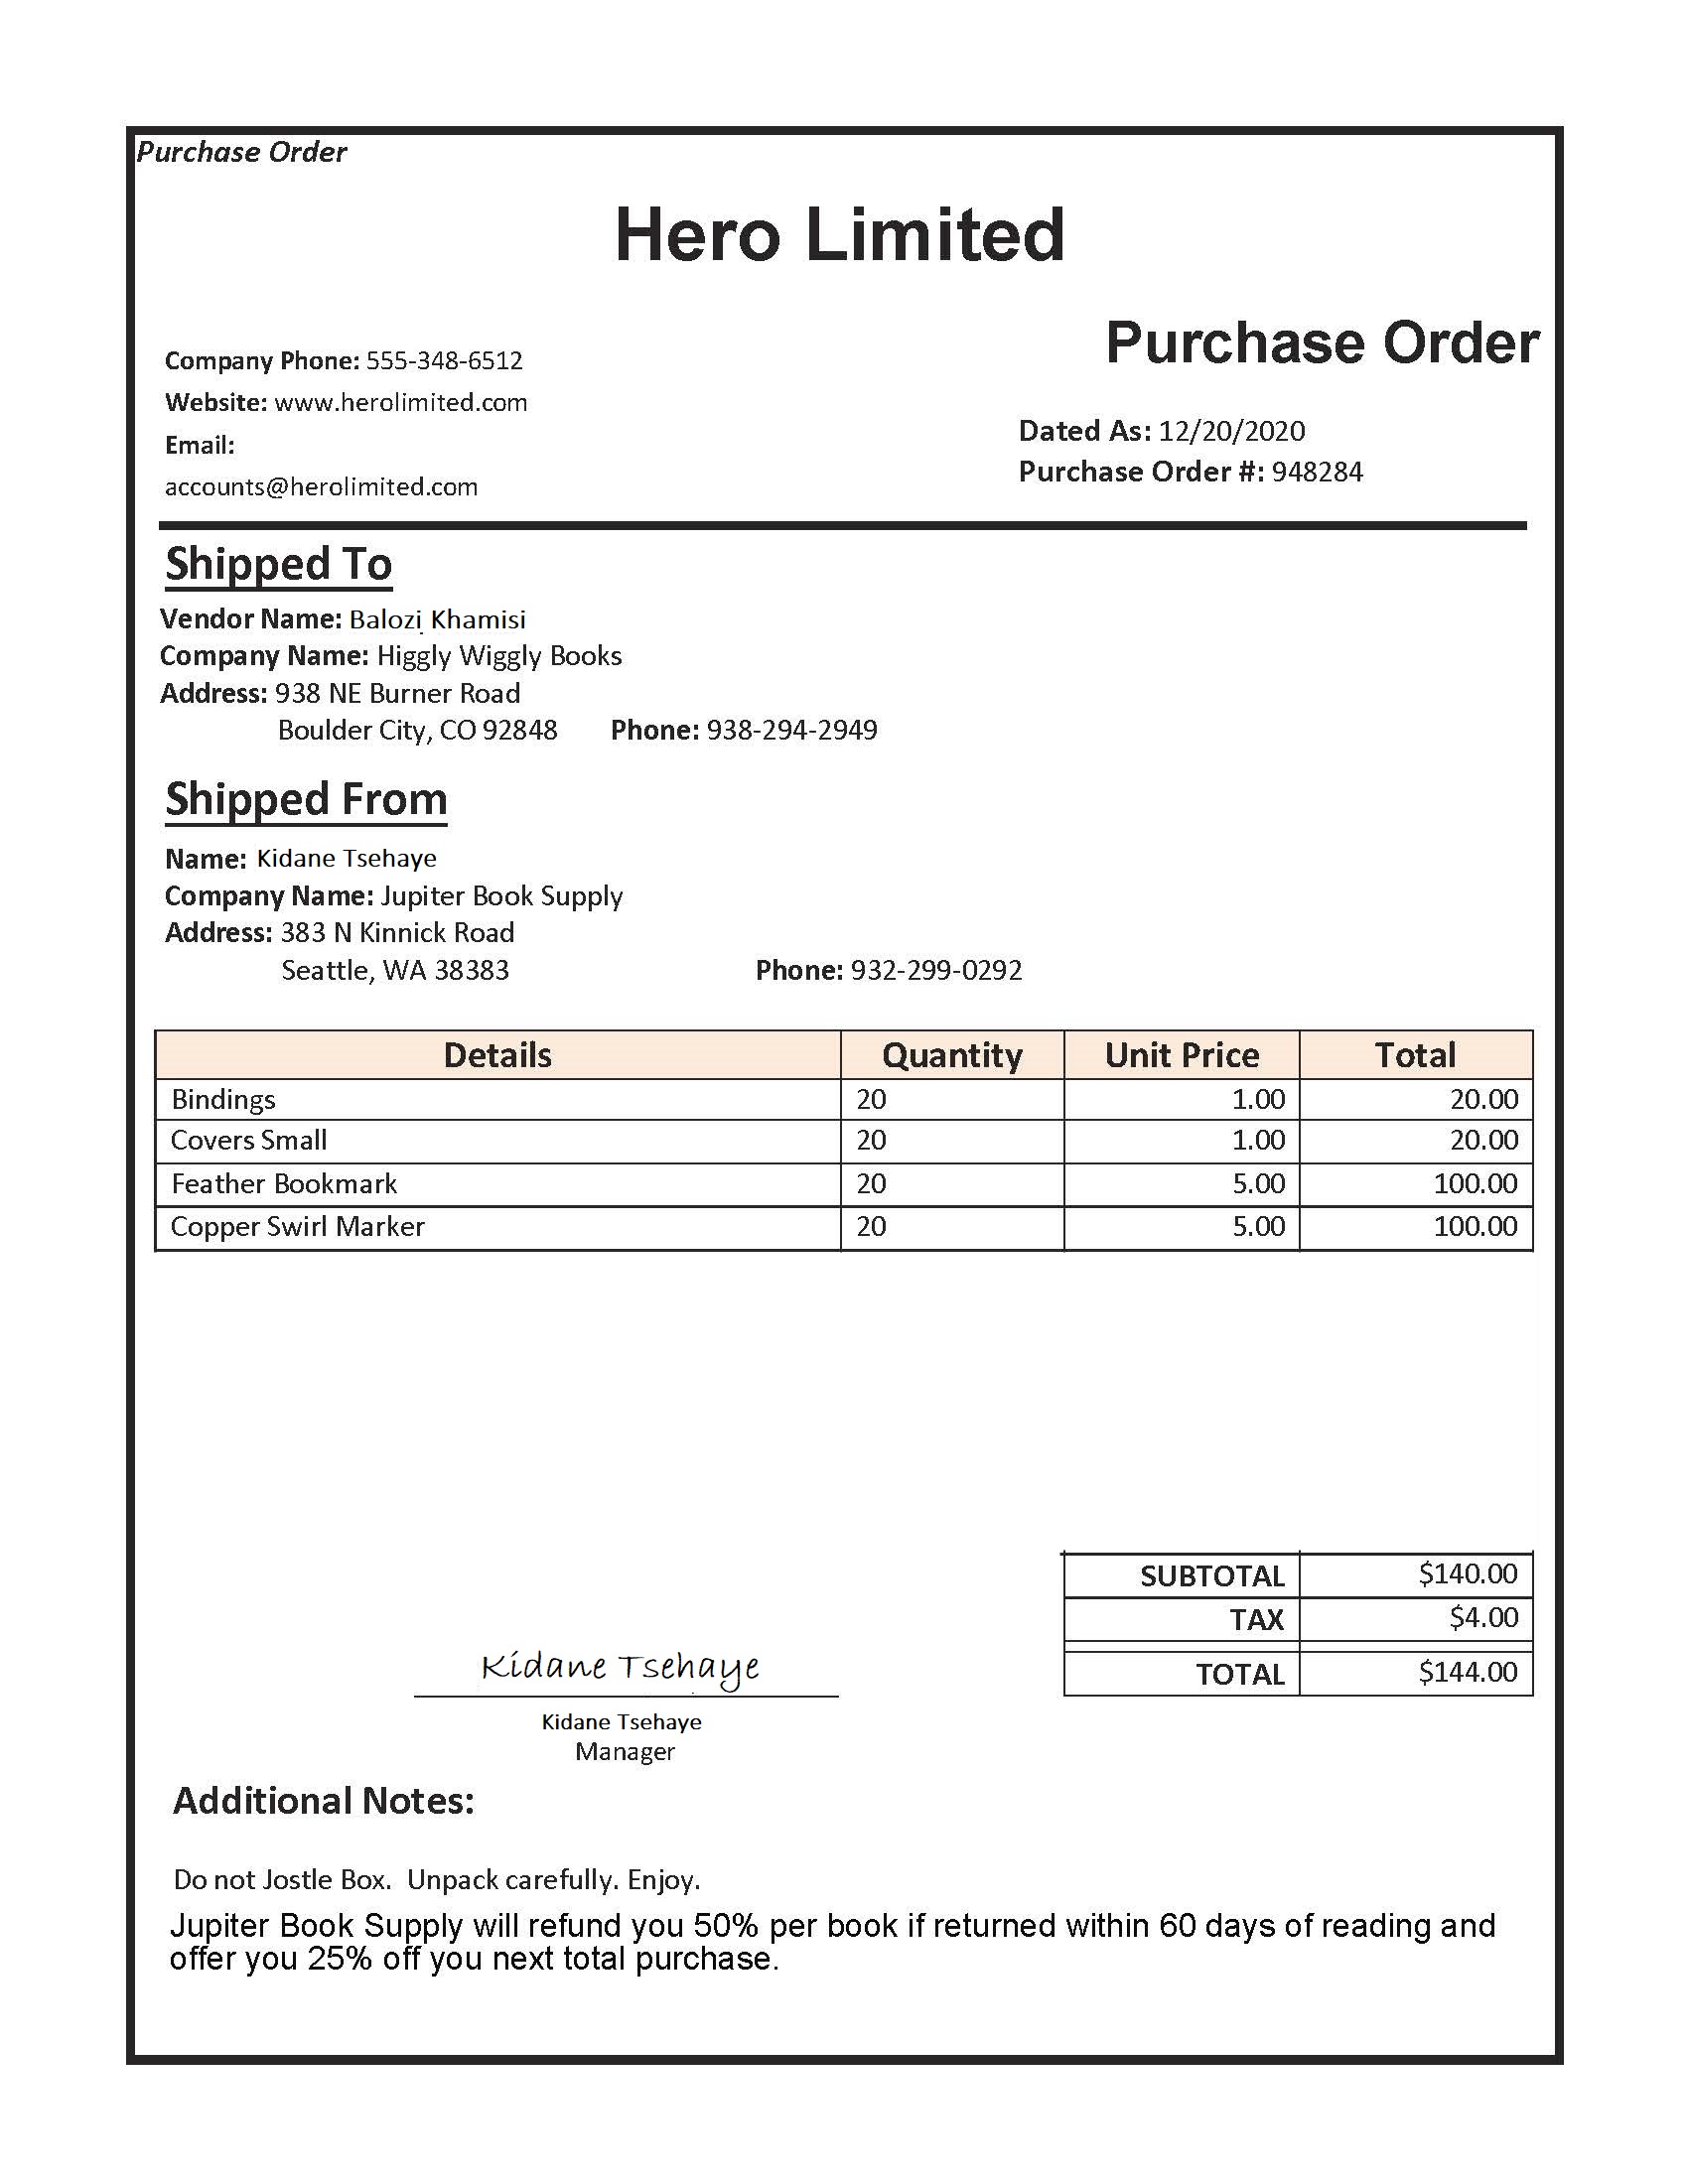
with open('test1.jpg', "rb") as f:
poller = form_recognizer_client.begin_recognize_custom_forms(
model_id=model_id, form=f)
result = poller.result()
for recognized_form in result:
print("Form type: {}".format(recognized_form.form_type))
for name, field in recognized_form.fields.items():
print("Field '{}' has label '{}' with value '{}' and a confidence score of {}".format(
name,
field.label_data.text if field.label_data else name,
field.value,
field.confidence
))
except Exception as ex:
print(ex)
if __name__ == '__main__':
main()
verify the app:
C:\Hans\AI-102-AIEngineer\21-custom-form\Python\test-model> python .\test-model.py
Form type: form-0
Field 'field-0' has label 'Hero Limited' with value 'accounts@herolimited.com' and a confidence score of 0.53
Field 'field-1' has label 'Company Phone:' with value '555-348-6512' and a confidence score of 1.0
Field 'field-2' has label 'Website:' with value 'www.herolimited.com' and a confidence score of 1.0
Field 'field-3' has label 'Email:' with value '49823 Major Ave Cheer, MS, 38601' and a confidence score of 0.53
Field 'field-4' has label 'Dated As:' with value '04/04/2020' and a confidence score of 1.0
Field 'field-5' has label 'Purchase Order #:' with value '3929423' and a confidence score of 1.0
Field 'field-6' has label 'Vendor Name:' with value 'Seth Stanley' and a confidence score of 0.53
Field 'field-7' has label 'Company Name:' with value 'Yoga for You' and a confidence score of 1.0
Field 'field-8' has label 'Address:' with value '343 E Winter Road' and a confidence score of 1.0
Field 'field-9' has label 'Seattle, WA 93849 Phone:' with value '234-986-6454' and a confidence score of 0.53
Field 'field-10' has label 'Name:' with value 'Josh Granger' and a confidence score of 0.86
Field 'field-11' has label 'Company Name:' with value 'Granger Supply' and a confidence score of 0.53
Field 'field-12' has label 'Address:' with value '922 N Ebby Lane' and a confidence score of 0.53
Field 'field-13' has label 'Phone:' with value '932-294-2958' and a confidence score of 1.0
Field 'field-14' has label 'SUBTOTAL' with value '$6750.00' and a confidence score of 1.0
Field 'field-15' has label 'TAX' with value '$600.00' and a confidence score of 1.0
Field 'field-16' has label 'TOTAL' with value '$7350.00' and a confidence score of 1.0
Field 'field-17' has label 'Additional Notes:' with value 'Enjoy. Namaste. If you have any issues with your Yoga supplies please contact us directly via email or at 250-209-1294 during business hours.' and a confidence score
of 0.53
Step 1. clone the repository https://github.com/MicrosoftLearning/AI-102-AIEngineer/20-ocr
Step 2. edit read-text.py as below:
import os
import time
from PIL import Image, ImageDraw
from matplotlib import pyplot as plt

# import namespaces
from azure.cognitiveservices.vision.computervision import ComputerVisionClient
from azure.cognitiveservices.vision.computervision.models import OperationStatusCodes
from msrest.authentication import CognitiveServicesCredentials

def main():
    global cv_client
    try:
        # Get Configuration Settings
        KEY='c36f33fd15784c3984c5a88dcde4c31c'
        ENDPOINT='https://ai102cg.cognitiveservices.azure.com/'

        # Authenticate Computer Vision client
        credential = CognitiveServicesCredentials(KEY)
        cv_client = ComputerVisionClient(ENDPOINT, credential)

        # Menu for text reading functions
        print('1: Use OCR API\n2: Use Read API\n3: Read handwriting\nAny other key to quit')
        command = input('Enter a number:')
        if command == '1':
            image_file = os.path.join('images','Lincoln.jpg')
            GetTextOcr(image_file)
        elif command =='2':
            image_file = os.path.join('images','Rome.pdf')
            GetTextRead(image_file)
        elif command =='3':
            image_file = os.path.join('images','Note.jpg')
            GetTextRead(image_file)

    except Exception as ex:
        print(ex)

def GetTextOcr(image_file):
    print('Reading text in {}\n'.format(image_file))
    # Use OCR API to read text in image
    with open(image_file, mode="rb") as image_data:
        ocr_results = cv_client.recognize_printed_text_in_stream(image_data)

    # Prepare image for drawing
    fig = plt.figure(figsize=(7, 7))
    img = Image.open(image_file)
    draw = ImageDraw.Draw(img)

    # Process the text line by line
    for region in ocr_results.regions:
        for line in region.lines:

            # Show the position of the line of text
            l,t,w,h = list(map(int, line.bounding_box.split(',')))
            draw.rectangle(((l,t), (l+w, t+h)), outline='magenta', width=5)

            # Read the words in the line of text
            line_text = ''
            for word in line.words:
                line_text += word.text + ' '
            print(line_text.rstrip())

    # Save the image with the text locations highlighted
    plt.axis('off')
    plt.imshow(img)
    outputfile = 'ocr_results.jpg'
    fig.savefig(outputfile)
    print('Results saved in', outputfile)

def GetTextRead(image_file):
    print('Reading text in {}\n'.format(image_file))
    # Use Read API to read text in image
    with open(image_file, mode="rb") as image_data:
        read_op = cv_client.read_in_stream(image_data, raw=True)

        # Get the async operation ID so we can check for the results
        operation_location = read_op.headers["Operation-Location"]
        operation_id = operation_location.split("/")[-1]

        # Wait for the asynchronous operation to complete
        while True:
            read_results = cv_client.get_read_result(operation_id)
            if read_results.status not in [OperationStatusCodes.running, OperationStatusCodes.not_started]:
                break
            time.sleep(1)

        # If the operation was successfuly, process the text line by line
        if read_results.status == OperationStatusCodes.succeeded:
            for page in read_results.analyze_result.read_results:
                for line in page.lines:
                    print(line.text)

if __name__ == "__main__":
    main()
Step 3. verify the app
C:\Hans\AI-102-AIEngineer\20-ocr\Python\read-text> python .\read-text.py
1: Use OCR API
2: Use Read API
3: Read handwriting
Any other key to quit
Enter a number:3
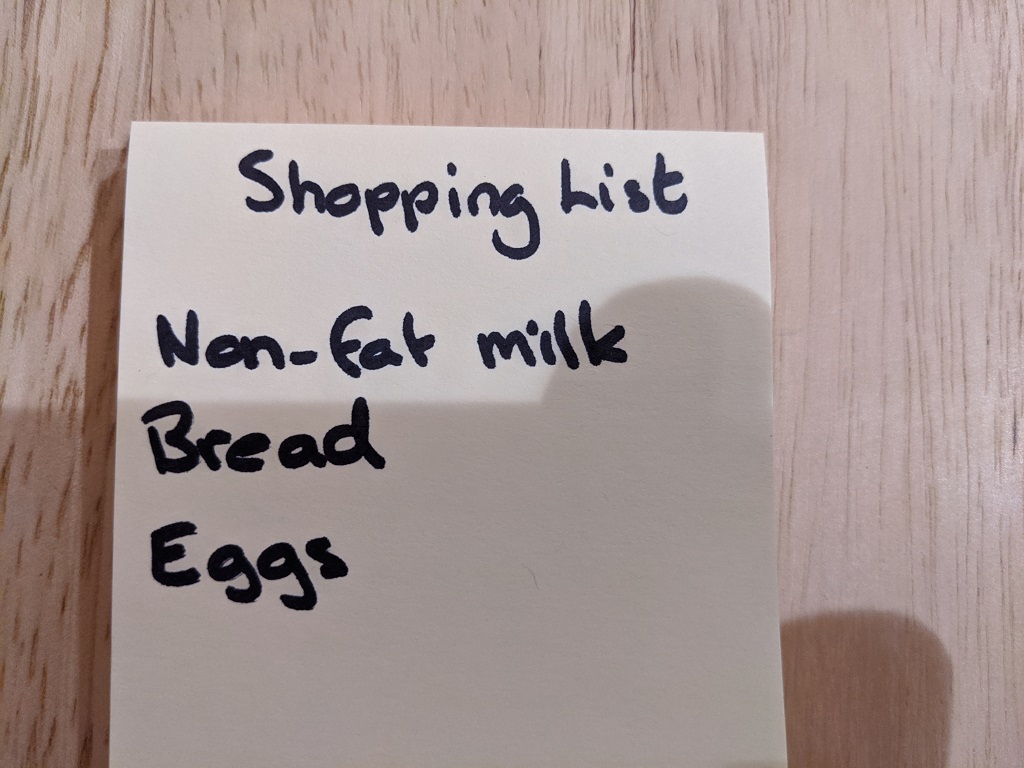
Reading text in images\Note.jpg
Shopping List
Non-Fat milk
Bread
Eggs
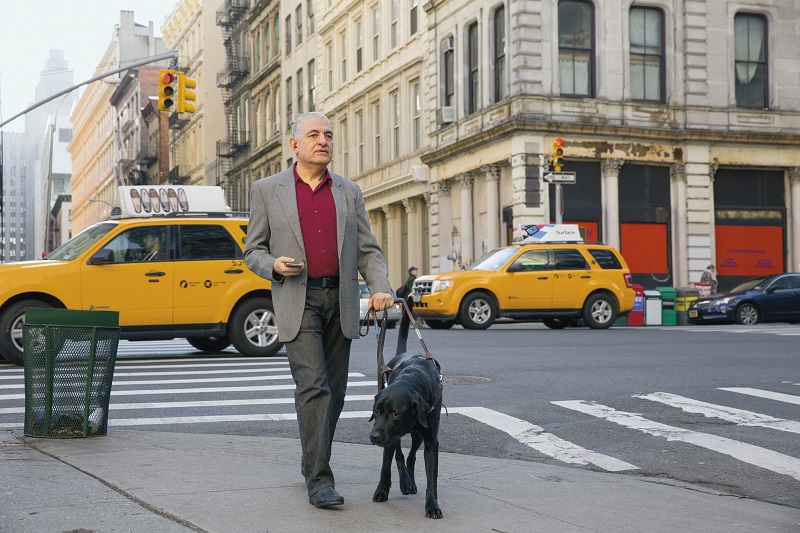
Step 2. create image-analysis.py and prepare a picture images/street.jpg
from dotenv import load_dotenv
import os
from array import array
from PIL import Image, ImageDraw
import sys
import time
from matplotlib import pyplot as plt
import numpy as np
# Import namespaces
from azure.cognitiveservices.vision.computervision import ComputerVisionClient
from azure.cognitiveservices.vision.computervision.models import VisualFeatureTypes
from msrest.authentication import CognitiveServicesCredentials
def main():
global cv_client
try:
# Get Configuration Settings
KEY='c36f33fd15784c3984c5a88dcde4c31c'
ENDPOINT='https://ai102cg.cognitiveservices.azure.com/'
# Get image
image_file = 'images/street.jpg'
if len(sys.argv) > 1:
image_file = sys.argv[1]
# Authenticate Computer Vision client
credential = CognitiveServicesCredentials(KEY)
cv_client = ComputerVisionClient(ENDPOINT, credential)
# Analyze image
AnalyzeImage(image_file)
# Generate thumbnail
GetThumbnail(image_file)
except Exception as ex:
print(ex)
def AnalyzeImage(image_file):
print('Analyzing', image_file)
# Specify features to be retrieved
features = [VisualFeatureTypes.description,
VisualFeatureTypes.tags,
VisualFeatureTypes.categories,
VisualFeatureTypes.brands,
VisualFeatureTypes.objects,
VisualFeatureTypes.adult]
# Get image analysis
with open(image_file, mode="rb") as image_data:
analysis = cv_client.analyze_image_in_stream(image_data , features)
# Get image description
for caption in analysis.description.captions:
print("Description: '{}' (confidence: {:.2f}%)".format(caption.text, caption.confidence * 100))
# Get image tags
if (len(analysis.tags) > 0):
print("Tags: ")
for tag in analysis.tags:
print(" -'{}' (confidence: {:.2f}%)".format(tag.name, tag.confidence * 100))
# Get image categories (including celebrities and landmarks)
if (len(analysis.categories) > 0):
print("Categories:")
landmarks = []
celebrities = []
for category in analysis.categories:
# Print the category
print(" -'{}' (confidence: {:.2f}%)".format(category.name, category.score * 100))
if category.detail:
# Get landmarks in this category
if category.detail.landmarks:
for landmark in category.detail.landmarks:
if landmark not in landmarks:
landmarks.append(landmark)
# Get celebrities in this category
if category.detail.celebrities:
for celebrity in category.detail.celebrities:
if celebrity not in celebrities:
celebrities.append(celebrity)
# If there were landmarks, list them
if len(landmarks) > 0:
print("Landmarks:")
for landmark in landmarks:
print(" -'{}' (confidence: {:.2f}%)".format(landmark.name, landmark.confidence * 100))
# If there were celebrities, list them
if len(celebrities) > 0:
print("Celebrities:")
for celebrity in celebrities:
print(" -'{}' (confidence: {:.2f}%)".format(celebrity.name, celebrity.confidence * 100))
# Get brands in the image
if (len(analysis.brands) > 0):
print("Brands: ")
for brand in analysis.brands:
print(" -'{}' (confidence: {:.2f}%)".format(brand.name, brand.confidence * 100))
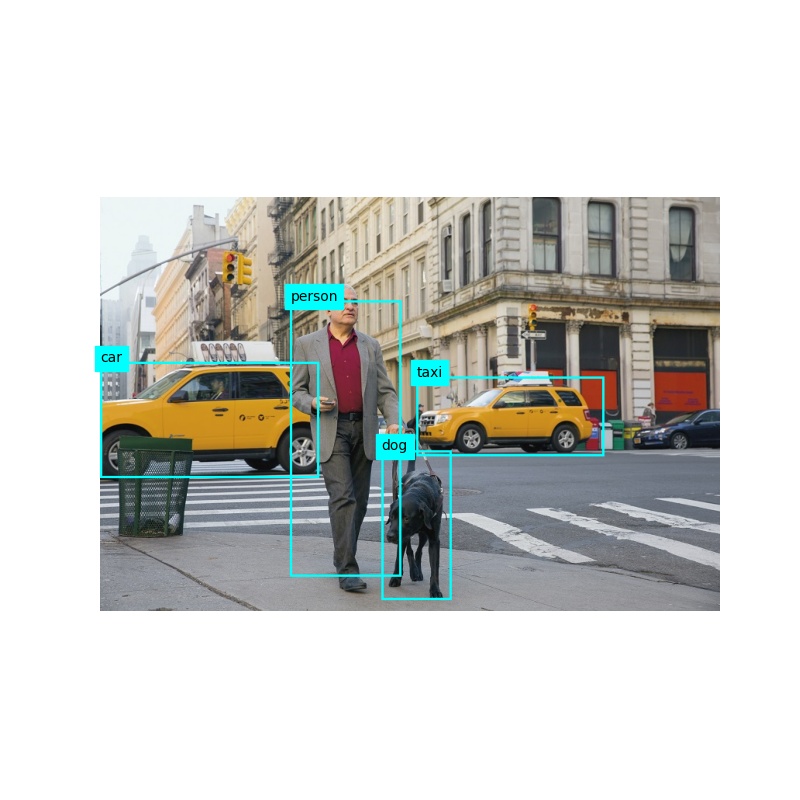
# Get objects in the image
if len(analysis.objects) > 0:
print("Objects in image:")
# Prepare image for drawing
fig = plt.figure(figsize=(8, 8))
plt.axis('off')
image = Image.open(image_file)
draw = ImageDraw.Draw(image)
color = 'cyan'
for detected_object in analysis.objects:
# Print object name
print(" -{} (confidence: {:.2f}%)".format(detected_object.object_property, detected_object.confidence * 100))
# Draw object bounding box
r = detected_object.rectangle
bounding_box = ((r.x, r.y), (r.x + r.w, r.y + r.h))
draw.rectangle(bounding_box, outline=color, width=3)
plt.annotate(detected_object.object_property,(r.x, r.y), backgroundcolor=color)
# Save annotated image
plt.imshow(image)
outputfile = 'objects.jpg'
fig.savefig(outputfile)
print(' Results saved in', outputfile)
# Get moderation ratings
ratings = 'Ratings:\n -Adult: {}\n -Racy: {}\n -Gore: {}'.format(analysis.adult.is_adult_content,
analysis.adult.is_racy_content,
analysis.adult.is_gory_content)
print(ratings)
def GetThumbnail(image_file):
print('Generating thumbnail')
# Generate a thumbnail
with open(image_file, mode="rb") as image_data:
# Get thumbnail data
thumbnail_stream = cv_client.generate_thumbnail_in_stream(100, 100, image_data, True)
# Save thumbnail image
thumbnail_file_name = 'thumbnail.png'
with open(thumbnail_file_name, "wb") as thumbnail_file:
for chunk in thumbnail_stream:
thumbnail_file.write(chunk)
print('Thumbnail saved in.', thumbnail_file_name)
if __name__ == "__main__":
main()
images/street.jpg
Step 3. run it with: python image-analysis.py images/street.jpg you will get objects.jpg and thumbnail.png generated in same folder:
Step 1. Clone the repository https://github.com/MicrosoftLearning/AI-102-AIEngineer We will use 13-bot-framework\Python
Step 2. Create a bot based on the EchoBot template pip install botbuilder-core pip install asyncio pip install aiohttp pip install cookiecutter==1.7.0 cookiecutter https://github.com/microsoft/botbuilder-python/releases/download/Templates/echo.zip when prompted by cookiecutter, enter the following details: bot_name: TimeBot bot_description: A bot for our times
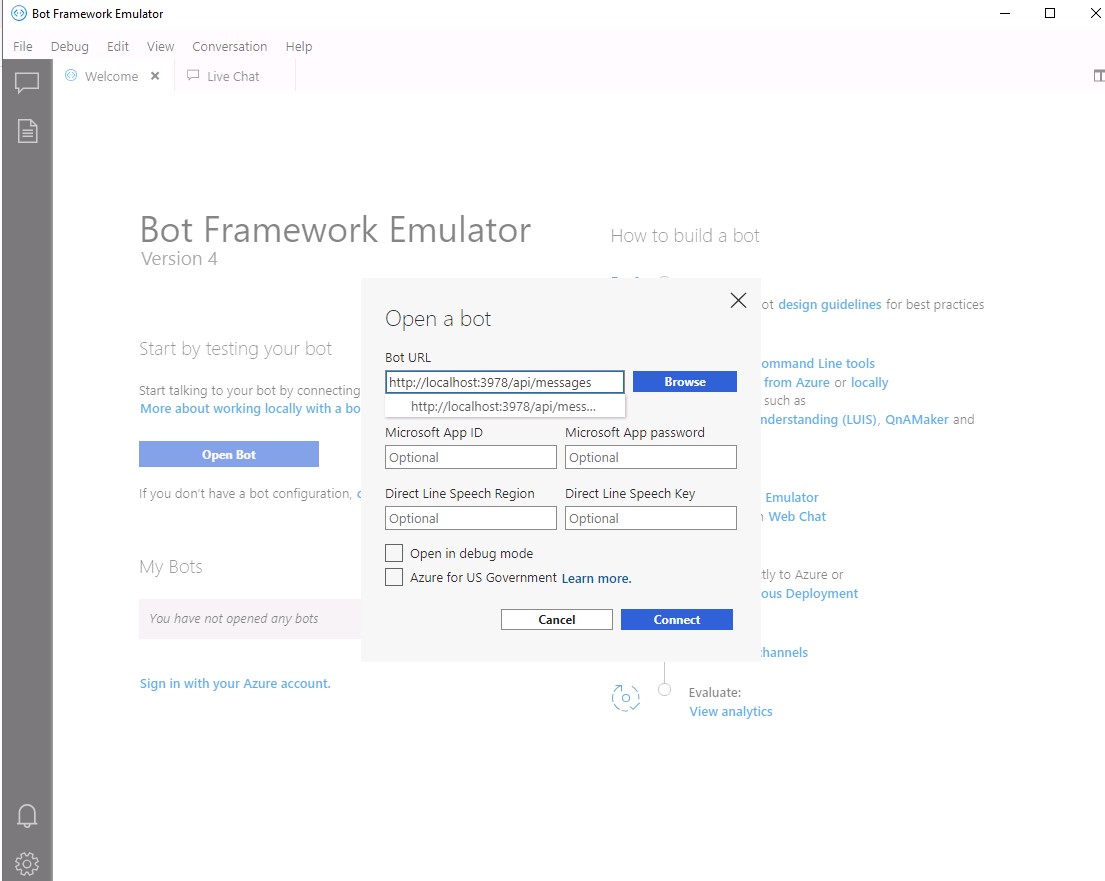
Step 3. Test the bot in the Bot Framework Emulator
(base) C:\Users\Student\hans\AI-102-AIEngineer\13-bot-framework\Python\TimeBot>python app.py
======== Running on http://localhost:3978 ========
(Press CTRL+C to quit)
Start the Bot Framework Emulator, and open your bot by specifying the endpoint with the /api/messages path appended, like this: http://localhost:3978/api/messages
Step 4. Update bot.py
# Copyright (c) Microsoft Corporation. All rights reserved.
# Licensed under the MIT License.

from botbuilder.core import ActivityHandler, TurnContext
from botbuilder.schema import ChannelAccount
from datetime import datetime

class MyBot(ActivityHandler):
    # See https://aka.ms/about-bot-activity-message to learn more about the message and other activity types.

    async def on_message_activity(self, turn_context: TurnContext):
        input_message = turn_context.activity.text
        response_message = 'Ask me what the time is.'
        if (input_message.lower().startswith('what') and 'time' in input_message.lower()):
            now = datetime.now()
            response_message = 'The time is {}:{:02d}.'.format(now.hour,now.minute)
        await turn_context.send_activity(response_message)

    async def on_members_added_activity(
        self,
        members_added: ChannelAccount,
        turn_context: TurnContext
    ):
        for member_added in members_added:
            if member_added.id != turn_context.activity.recipient.id:
                await turn_context.send_activity("Hello and welcome!")
Step 5. Create an Azure application registration az login az ad app create –display-name “TimeBot” –password “Super$ecretPassw0rd” –available-to-other-tenants
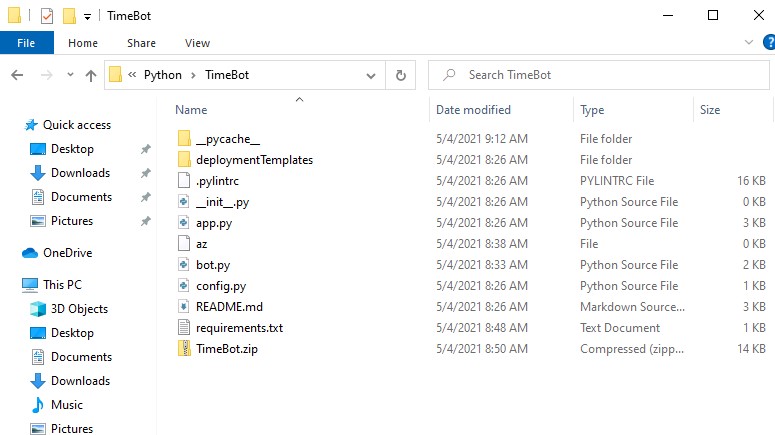
Step 7. Create a zip archive for deployment select all of the files in the TimeBot folder to TimeBot.zip.
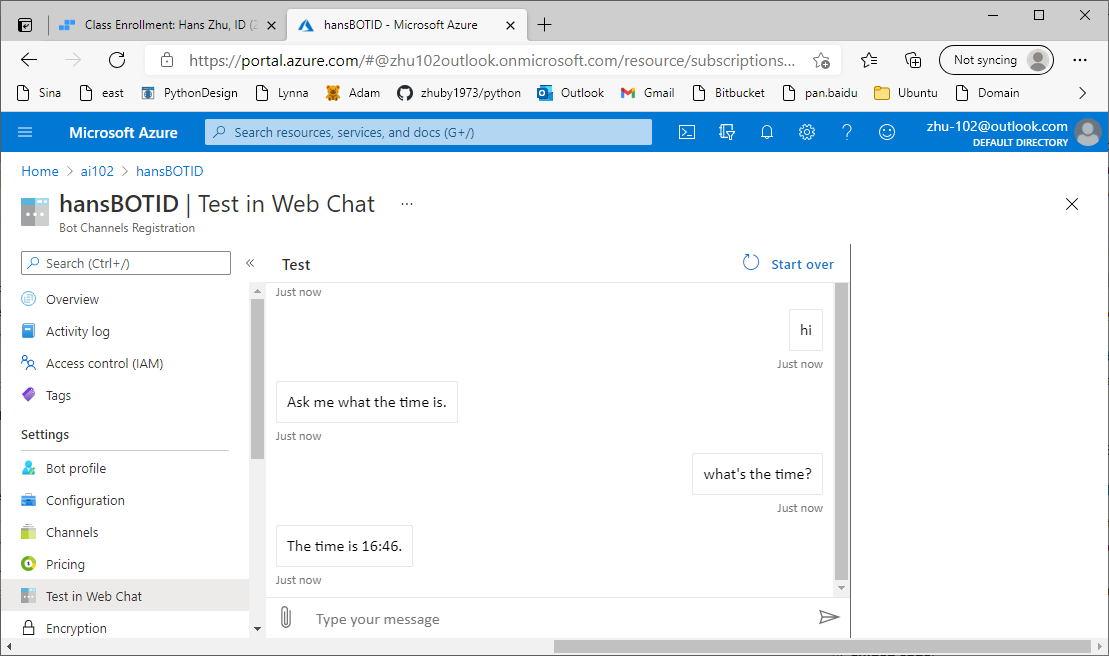
Step 8. Deploy and test the bot in Azure Portal az webapp deployment source config-zip –resource-group “YOUR_RESOURCE_GROUP” –name “YOUR_WEB_APP_NAME” –src “TimeBot.zip” In the Azure portal, in the resource group containing your resources, open the Bot Channels Registration resource (which will have the name you assigned to the BotId parameter when creating Azure resources). In the Bot management section, select Test in Web Chat. Then wait for your bot to initialize. Enter a message such as Hello and view the response from the bot, which should be Ask me what the time is. Enter What is the time? and view the response.
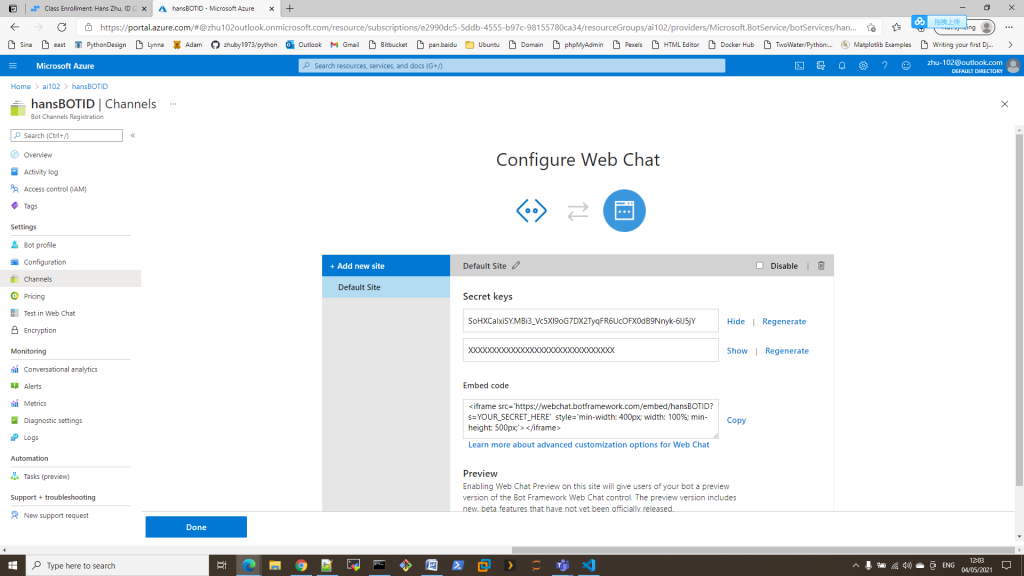
Step 9. Get the Web Chat channel info from Azure Portal
Step 10. Update 13-bot-framework/web-client/default.html with Embed code and Secret Key
<head>
<title>Time for Bots</title>
</head>
<Body>
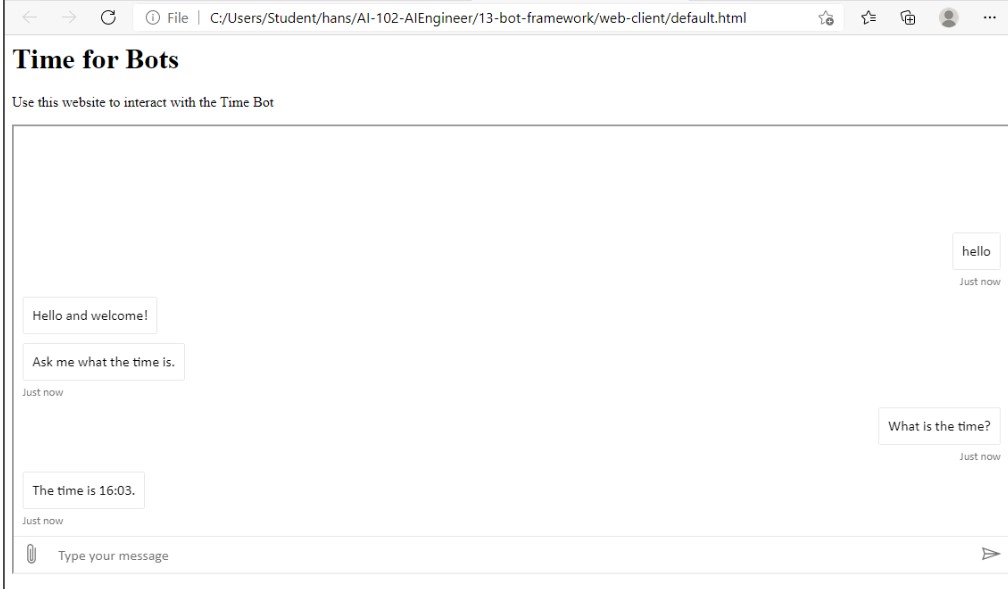
<h1>Time for Bots</h1>
<p>Use this website to interact with the Time Bot</p>
<!-- add the iframe for the bot here-->
<iframe src='https://webchat.botframework.com/embed/hansBOTID?s=SoHXCaIxiSY.MBi3_Vc5Xl9oG7DX2TyqFR6UcOFX0dB9Nnyk-6lJ5jY' style='min-width: 400px; width: 100%; min-height: 500px;'></iframe>
</Body>
then you can open the html page in Edge and test the Bots service:
Step 1. Clone the repository Start Visual Studio Code. Open the palette (SHIFT+CTRL+P) and run a Git: Clone command to clone the https://github.com/MicrosoftLearning/AI-102-AIEngineer repository to a local folder.
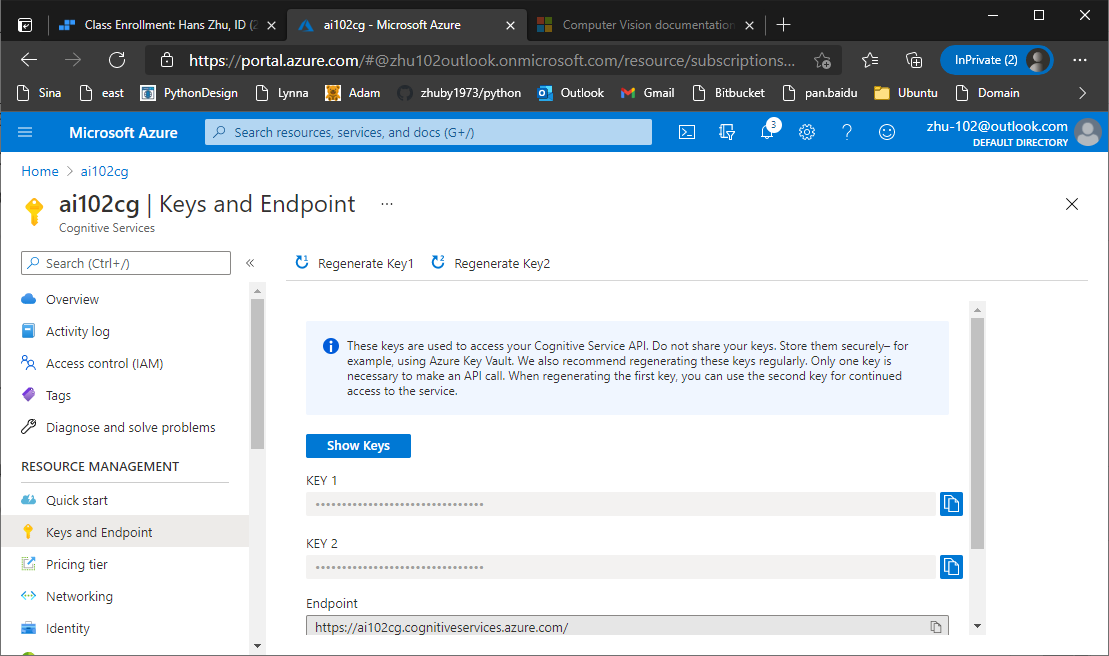
Step 2. Create a Cognitive Services resource with the following settings: Subscription: Your Azure subscription Resource group: Choose or create a resource group Region: Choose any available region Name: Enter a unique name Pricing tier: Standard S0
When the resource has been deployed, go to it and view its Keys and Endpoint page. You will need the endpoint and one of the keys from this page in our API.
Step 3. In Visual Studio Code, in the Explorer pane, browse to the 05-analyze-text folder and expand the Python folder. Right-click the text-analysis folder and open an integrated terminal. Then install the Text Analytics SDK package by running the appropriate command for your language preference: pip install azure-ai-textanalytics==5.0.0, then edit .env with your Coginitive Services info: COG_SERVICE_ENDPOINT=your_cognitive_services_endpoint COG_SERVICE_KEY=your_cognitive_services_key
Step 4. Edit text-analysis.py as below:
from dotenv import load_dotenv
import os
# Import namespaces
from azure.core.credentials import AzureKeyCredential
from azure.ai.textanalytics import TextAnalyticsClient

def main():
    try:
        # Get Configuration Settings
        load_dotenv()
        cog_endpoint = os.getenv('COG_SERVICE_ENDPOINT')
        cog_key = os.getenv('COG_SERVICE_KEY')

        # Create client using endpoint and key
        credential = AzureKeyCredential(cog_key)
        cog_client = TextAnalyticsClient(endpoint=cog_endpoint, credential=credential)

        # Analyze each text file in the reviews folder
        reviews_folder = 'reviews'
        for file_name in os.listdir(reviews_folder):
            # Read the file contents
            print('\n-------------\n' + file_name)
            text = open(os.path.join(reviews_folder, file_name), encoding='utf8').read()
            print('\n' + text)

            # Get language
            detectedLanguage = cog_client.detect_language(documents=[text])[0]
            print('\nLanguage: {}'.format(detectedLanguage.primary_language.name))

            # Get sentiment
            sentimentAnalysis = cog_client.analyze_sentiment(documents=[text])[0]
            print("\nSentiment: {}".format(sentimentAnalysis.sentiment))

            # Get key phrases
            phrases = cog_client.extract_key_phrases(documents=[text])[0].key_phrases
            if len(phrases) > 0:
                print("\nKey Phrases:")
                for phrase in phrases:
                    print('\t{}'.format(phrase))

            # Get entities
            entities = cog_client.recognize_entities(documents=[text])[0].entities
            if len(entities) > 0:
                print("\nEntities")
                for entity in entities:
                    print('\t{} ({})'.format(entity.text, entity.category))

            # Get linked entities
            entities = cog_client.recognize_linked_entities(documents=[text])[0].entities
            if len(entities) > 0:
                print("\nLinks")
                for linked_entity in entities:
                    print('\t{} ({})'.format(linked_entity.name, linked_entity.url))
    except Exception as ex:
        print(ex)
if __name__ == "__main__":
    main()