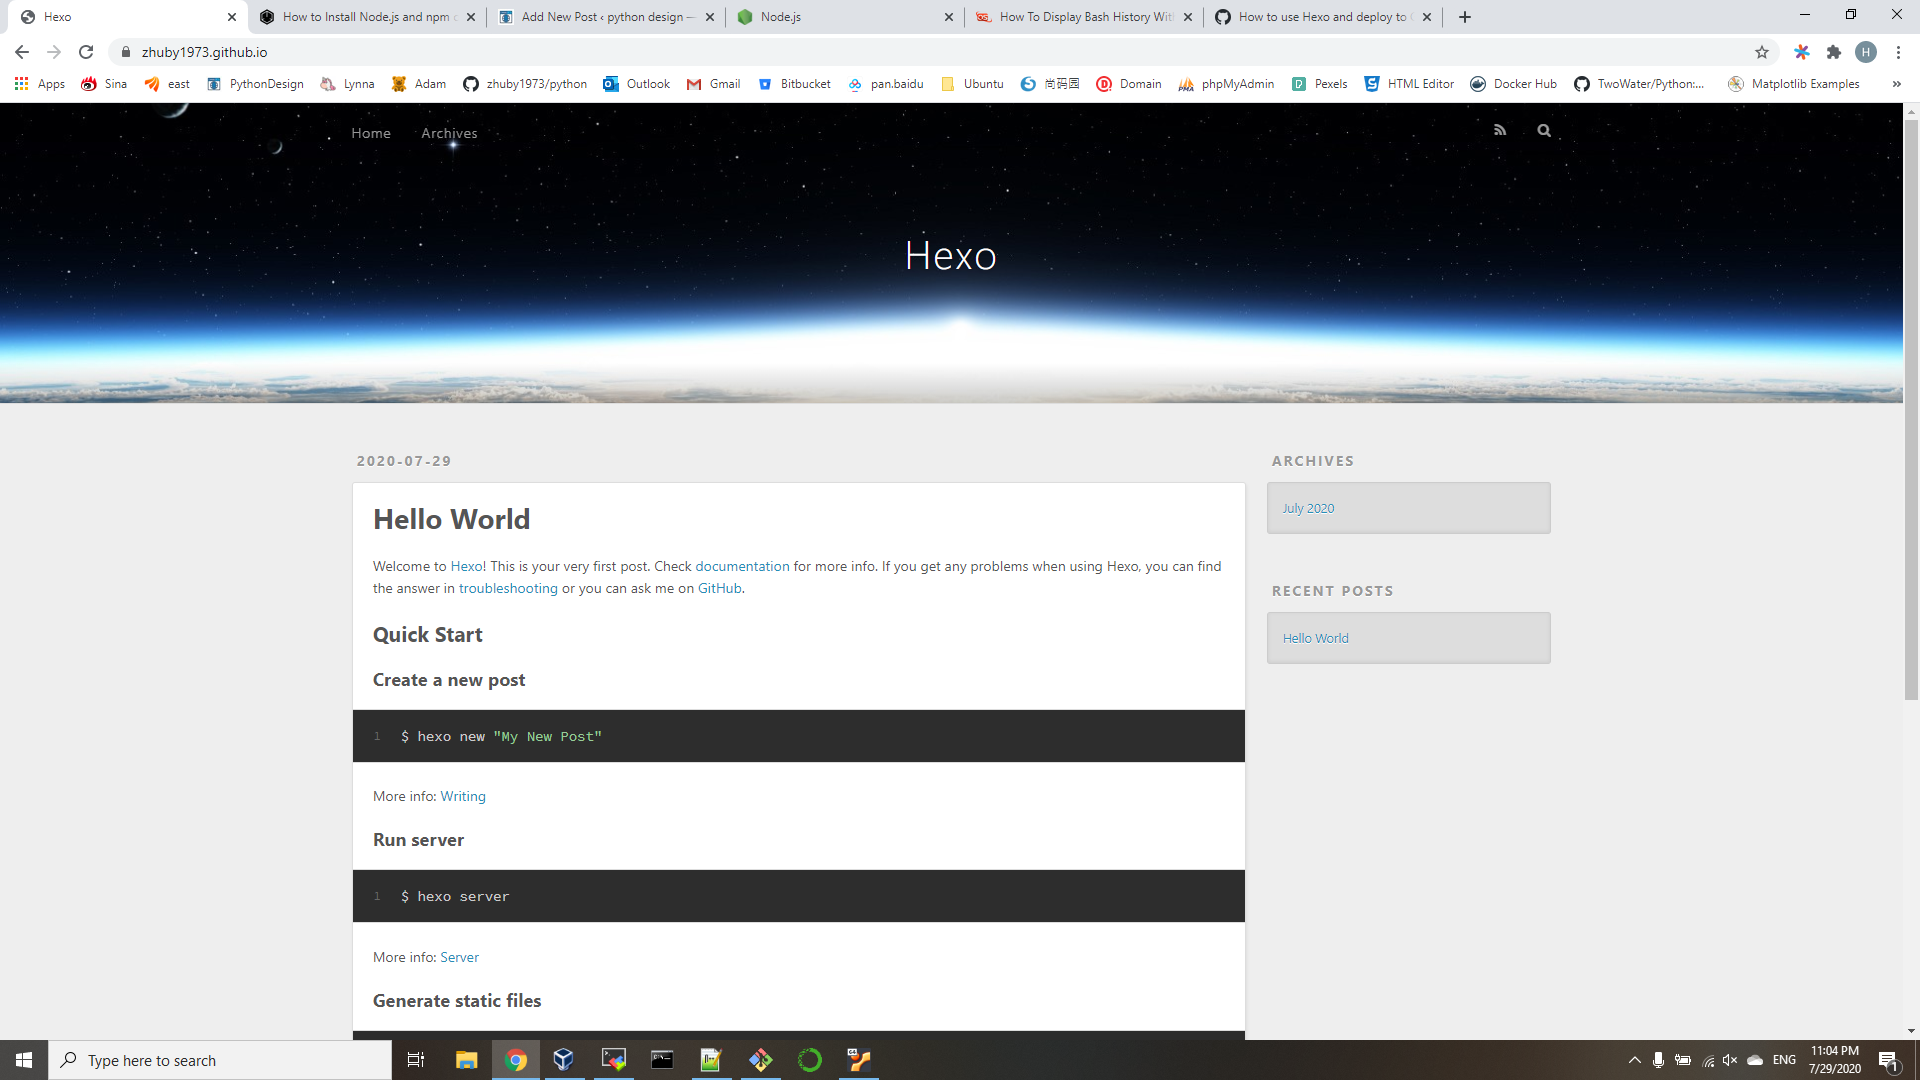
Head over to GitHub and create a new repository named username.github.io, where username is your username (or organization name) on GitHub.
install nodejs and npm on Ubuntu
sudo apt install nodejs npm
install hexo and setup
npm install hexo-cli -g
hexo init zhuby1973.github.io
cd zhuby1973.github.io
npm install
hexo clean
hexo g
hexo s
hexo new "My New Post"
npm install hexo-deployer-git --save
Step 1: Install NGINX Dependencies
RTMP has 3 Dependencies: OpenSSL, PCRE and Zlib.
Ubuntu 20.04 already has default OpenSSL, PCRE, we only need install Zlib:
wget http://zlib.net/zlib-1.2.11.tar.gz
tar -zxf zlib-1.2.11.tar.gz
cd zlib-1.2.11
./configure
make
sudo make install
Step 2: Installing nginx with RTMP module
$ sudo apt-get install build-essential libpcre3 libpcre3-dev libssl-dev
$ wget http://nginx.org/download/nginx-1.15.1.tar.gz
$ wget https://github.com/sergey-dryabzhinsky/nginx-rtmp-module/archive/dev.zip
$ tar -zxvf nginx-1.15.1.tar.gz
$ unzip dev.zip
$ cd nginx-1.15.1
$ ./configure --with-http_ssl_module --add-module=../nginx-rtmp-module-dev
$ make
$ sudo make install
$ sudo /usr/local/nginx/sbin/nginx
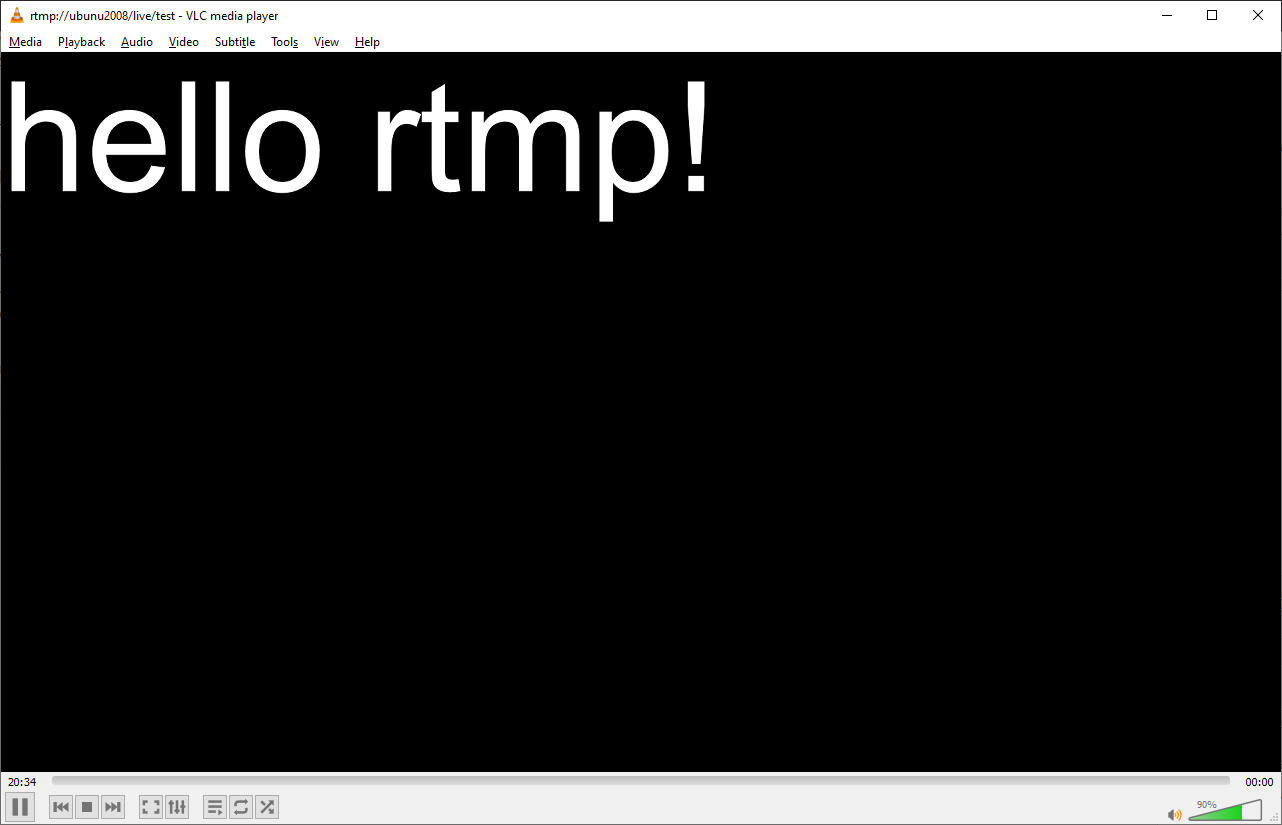
And to test to make sure nginx is running, point your browser to http:/// and you should get the "Welcome to nginx!" page.
Step 3: Configuring nginx to use RTMP
Open your config file, located by default at /usr/local/nginx/conf/nginx.conf and add the following at the very end of the file:
rtmp {
        server {
                listen 1935;
                chunk_size 4096;

                application live {
                        live on;
                        record off;
                }
        }
}
import tushare as ts
import time

st=ts.get_stock_basics()
print(st.head())
print((st.loc['600016']))
list1=['600016', '600519']

index=False
autype='hfq'
ktype='D'
ds='2018-01-01'
de=time.strftime('%Y-%m-%d', time.localtime(time.time()))
print(de)
i=0
for ss in list1:
    i=i+1
    print(i,ss)
    for autype in ['qfa', 'None', 'hfq']:
        for ktype in ['D', 'W', 'M']:
            pp=''
            if autype=='None':
                pp=pp+'none\\'
            if autype=='hfq':
                pp=pp+'hfq\\'
            if index==True:
                pp=pp+'index'

            kk=''
            if ktype=='D':
                kk=kk+'day\\'
            if ktype=='W':
                kk=kk+'week\\'
            if ktype=='M':
                kk=kk+'month\\'
            if ktype=='5':
                kk=kk+'minutes\\5\\'

            df1 = ts.get_k_data(ss,ktype=ktype,start=ds,index=index,autype=autype)
            ss1=kk+pp+ss+'.csv'
            print(ss1)
            df1.to_csv(ss1, encoding='gbk')
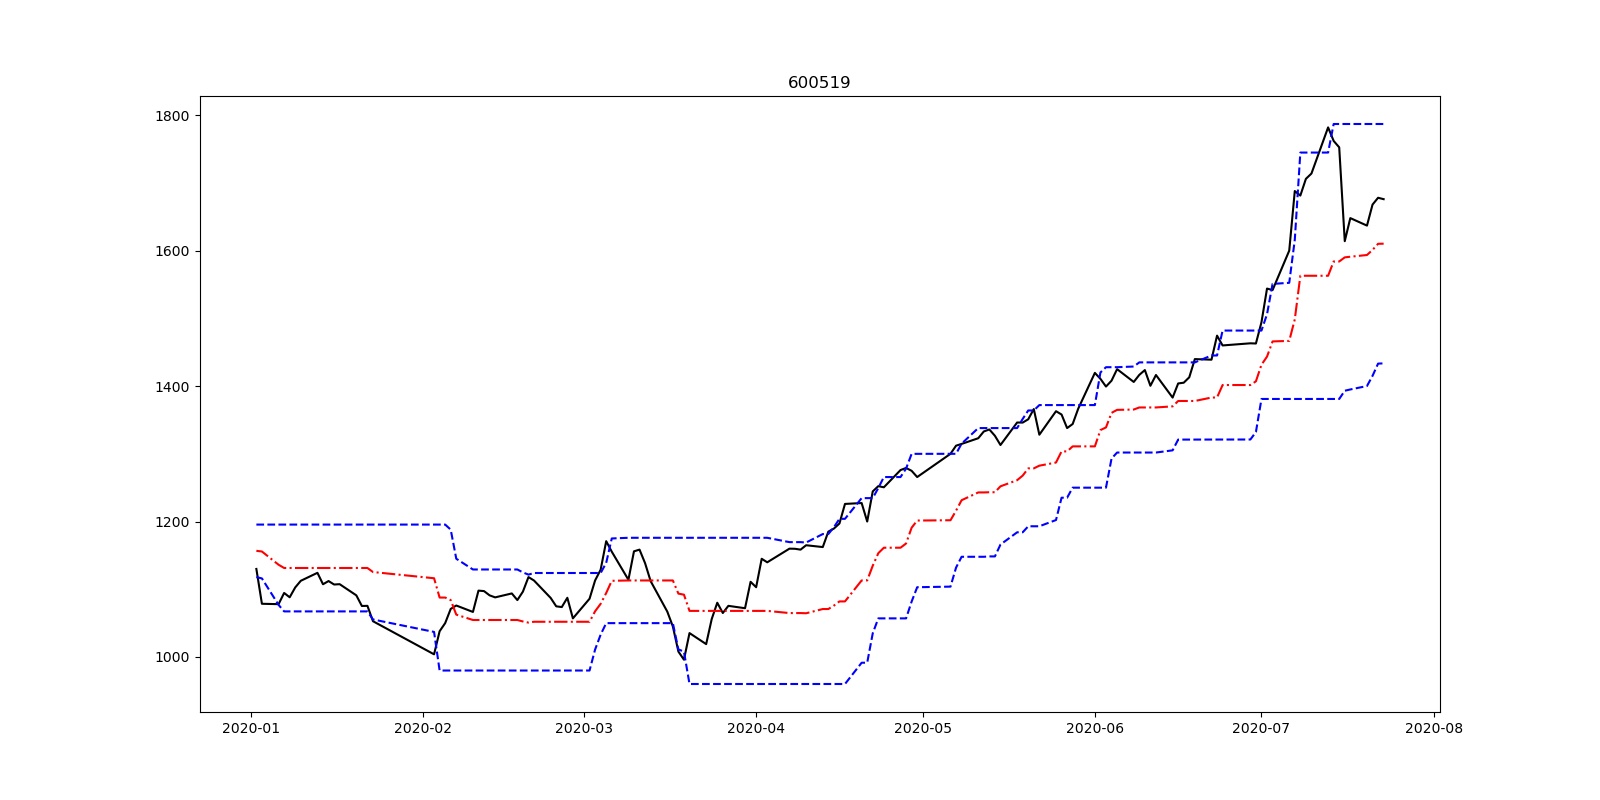
2. generate Donchian Channels Chart from the csv file
import pandas as pd
import numpy as np
import matplotlib.pyplot as plt
ChinaUnicom=pd.read_csv('600519.csv')
ChinaUnicom.index=ChinaUnicom.iloc[:,1]
ChinaUnicom.index=pd.to_datetime(ChinaUnicom.index, format='%Y-%m-%d')
ChinaUnicom=ChinaUnicom.iloc[:,2:]
Close=ChinaUnicom.close
High=ChinaUnicom.high
Low=ChinaUnicom.low
upboundDC=pd.Series(0.0,index=Close.index)
downboundDC=pd.Series(0.0,index=Close.index)
midboundDC=pd.Series(0.0,index=Close.index)
for i in range(20,len(Close)):
    upboundDC[i]=max(High[(i-20):i])
    downboundDC[i]=min(Low[(i-20):i])
    midboundDC[i]=0.5*(upboundDC[i]+downboundDC[i])
upboundDC=upboundDC[20:]
downboundDC=downboundDC[20:]
midboundDC= midboundDC[20:]
fig = plt.figure(figsize=(16, 8))
#plt.rcParams['font.sans-serif'] = ['SimHei']
plt.plot(Close['2020'],label="Close",color='k')
plt.plot(upboundDC['2020'],label="upboundDC",color='b',linestyle='dashed')
plt.plot(midboundDC['2020'],label="midboundDC",color='r',linestyle='-.')
plt.plot(downboundDC['2020'],label="downboundDC",color='b',linestyle='dashed')
plt.title("600519 Donchian channel 2020")
#plt.ylim(2.9,3.9)
plt.show()
records is one of the Kenneth Reitz "for Humans" series.
we can use it to query all kinds of db.
import records
db = records.Database('postgres://...')  # connect to db
rows = db.query('select * from active_users')  # exec SQL
for r in rows:
    print(r.name, r.user_email)
print(rows.dataset)
# username|active|name      |user_email       |timezone
# --------|------|----------|-----------------|--------------------------
# model-t |True  |Henry Ford|model-t@gmail.com|2016-02-06 22:28:23.894202
# export to different format
print(rows.export('json'))  # json
print(rows.export('csv'))  # csv
print(rows.export('yaml')) # yaml
rows.export('df')  # pandas df
with open('report.xls', 'wb') as f:
    f.write(rows.export('xls'))  # xls
use smtplib and your gmail account to send email
you need Turn on "Less secure app access" on your gmail account settings, then send it with code:
import smtplib
from email.mime.multipart import MIMEMultipart
from email.mime.text import MIMEText
me = "youremail@gmail.com"
my_password = r"****"
you = "receiver@hotmail.com"
msg = MIMEMultipart('alternative')
msg['Subject'] = "Alert"
msg['From'] = me
msg['To'] = you
html = '<html><body><p>Hi, I have the following alerts for you!</p></body></html>'
part2 = MIMEText(html, 'html')
msg.attach(part2)
# Send the message via gmail's regular server, over SSL - passwords are being sent, afterall
s = smtplib.SMTP_SSL('smtp.gmail.com', 465)
# uncomment if interested in the actual smtp conversation
# s.set_debuglevel(1)
# do the smtp auth; sends ehlo if it hasn't been sent already
s.login(me, my_password)
s.sendmail(me, you, msg.as_string())
s.quit()
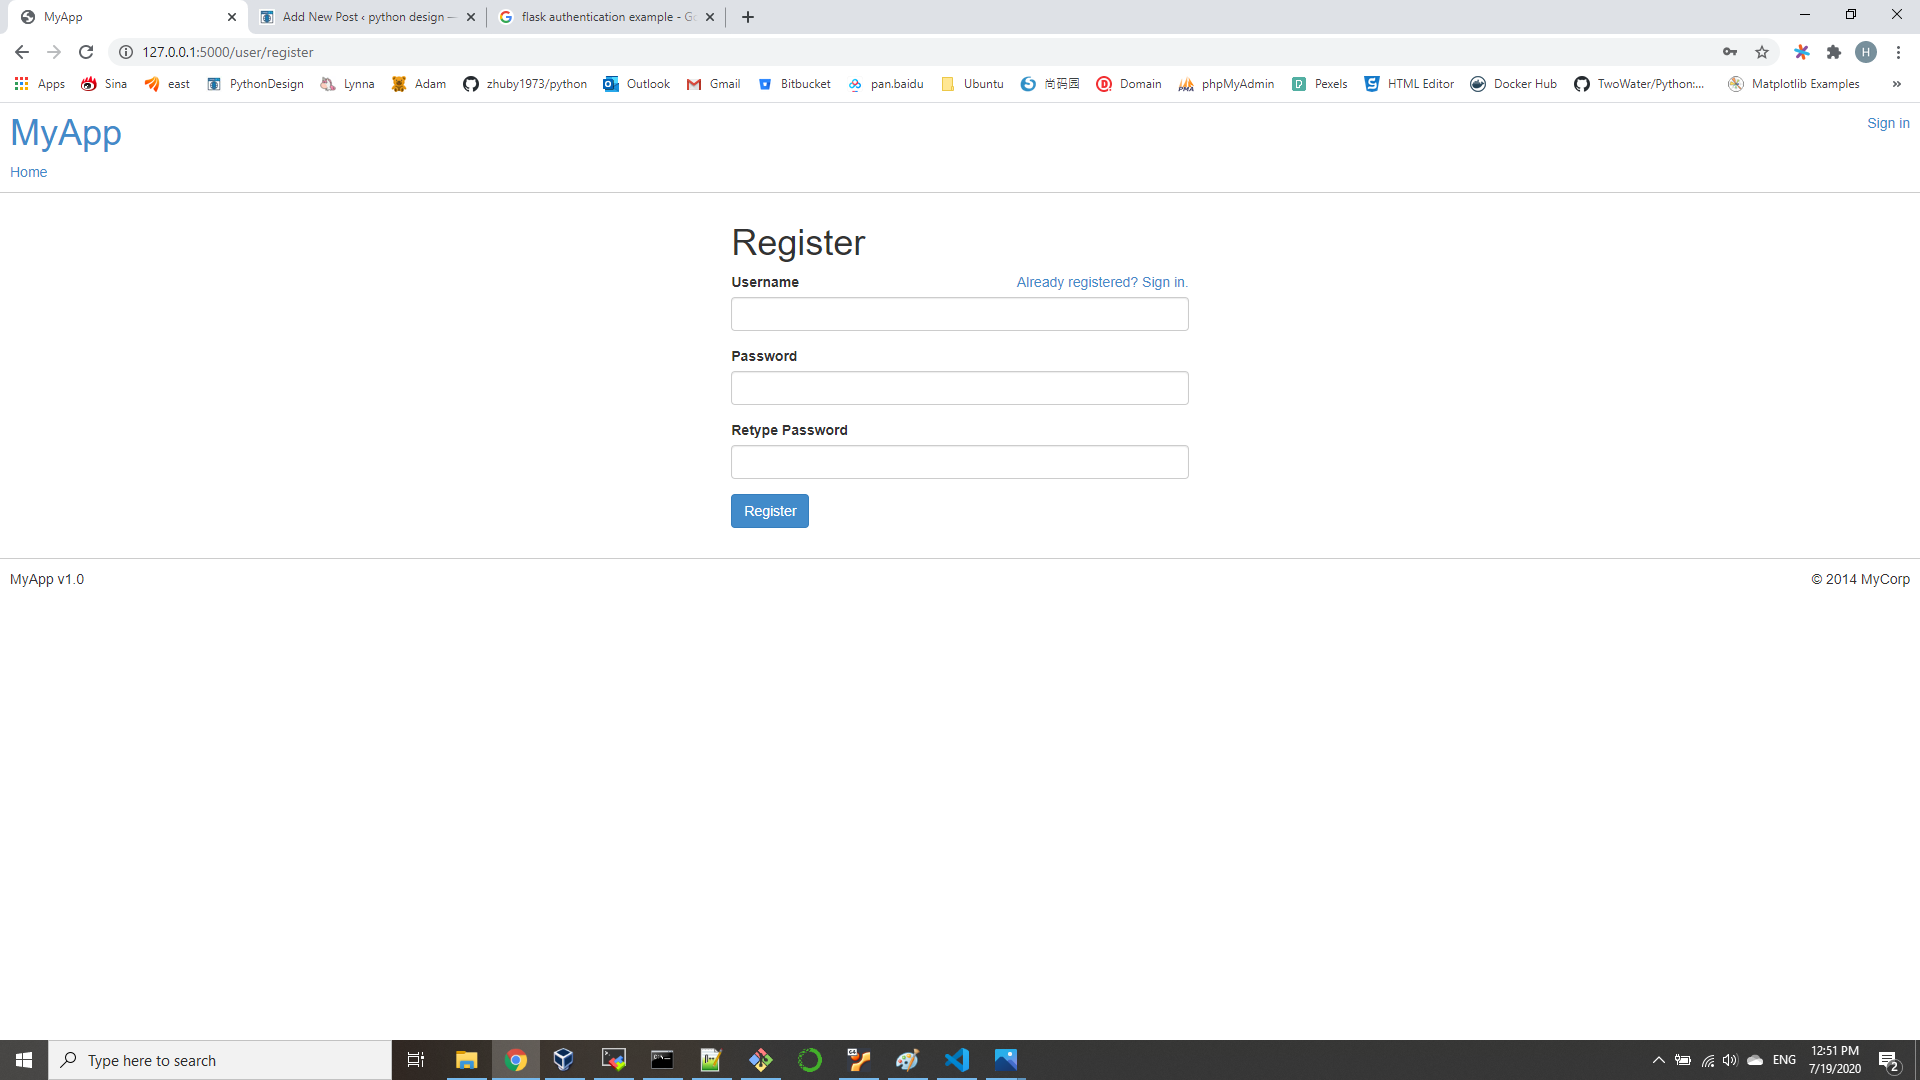
we need pip install "Flask-User<0.7" first.
then write app.py:
from flask import Flask
from flask_sqlalchemy import SQLAlchemy
from flask_user import login_required, UserManager, UserMixin, SQLAlchemyAdapter
db = SQLAlchemy()
app = Flask(__name__)

app.config['SECRET_KEY'] = 'thisisalkesdf'
app.config['SQLALCHEMY_DATABASE_URI'] = 'sqlite:///db.sqlite'
app.config['SQLALCHEMY_TRACK_MODIFICATIONS'] = False
db.init_app(app)
app.config['CSRF_ENABLED'] = True
app.config['USER_ENABLE_EMAIL'] = False

db = SQLAlchemy(app)

class User(db.Model, UserMixin):
    id = db.Column(db.Integer, primary_key=True)
    username = db.Column(db.String(50), nullable=False, unique=True)
    password = db.Column(db.String(255), nullable=False, server_default='')
    active = db.Column(db.Boolean(), nullable=False, server_default='0')

db_adapter = SQLAlchemyAdapter(db, User)
user_manager = UserManager(db_adapter, app)

@app.route('/')
def index():
    return '<h1>This is the home page!</h1>'

@app.route('/profile')
@login_required
def profile():
    return '<h1>This is the protected profile page!</h1>'

if __name__ == '__main__':
    app.run(debug=True)
create db as below:
C:\Users\zhuby>python
Python 3.8.3 (tags/v3.8.3:6f8c832, May 13 2020, 22:37:02) [MSC v.1924 64 bit (AMD64)] on win32
Type "help", "copyright", "credits" or "license" for more information.
>>> from app import db
>>> db.create_all()
If you install ldap3==2.5 on python 3.8, you will get error message: strategy.async import AsyncStrategy.
the reason is async and await have become keywords from Python 3.7!
ldap3==2.4.1 is working good on python 3.7/8
(base) ubuntu@ubunu2004:~$ pip install ldap3==2.4.1
test the LDAP connection with sample code:
from ldap3 import Server, Connection, ALL
server = Server('localhost', get_info=ALL)
conn = Connection(server, 'cn=admin,dc=linuxvmimagrs,dc=local', 'pas8word', auto_bind=True)
conn.search('dc=linuxvmimagrs,dc=local', '(objectclass=person)')
print(conn.entries)
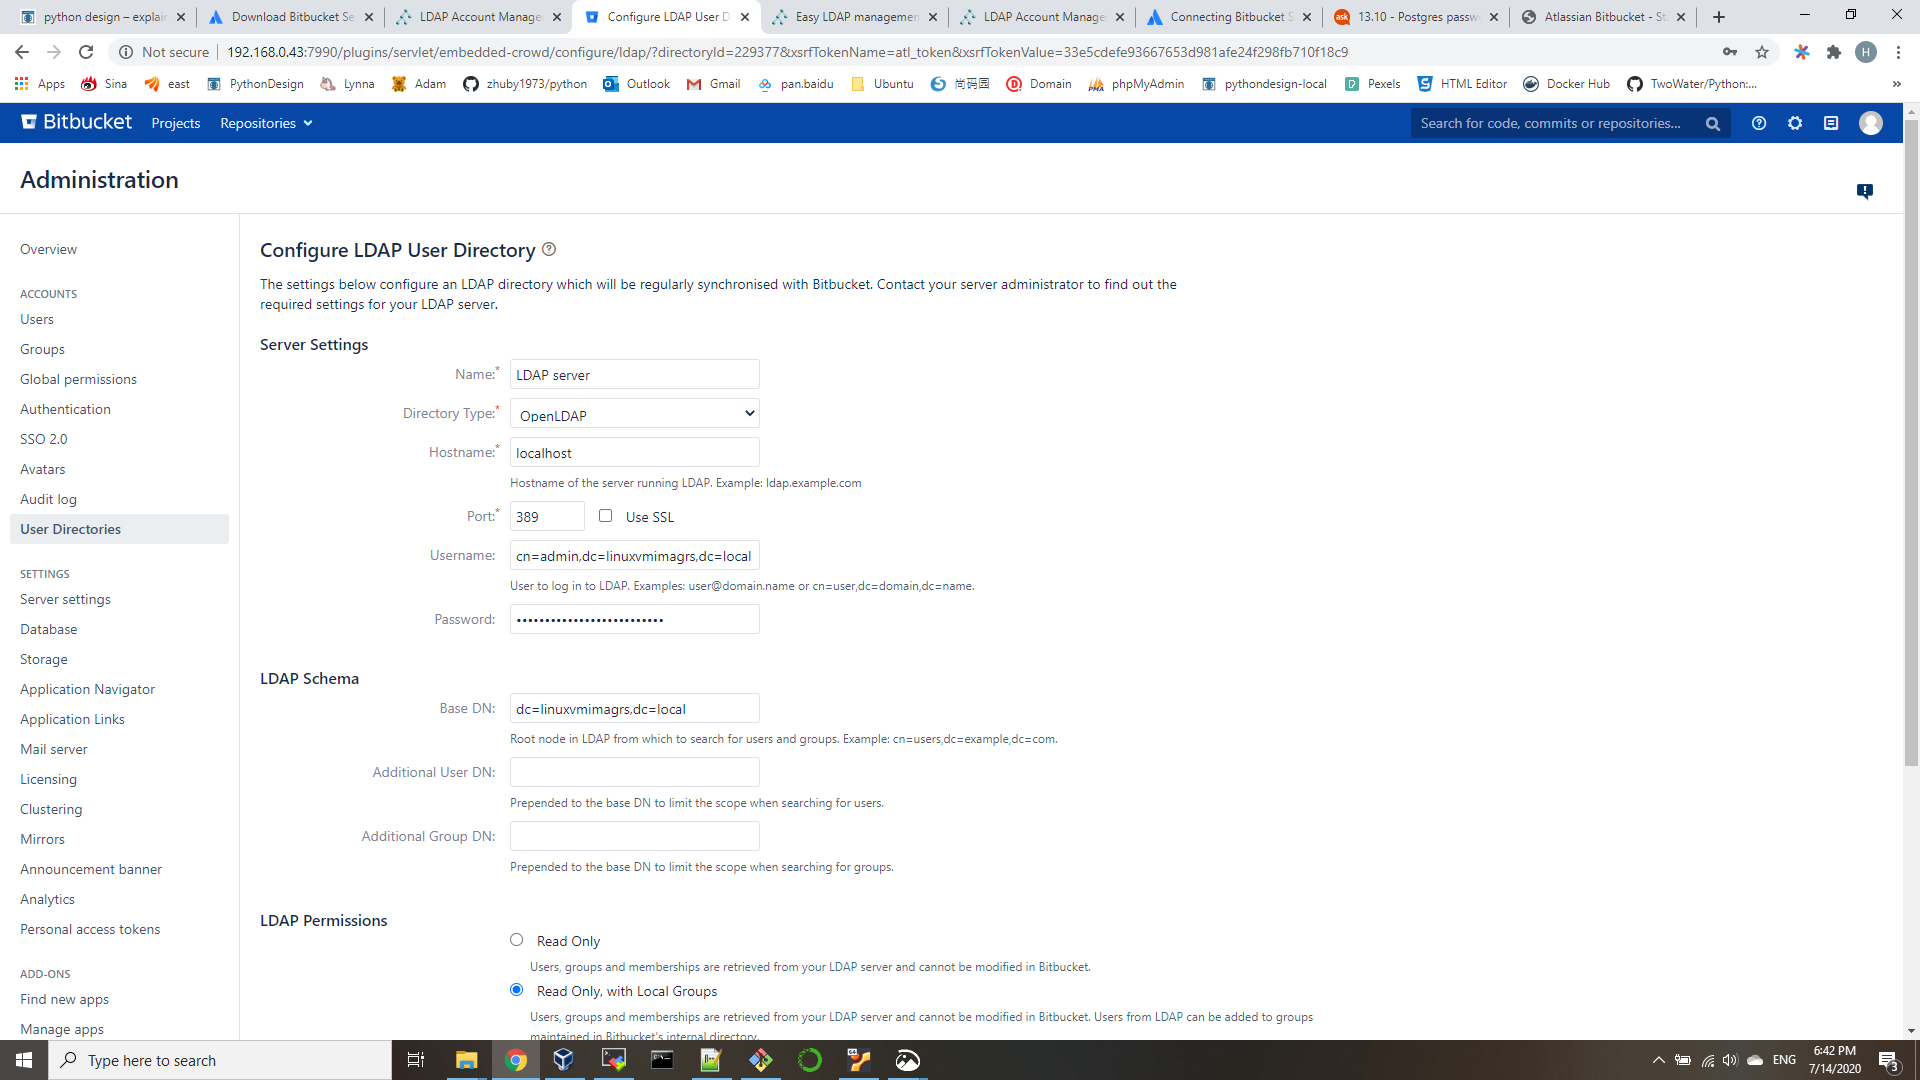
logon http://192.168.0.43:7990/admin with admin user
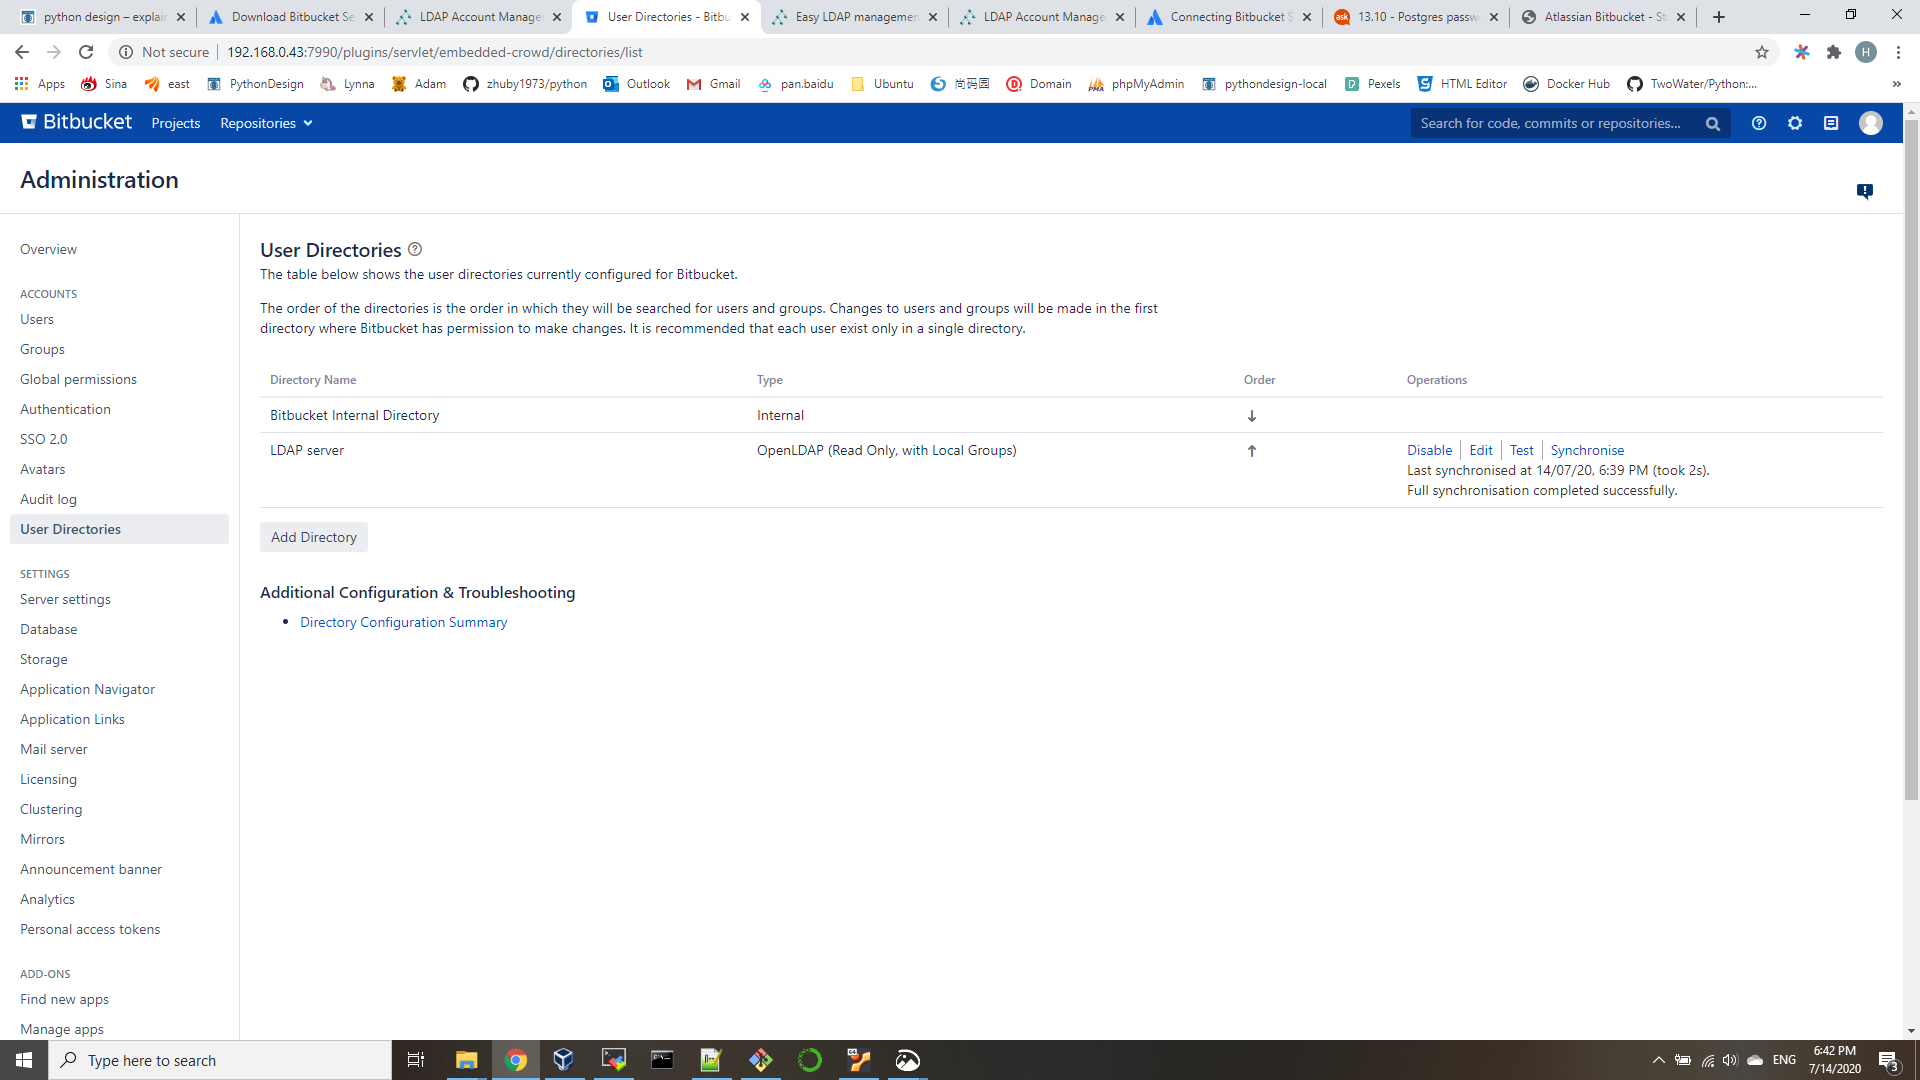
click "User Directories" from left menu and input LDAP info and Test connection and Save:
Synchronise LDAP users into Bitbucket.
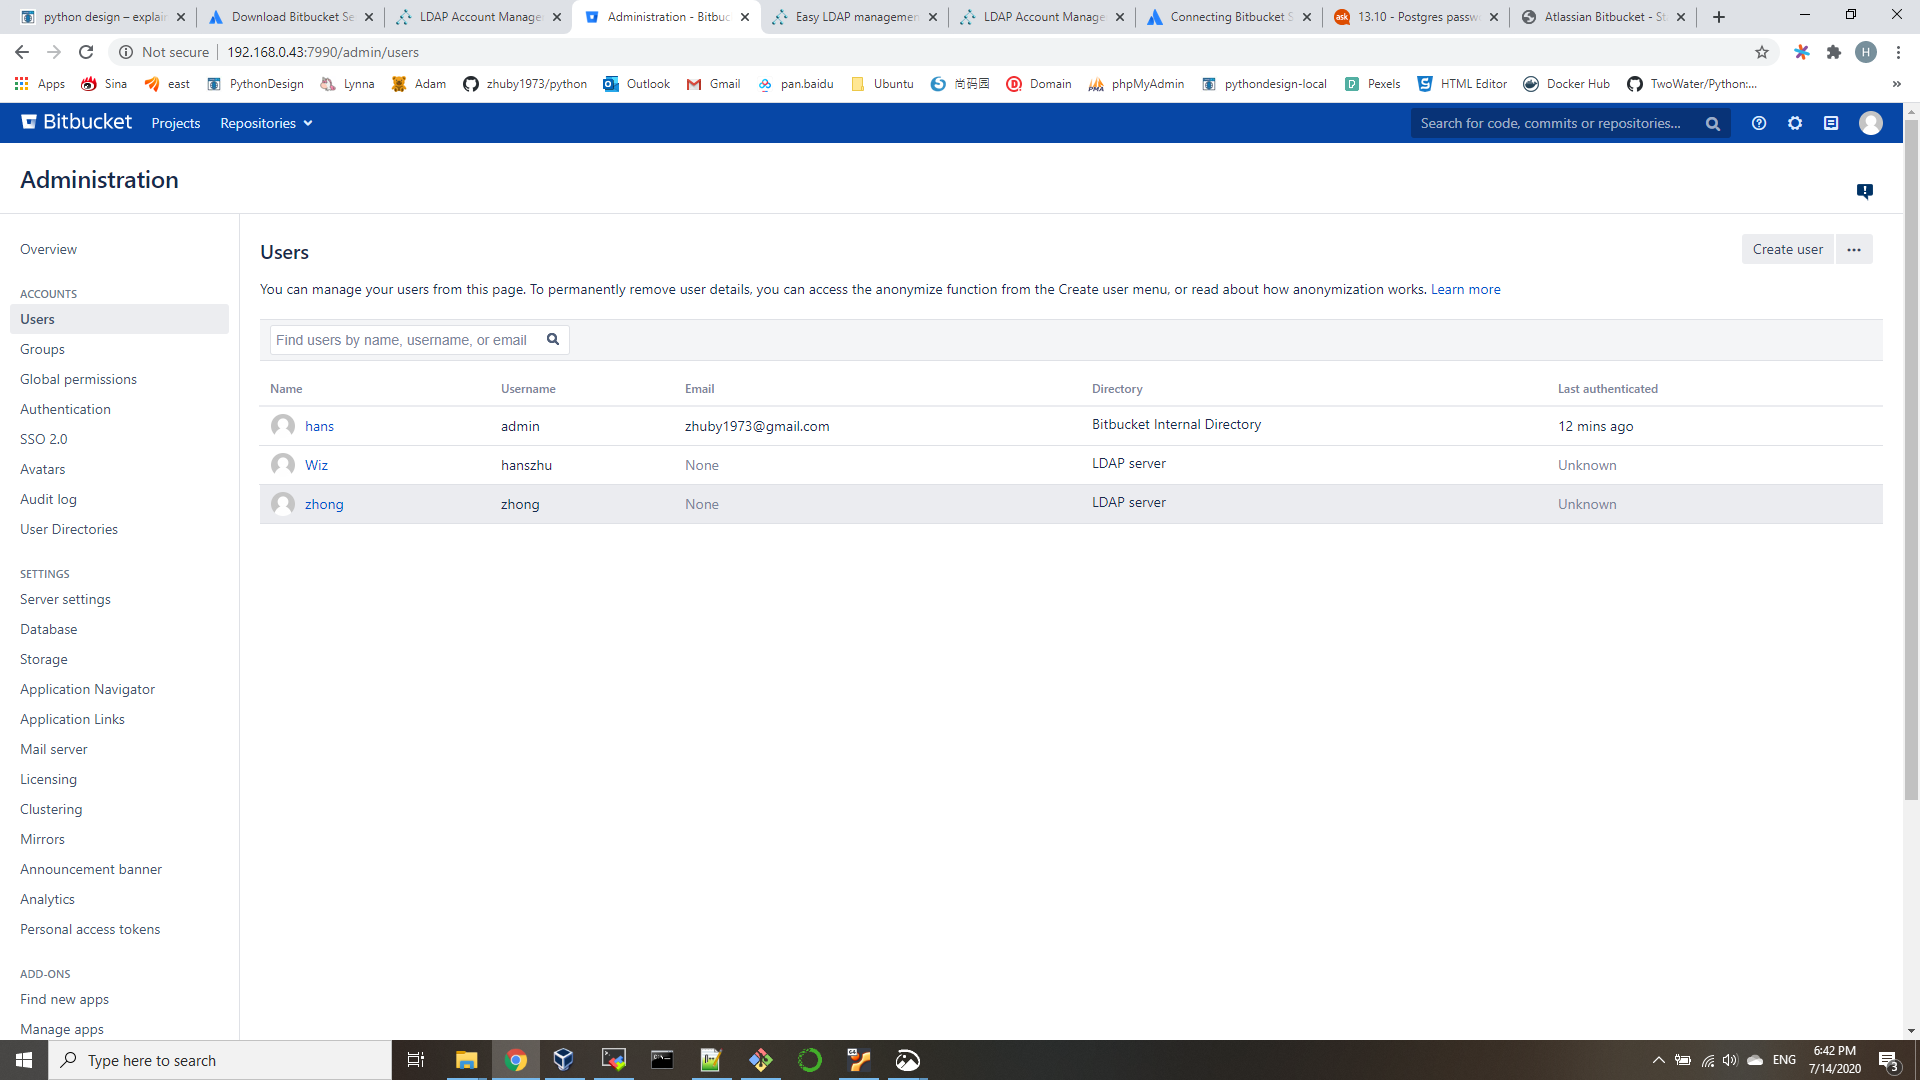
Click Users from left menu, you should be able find LDAP users:
Click Global Permissions to add LDAP user and groups:
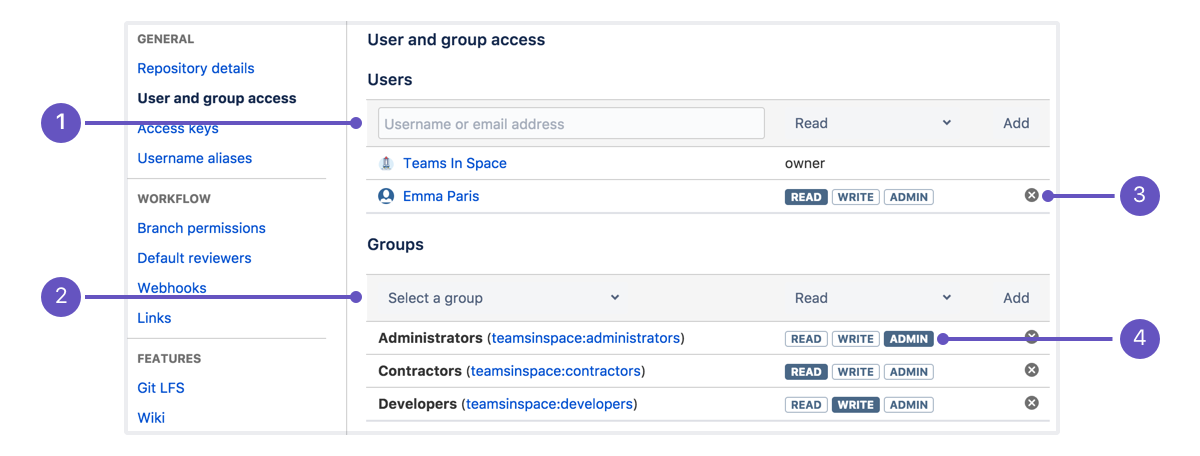
Grant repository access to users and groups: