
-
we can search php and apache image on Docker Hub, we will use php:7.0-apache for this demo.
-
create Dockerfile and src/index.php as below
root@ubunu2004:~/docker_sample# tree . ├── Dockerfile └── src └── index.php 1 directory, 2 files root@ubunu2004:~/docker_sample# cat Dockerfile FROM php:7.0-apache COPY src/ /var/www/html EXPOSE 80 root@ubunu2004:~/docker_sample# cat src/index.php <?php echo "Hello World!"; -
build the container
docker build -t hello_world . -
run the container
docker run -p 82:80 hello_world
then you can verify it on http://192.168.0.43:82/ -
if you want mapping the index.php to container, you can start it with
docker run -p 82:80 -v /root/docker_sample/src/:/var/www/html/ hello_world
now if you update index.php, you will get the change immediately on http://192.168.0.43:82/ -
you can push this image to Docker Hub
root@ubunu2004:~/docker_sample# docker images
REPOSITORY TAG IMAGE ID CREATED SIZE
hello_world latest dc8c649d4e8b 19 minutes ago 368MB
root@ubunu2004:~/docker_sample# docker run -it -d hello_world:latest
root@ubunu2004:~/docker_sample# docker ps
CONTAINER ID IMAGE COMMAND CREATED STATUS PORTS NAMES
d2963444e718 hello_world:latest "docker-php-entrypoi…" 10 seconds ago Up 6 seconds 80/tcp laughing_williamson
root@ubunu2004:~/docker_sample# docker commit d2963444e718 zhuby1973/php:1
sha256:1f2007f4786c344c8007b574af6f71b7604431c6d6cce0e2091e6adf1a8c8621
root@ubunu2004:~/docker_sample# docker push zhuby1973/php:1
commit and push a docker image to Docker Hub
- sign up on Docker Hub to get your user id and password
- pull a image from Docker Hub
docker pull ubuntu - make a dir on ubuntu image and commit/push image
docker images docker run -it -d ubuntu docker ps -a root@ubunu2004:~# docker exec -it 6e08ac7cc702 bash root@6e08ac7cc702:/# mkdir /test_dir root@6e08ac7cc702:/# exit exit docker commit 6e08ac7cc702 zhuby1973/ubuntu:1 root@ubunu2004:~# docker login Login with your Docker ID to push and pull images from Docker Hub. If you don't have a Docker ID, head over to https://hub.docker.com to create one. Username: zhuby1973 Password: WARNING! Your password will be stored unencrypted in /root/.docker/config.json. Configure a credential helper to remove this warning. See https://docs.docker.com/engine/reference/commandline/login/#credentials-store Login Succeeded root@ubunu2004:~# docker push zhuby1973/ubuntu:1 The push refers to repository [docker.io/zhuby1973/ubuntu] d3d28de77691: Pushed 544a70a875fc: Mounted from library/ubuntu cf0f3facc4a3: Mounted from library/ubuntu 132bcd1e0eb5: Mounted from library/ubuntu d22cfd6a8b16: Mounted from library/ubuntu 2: digest: sha256:4c50ab7b0f8cadd72f5d37a569795a4ba697be892fca1b36a96eb9aa49a59d2e size: 1359 - logon https://hub.docker.com/repositories you will find zhuby1973/ubuntu already there!
- you can start this container to verify
root@ubunu2004:~# docker run -it -d zhuby1973/ubuntu:1
e5477e45b6b2bfe330e9f37a6f74e90964ef887f0f0a37ae23bbae4319a465a1
root@ubunu2004:~# docker ps
CONTAINER ID        IMAGE                COMMAND             CREATED             STATUS              PORTS               NAMES
e5477e45b6b2        zhuby1973/ubuntu:1   "/bin/bash"         26 seconds ago      Up 24 seconds                           vigilant_satoshi
df78087a8ef1        zhuby1973/test:2     "/bin/bash"         17 minutes ago      Up 17 minutes                           charming_wiles
6e08ac7cc702        ubuntu               "/bin/bash"         32 minutes ago      Up 32 minutes                           charming_goodall
root@ubunu2004:~# docker exec -it e5477e45b6b2 bash
root@e5477e45b6b2:/# ls -ltr /test-dir
total 0
My First SoapUI SOAP project
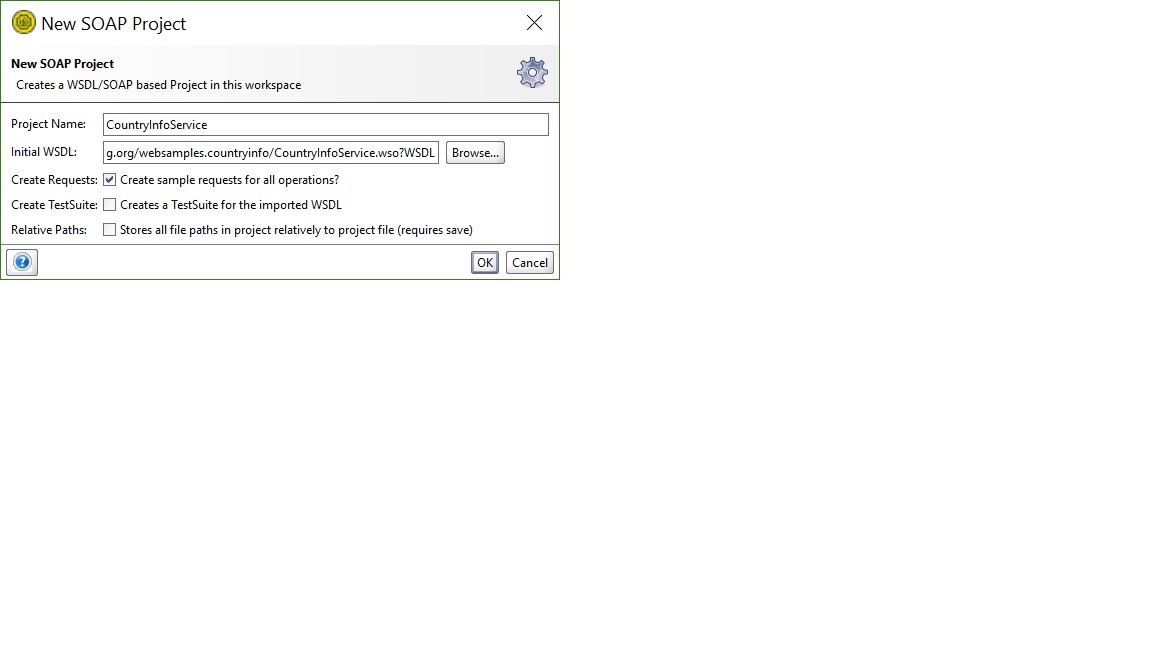
- create a SOAP API project
Ctrl-N to create a new SOAP project:
we will use http://webservices.oorsprong.org/websamples.countryinfo/CountryInfoService.wso?WSDL for demo
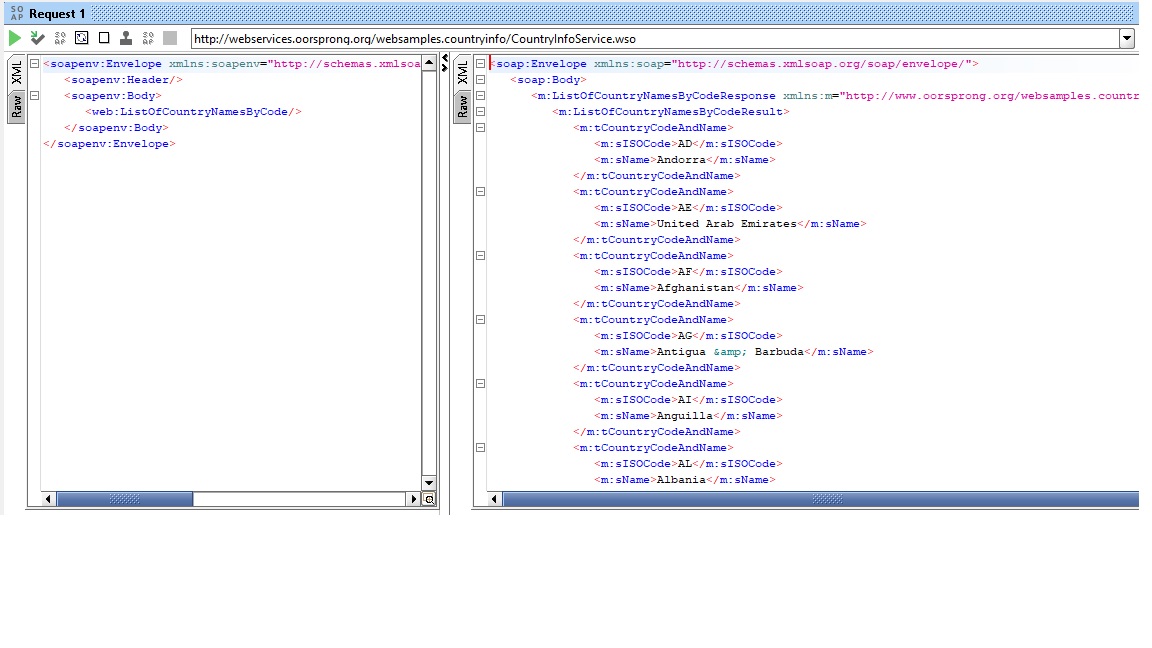
- get info by click ListOfCountryNamesByCode
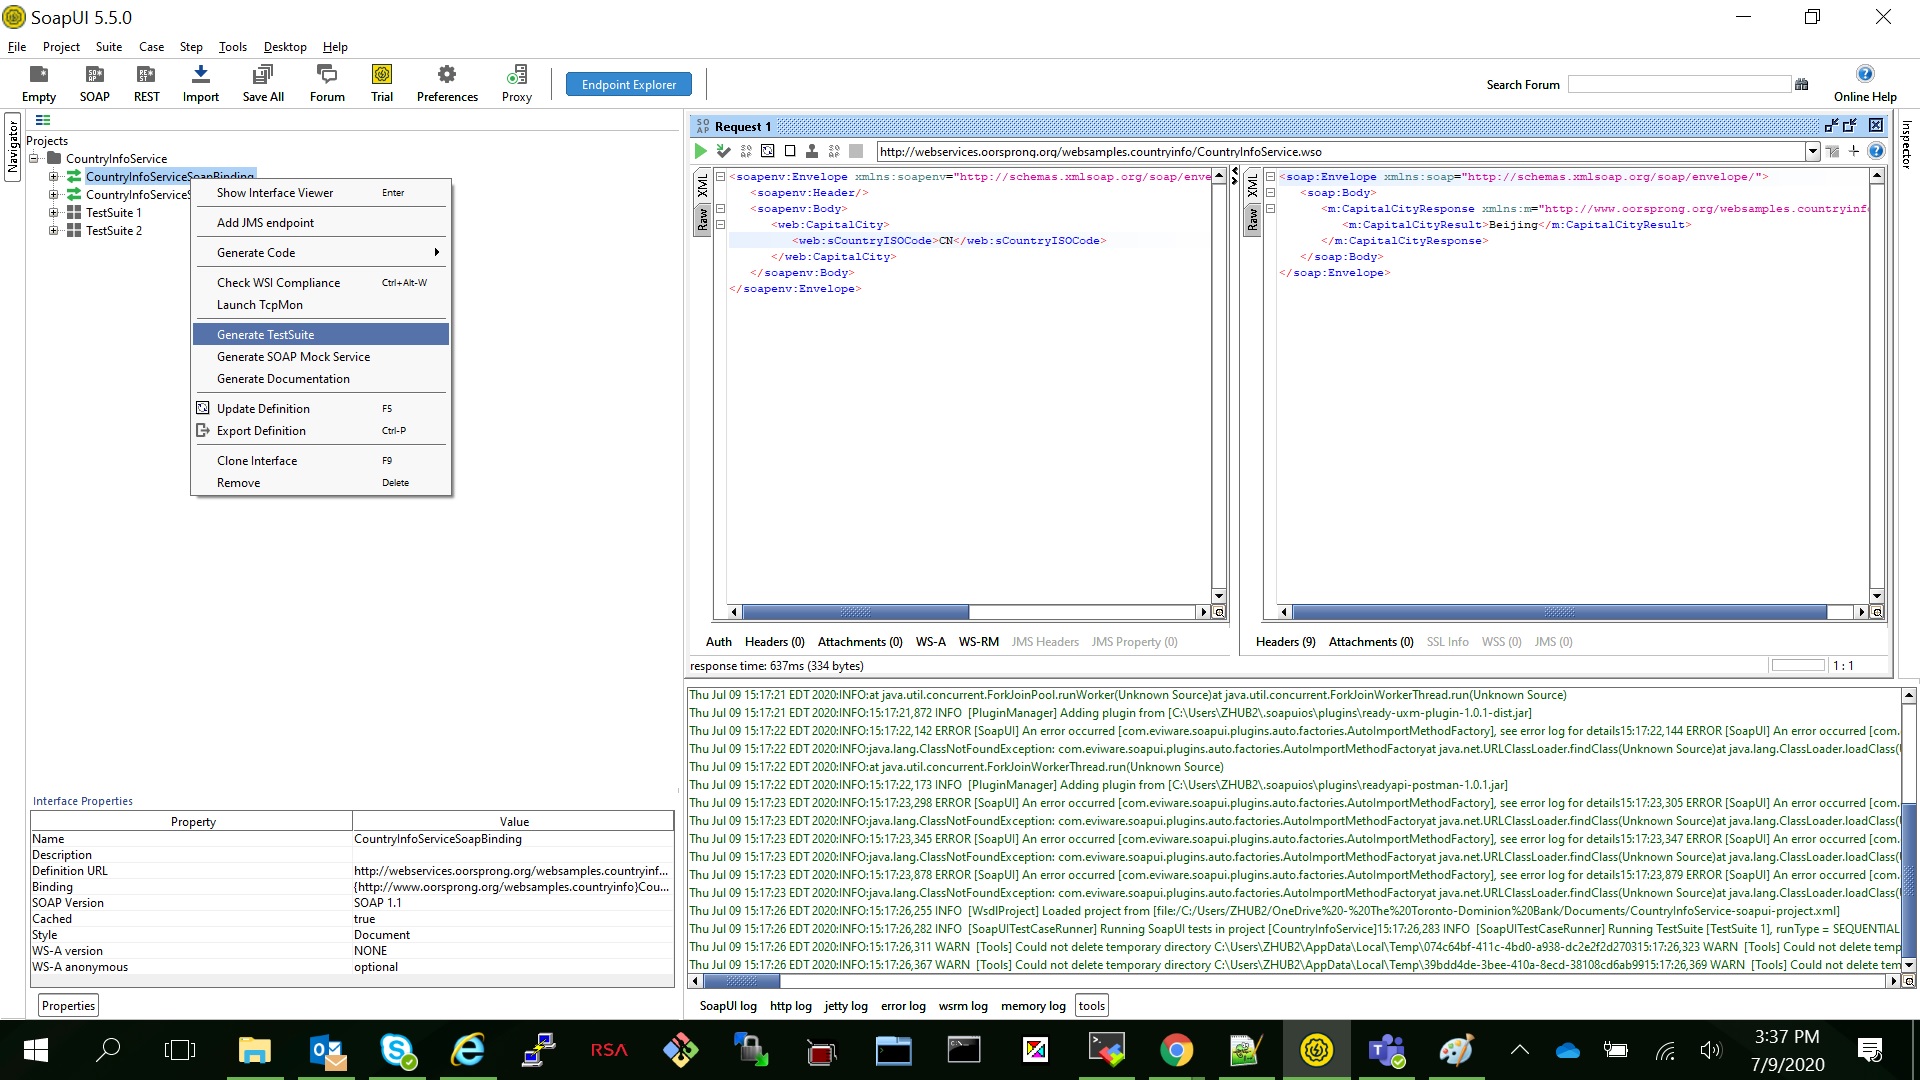
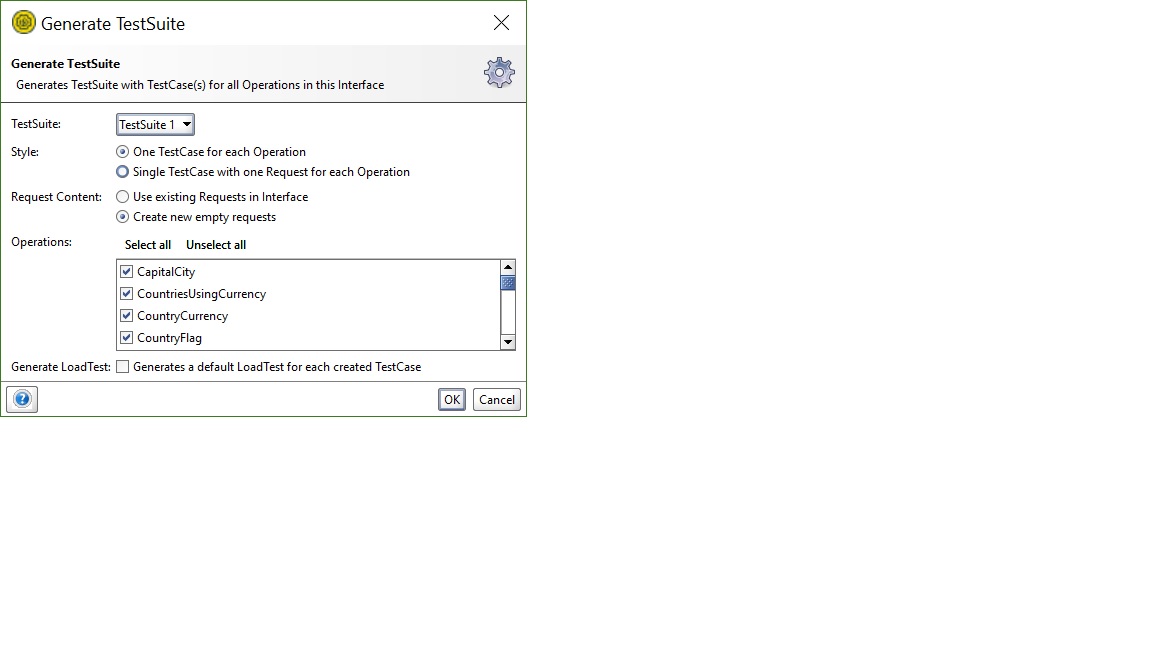
- create TestSuite -> Test Cases
right click "CountryInfoServiceSoapBinding" and select "Generate Testsuite"
- add Assertions
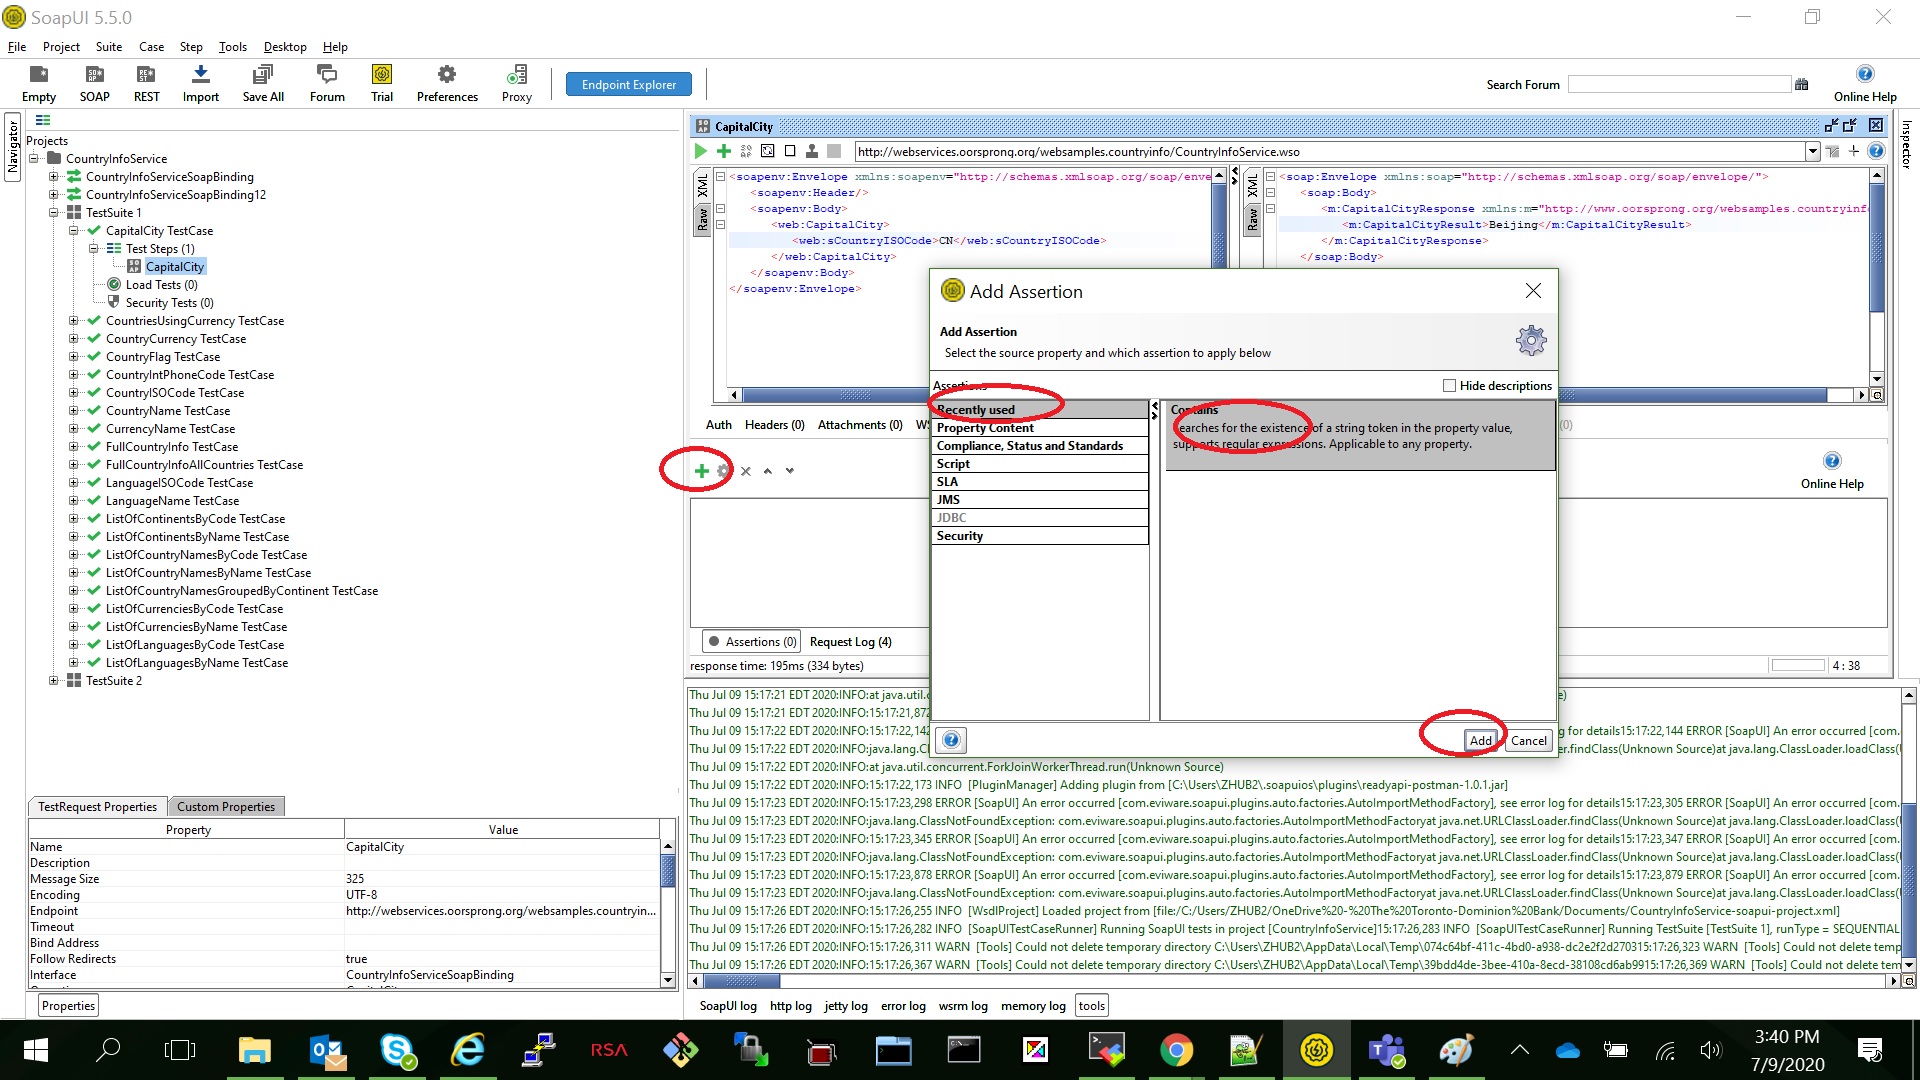
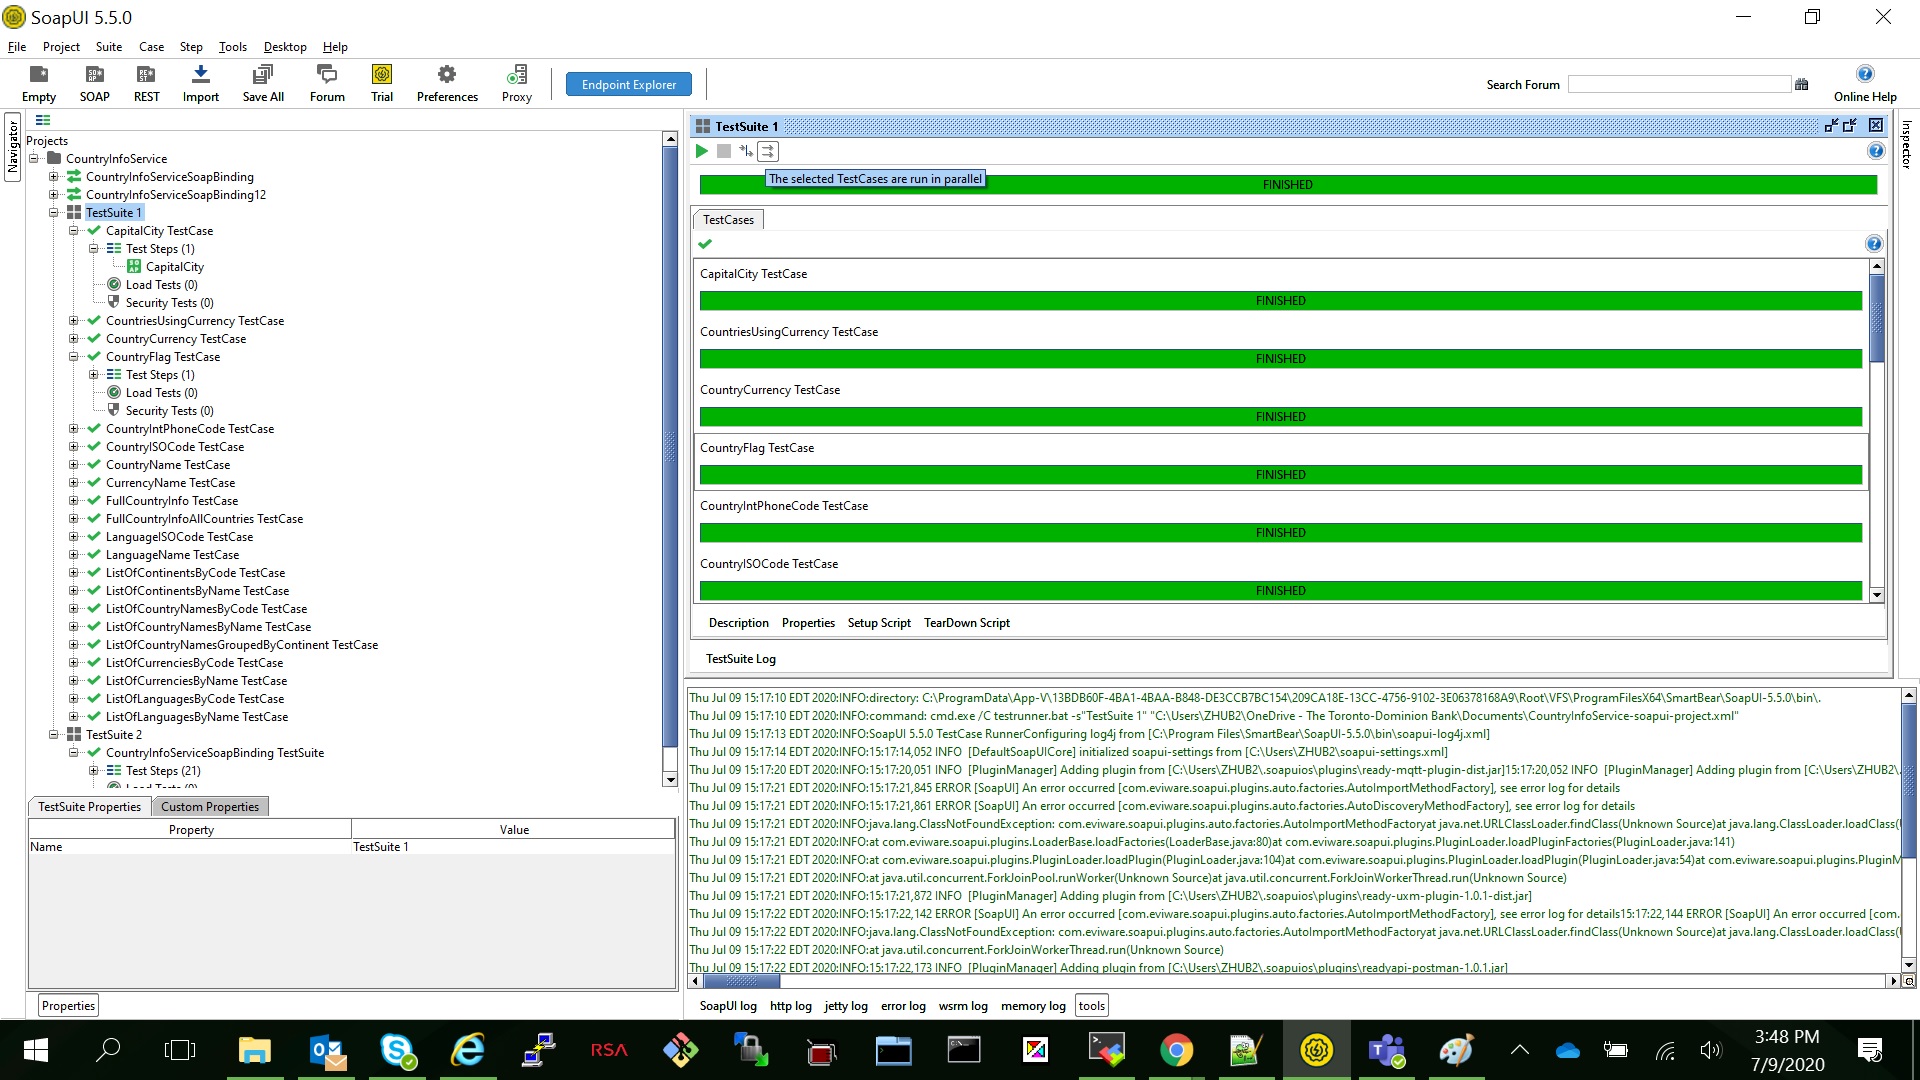
- how to run in sequence and in parallel
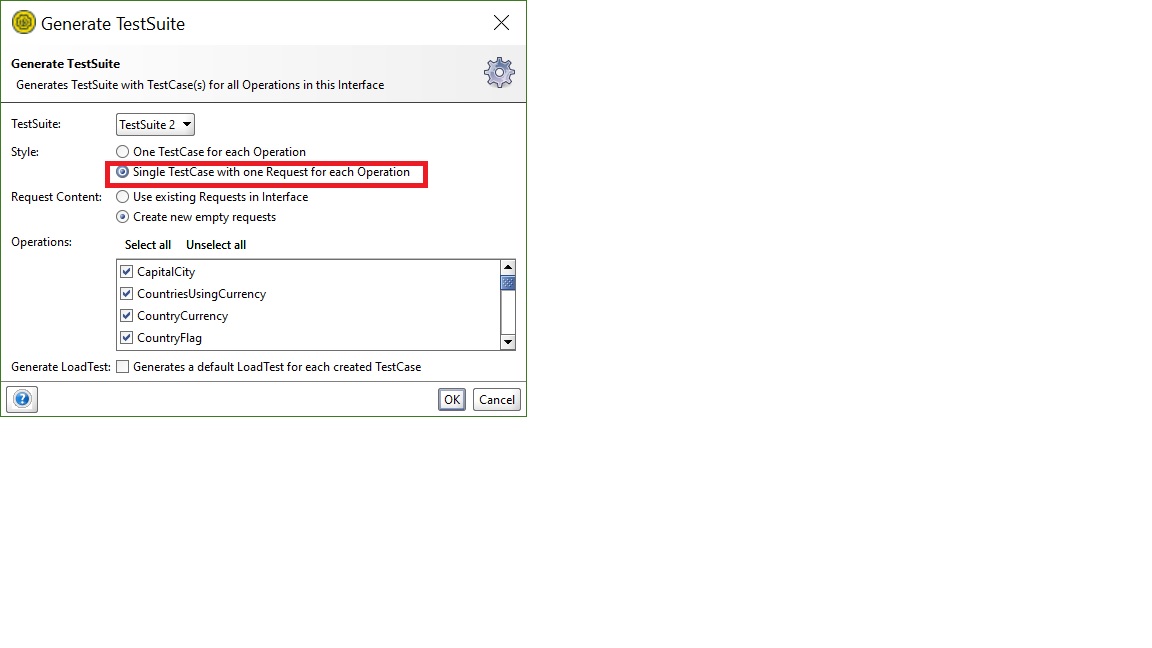
- how to create single testcase with one request
- how to create API Documention

install Docker on Ubuntu and setup CONTAINER openspug/spug
- install Docker on Ubuntu
sudo apt-get update
sudo apt install docker.io
sudo systemctl start docker
sudo systemctl enable docker
docker –version - setup openspug/spug container
openspug/spug is a small server manage tool developed with python!
https://github.com/openspug/spug
sudo docker pull openspug/spug
sudo docker run -d -p 80:80 openspug/spug
if port 80 already in use, you can find the process by:
sudo lsof -i:80
in our case it’s apache, stop it with:
sudo systemctl stop apache2
sudo docker ps to get running container details:
(base) ubuntu@ubunu2004:/$ sudo docker ps
CONTAINER ID        IMAGE               COMMAND             CREATED             STATUS              PORTS                NAMES
c493cbf6aceb        openspug/spug       "/entrypoint.sh"    4 minutes ago       Up 4 minutes        0.0.0.0:80->80/tcp   determined_allen
initial and restart the spug:
export CONTAINER_ID=c493cbf6aceb
sudo docker exec $CONTAINER_ID init_spug admin spug.dev
sudo docker restart $CONTAINER_ID
then you can login http://192.168.0.43/ with:
user: admin
password: spug.dev
create Maven project in Jenkins and deploy to Jboss
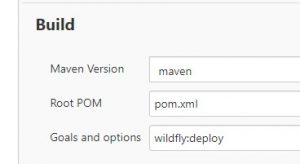
- in Jenkins select create new item, give name as "java-web-project", type as "Maven Project". Keep all default value, only add "wildfly:deploy" in "Build => Goals and options" then apply and save.
- in /var/lib/jenkins/workspace/, run maven command to create webapp:
mvn archetype:generate -DgroupId=com.pythondesign.web -DartifactId=java-web-project -DarchetypeArtifactId=maven-archetype-webapp -DinteractiveMode=false
you will get files:(base) ubuntu@ubunu2004:/var/lib/jenkins/workspace/java-web-project$ tree . ├── pom.xml ├── src │ └── main │ ├── resources │ └── webapp │ ├── index.jsp │ └── WEB-INF │ └── web.xml
3. update pom.xml as below:
```xml
<project xmlns="http://maven.apache.org/POM/4.0.0" xmlns:xsi="http://www.w3.org/2001/XMLSchema-instance"
  xsi:schemaLocation="http://maven.apache.org/POM/4.0.0 http://maven.apache.org/maven-v4_0_0.xsd">
  <modelVersion>4.0.0</modelVersion>
  <groupId>com.mkyong.web</groupId>
  <artifactId>java-web-project</artifactId>
  <packaging>war</packaging>
  <version>1.0-SNAPSHOT</version>
  <name>java-web-project Maven Webapp</name>
  <url>http://maven.apache.org</url>
  <dependencies>
    <dependency>
      <groupId>junit</groupId>
      <artifactId>junit</artifactId>
      <version>3.8.1</version>
      <scope>test</scope>
    </dependency>
  </dependencies>
  <build>
    <finalName>java-web-project</finalName>
        <pluginManagement><!-- lock down plugins versions to avoid using Maven defaults (may be moved to parent pom) -->
         <plugins>
        <plugin>
            <groupId>org.wildfly.plugins</groupId>
            <artifactId>wildfly-maven-plugin</artifactId>
            <version>2.1.0.Beta1</version>
            <configuration>
                <hostname>localhost</hostname>
                <port>9990</port>
                <username>admin</username>
                <password>pas8word@</password>
            </configuration>
        </plugin>
         </plugins>
        </pluginManagement>
  </build>
</project>
- you can test it with command:
mvn package
mvn wildfly:deploy - now we can click "Build Now" in Jenkins, check the console, you will get:
BUILD SUCCESS! and verify the webapp on jboss:
http://192.168.0.43:8090/java-web-project/index.jsp
Using selenium login pan.baidu.com with cookie
we relsoved two issues in this code:
- login with cookie
- close the popup window after login.
here is the code:import requests import time from selenium import webdriver PATH = "C:\Program Files\chromedriver.exe" driver = webdriver.Chrome(PATH) url = "https://pan.baidu.com/disk/home#/all?path=%2F&vmode=list" driver.get(url) cookies = { "BDUSS": "your_BDUSS", "STOKEN": "your_STOKEN", "domain": "pan.baidu.com" } response_cookies_browser = [{'name':name, 'value':value} for name, value in cookies.items()] c = [driver.add_cookie(c) for c in response_cookies_browser] #the browser now contains the cookies generated from the authentication driver.get(url) #wait 10 seconds for the popup window, so we can click the close button time.sleep(10) driver.find_elements_by_xpath('.//span[@class = "dialog-icon dialog-close icon icon-close"]')[-1].click()