Step 1 – Install Apache2 and PHP 7.4
sudo apt install apache2 wget unzip
sudo apt install software-properties-common
sudo add-apt-repository ppa:ondrej/php
sudo apt update
sudo apt install -y php7.4
sudo apt install php7.4-mysql php7.4-curl php7.4-json php7.4-cgi php7.4-xsl
sudo apt install php7.4-zip php7.4-mbstring
sudo systemctl enable apache2
sudo systemctl start apache2
Step 2 – Install phpMyAdmin on Ubuntu 20.04
wget https://files.phpmyadmin.net/phpMyAdmin/5.0.2/phpMyAdmin-5.0.2-all-languages.zip
unzip phpMyAdmin-5.0.2-all-languages.zip
sudo mkdir /usr/share/phpmyadmin
sudo mv phpMyAdmin-5.0.2-all-languages/* /usr/share/phpmyadmin
sudo mkdir /usr/share/phpmyadmin/tmp
sudo chown -R www-data:www-data /usr/share/phpmyadmin
sudo chmod 777 /usr/share/phpmyadmin/tmp
Step 3 – Configure phpMyAdmin
sudo vi /etc/apache2/conf-available/phpmyadmin.conf:
Alias /phpmyadmin /usr/share/phpmyadmin
Alias /phpMyAdmin /usr/share/phpmyadmin

<Directory /usr/share/phpmyadmin/>
   AddDefaultCharset UTF-8
   <IfModule mod_authz_core.c>
      <RequireAny>
      Require all granted
     </RequireAny>
   </IfModule>
</Directory>

<Directory /usr/share/phpmyadmin/setup/>
   <IfModule mod_authz_core.c>
     <RequireAny>
       Require all granted
     </RequireAny>
   </IfModule>
</Directory>
sudo a2enconf phpmyadmin
you will see the link in /etc/apache2/conf-enabled
sudo systemctl restart apache2
Step 4 – Adjusting FirewallD
sudo firewall-cmd –permanent –add-service=http
sudo firewall-cmd –reload
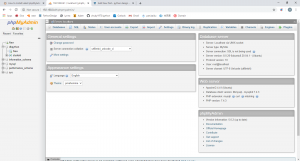
Step 5 – Access phpMyAdmin
http://your-server-ip-domain/phpmyadmin
Log in with the username and password used to access MySQL on the command line.