SQLAlchemy connect to MySQL when password contains special characters

When DB user password contains special characters, we can make the connection string as:
from urllib import parse
from sqlalchemy.engine import create_engine
engine = create_engine(‘postgres://user:%s@host/database’ % parse.unquote_plus(‘badpass’))
Here is an example hello.py:

import os
from flask import Flask, render_template, session, redirect, url_for, flash
from flask_bootstrap import Bootstrap
from flask_moment import Moment
from flask_wtf import FlaskForm
from wtforms import StringField, SubmitField
from wtforms.validators import DataRequired
from flask_sqlalchemy import SQLAlchemy
from urllib import parse
basedir = os.path.abspath(os.path.dirname(__file__))

app = Flask(__name__)

app.config['SQLALCHEMY_DATABASE_URI'] = 'mysql+pymysql://zhuby:%s@192.168.0.43/EmployeeDB' % parse.unquote_plus('somIUpass#98')
app.config['SQLALCHEMY_TRACK_MODIFICATIONS'] = False


bootstrap = Bootstrap(app)
moment = Moment(app)
db = SQLAlchemy(app)


class Role(db.Model):
    __tablename__ = 'roles'
    id = db.Column(db.Integer, primary_key=True)
    name = db.Column(db.String(64), unique=True)
    users = db.relationship('User', backref='role')

    def __repr__(self):
        return '<Role %r>' % self.name


class User(db.Model):
    __tablename__ = 'users'
    id = db.Column(db.Integer, primary_key=True)
    username = db.Column(db.String(64), unique=True, index=True)
    role_id = db.Column(db.Integer, db.ForeignKey('roles.id'))

    def __repr__(self):
        return '<User %r>' % self.username


class NameForm(FlaskForm):
    name = StringField('What is your name?', validators=[DataRequired()])
    submit = SubmitField('Submit')


@app.errorhandler(404)
def page_not_found(e):
    return render_template('404.html'), 404


@app.errorhandler(500)
def internal_server_error(e):
    return render_template('500.html'), 500


@app.route('/', methods=['GET', 'POST'])
def index():
    form = NameForm()
    if form.validate_on_submit():
        old_name = session.get('name')
        if old_name is not None and old_name != form.name.data:
            flash('Looks like you have changed your name!')
        session['name'] = form.name.data
        return redirect(url_for('index'))
    return render_template('index.html', form=form, name=session.get('name'))
verify the code with python commands:
(venv) C:\Users\zhuby\flasky>python
Python 3.8.3 (tags/v3.8.3:6f8c832, May 13 2020, 22:37:02) [MSC v.1924 64 bit (AMD64)] on win32
Type "help", "copyright", "credits" or "license" for more information.
>>> from hello import db
>>> db.create_all()
C:\Users\zhuby\python\flask_db_api\venv\lib\site-packages\pymysql\cursors.py:170: Warning: (3719, "'utf8' is currently an alias for the character set UTF8MB3, but will be an alias for UTF8MB4 in a future release. Please consider using UTF8MB4 in order to be unambiguous.")
  result = self._query(query)
>>> from hello import Role, User
>>> admin_role = Role(name='Admin')
>>> mod_role = Role(name='Moderator')
>>> user_role = Role(name='User')
>>> user_john = User(username='john', role=admin_role)
>>> user_susan = User(username='susan', role=user_role)
>>> db.session.add(admin_role)
>>> db.session.add(mod_role)
>>> db.session.add(user_role)
>>> db.session.add(user_john)
>>> db.session.add(user_susan)
>>> db.session.commit()
>>> print(admin_role.id)
1
>>> print(user_role.id)
3
>>> Role.query.all()
[<Role 'Admin'>, <Role 'Moderator'>, <Role 'User'>]
>>> User.query.all()
[<User 'john'>, <User 'susan'>]
>>> User.query.filter_by(role=user_role).all()
[<User 'susan'>]

Create a CRUD Restful Service API using Flask + MySQL

  1. SETTING UP ENVIRONMENT on Ubuntu20:
    (base) ubuntu@ubunu2004:~$ mkdir flaskdbexample
    (base) ubuntu@ubunu2004:~$ cd flaskdbexample
    (base) ubuntu@ubunu2004:~/flaskdbexample$ sudo apt install python3-virtualenv
    (base) ubuntu@ubunu2004:~/flaskdbexample$ virtualenv venv
    created virtual environment CPython3.8.2.final.0-64 in 805ms

(base) ubuntu@ubunu2004:~/flaskdbexample/venv/bin$ source ./activate
(venv) (base) ubuntu@ubunu2004:~$ cd flaskdbexample/
(venv) (base) ubuntu@ubunu2004:~/flaskdbexample$ pip install flask flask-sqlalchemy
(venv) (base) ubuntu@ubunu2004:~/flaskdbexample$ pip install pymysql
(venv) (base) ubuntu@ubunu2004:~/flaskdbexample$ pip install marshmallow_sqlalchemy

  1. Complete Code
    (venv) (base) ubuntu@ubunu2004:~/flaskdbexample$ vi app.py
from flask import Flask, request, jsonify, make_response
from flask_sqlalchemy import SQLAlchemy
from marshmallow_sqlalchemy import ModelSchema
from marshmallow import fields
app = Flask(__name__)

app.config['SQLALCHEMY_DATABASE_URI'] = 'mysql+pymysql://monty:password@192.168.0.43/EmployeeDB'
db = SQLAlchemy(app)

###Models####
class Product(db.Model):
    __tablename__ = "products"
    id = db.Column(db.Integer, primary_key=True)
    title = db.Column(db.String(20))
    productDescription = db.Column(db.String(100))
    productBrand = db.Column(db.String(20))
    price = db.Column(db.Integer)

    def create(self):
      db.session.add(self)
      db.session.commit()
      return self
    def __init__(self,title,productDescription,productBrand,price):
        self.title = title
        self.productDescription = productDescription
        self.productBrand = productBrand
        self.price = price
    def __repr__(self):
        return '' % self.id
db.create_all()
class ProductSchema(ModelSchema):
    class Meta(ModelSchema.Meta):
        model = Product
        sqla_session = db.session
    id = fields.Number(dump_only=True)
    title = fields.String(required=True)
    productDescription = fields.String(required=True)
    productBrand = fields.String(required=True)
    price = fields.Number(required=True)

@app.route('/products', methods = ['GET'])
def index():
    get_products = Product.query.all()
    product_schema = ProductSchema(many=True)
    products = product_schema.dump(get_products)
    return make_response(jsonify({"product": products}))
@app.route('/products/<id>', methods = ['GET'])
def get_product_by_id(id):
    get_product = Product.query.get(id)
    product_schema = ProductSchema()
    product = product_schema.dump(get_product)
    return make_response(jsonify({"product": product}))
@app.route('/products/<id>', methods = ['PUT'])
def update_product_by_id(id):
    data = request.get_json()
    get_product = Product.query.get(id)
    if data.get('title'):
        get_product.title = data['title']
    if data.get('productDescription'):
        get_product.productDescription = data['productDescription']
    if data.get('productBrand'):
        get_product.productBrand = data['productBrand']
    if data.get('price'):
        get_product.price= data['price']    
    db.session.add(get_product)
    db.session.commit()
    product_schema = ProductSchema(only=['id', 'title', 'productDescription','productBrand','price'])
    product = product_schema.dump(get_product)
    return make_response(jsonify({"product": product}))
@app.route('/products/<id>', methods = ['DELETE'])
def delete_product_by_id(id):
    get_product = Product.query.get(id)
    db.session.delete(get_product)
    db.session.commit()
    return make_response("",204)
@app.route('/products', methods = ['POST'])
def create_product():
    data = request.get_json()
    product_schema = ProductSchema()
    product = product_schema.load(data)
    result = product_schema.dump(product.create())
    return make_response(jsonify({"product": result}),200)
if __name__ == "__main__":
    app.run(debug=True)

3. testing the API
(venv) (base) ubuntu@ubunu2004:~/flaskdbexample$ flask run –host=0.0.0.0
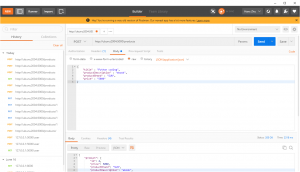
A. POST data to http://ubunu2004:5000/products
{
“title” : “Python coding”,
“productDescription” : “ebook”,
“productBrand” : “SUN”,
“price” : “5000”
}

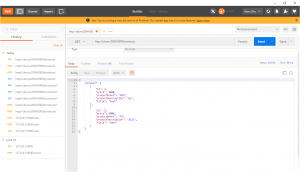
B. GET data

simple flask web app to INSERT record into MySQL

1. install flask and flask-mysqldb
pip install flask
pip install flask_mysqldb
2. mkdir flask_mysql and subfolder templates
we only need two files:
app.py and templates/index.html
3. make app works without DB:
index.html

<HTML>
<BODY bgcolor="cyan">
<form method="POST" action="">
    <center>
    <H1>Enter your details </H1> <br>
    First Name <input type = "text" name= "fname" /> <br>
    Last Name <input type = "text" name = "lname" /> <br>
    <input type = "submit">
    </center>
</form>
</BODY>
</HTML>

app.py

from flask import Flask, render_template
app = Flask(__name__)
@app.route('/', methods=['GET', 'POST'])
def index():
    return render_template('index.html')
if __name__ == '__main__':
    app.run()

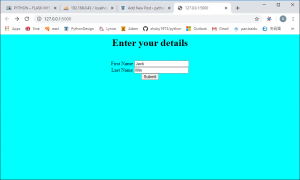
4. test app.py, you will get the web page as below:

5. then we can create table in MySQL:
CREATE TABLE MyUsers ( firstname VARCHAR(30) NOT NULL, lastname VARCHAR(30) NOT NULL);
update app.py:

from flask import Flask, render_template, request
from flask_mysqldb import MySQL
app = Flask(__name__)
app.config['MYSQL_HOST'] = '192.168.0.43'
app.config['MYSQL_USER'] = 'monty'
app.config['MYSQL_PASSWORD'] = 'somIUpass#98'
app.config['MYSQL_DB'] = 'EmployeeDB'
mysql = MySQL(app)
@app.route('/', methods=['GET', 'POST'])
def index():
    if request.method == "POST":
        details = request.form
        firstName = details['fname']
        lastName = details['lname']
        cur = mysql.connection.cursor()
        cur.execute("INSERT INTO MyUsers(firstName, lastName) VALUES (%s, %s)", (firstName, lastName))
        mysql.connection.commit()
        cur.close()
        return 'success'
    return render_template('index.html')
if __name__ == '__main__':
    app.run()

6. run it again, you can submit info into DB on http://127.0.0.1:5000/

python code debug

  1. python pdb debug
    we have sample code read_redis.py:
    import json
    import redis
    client = redis.Redis()
    data = client.lpop(‘info’)
    run it with command: python -i read_redis.py.
    once you got "exception occurred", start pdb debuggin as below:
>>> import pdb
>>> pdb.pm()
> c:\python\lib\site-packages\redis\connection.py(563)connect()
-> raise ConnectionError(self._error_message(e))
(Pdb) data
*** NameError: name 'data' is not defined
  1. VS CODE debug
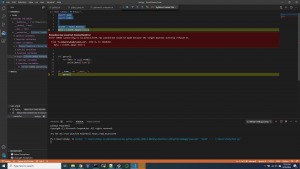
    you can press F5 to start debugging python in VS CODE as below:

TAOBAO login with selenium and pyautogui

there are two challenges during taobao.com login:
1. sometimes the site will ask you pull the slider
resolved with Selenium ActionChains
2. taobao disabled selenium click()
resolved with pyautogui lib:
pip install pyautogui
here is the code for taobao.com login:

from selenium import webdriver
import logging
import time
from selenium.common.exceptions import NoSuchElementException, WebDriverException
from retrying import retry
from selenium.webdriver import ActionChains

import pyautogui
pyautogui.PAUSE = 0.5 

logging.basicConfig(level = logging.INFO,format = '%(asctime)s - %(name)s - %(levelname)s - %(message)s')
logger = logging.getLogger(__name__)

class taobao():
    def __init__(self):
        self.browser = webdriver.Chrome("path\to\your\chromedriver.exe")
        self.browser.maximize_window()
        self.browser.implicitly_wait(5)
        self.domain = 'http://www.taobao.com'
        self.action_chains = ActionChains(self.browser)

    def login(self, username, password):
        while True:
            self.browser.get(self.domain)
            time.sleep(1)

            #self.browser.find_element_by_class_name('h').click()
            #self.browser.find_element_by_id('fm-login-id').send_keys(username)
            #self.browser.find_element_by_id('fm-login-password').send_keys(password)
            self.browser.find_element_by_xpath('//*[@id="J_SiteNavLogin"]/div[1]/div[1]/a[1]').click()
            self.browser.find_element_by_xpath('//*[@id="fm-login-id"]').send_keys(username)
            self.browser.find_element_by_xpath('//*[@id="fm-login-password"]').send_keys(password)
            time.sleep(1)

            try:
                # using Selenium ActionChains for the website SLIDE authentication
                slider = self.browser.find_element_by_xpath("//span[contains(@class, 'btn_slide')]")
                if slider.is_displayed():
                    # pull the slider
                    self.action_chains.drag_and_drop_by_offset(slider, 258, 0).perform()
                    time.sleep(0.5)
                    # release the slider
                    self.action_chains.release().perform()
            except (NoSuchElementException, WebDriverException):
                logger.info('slider not found')

            # using pyautogui click the LOGIN PNG image
            #self.browser.find_element_by_class_name('password-login').click()
            #self.browser.find_element_by_xpath('//*[@id="login-form"]/div[4]/button').click()
             coords = pyautogui.locateOnScreen('1.png')
            x, y = pyautogui.center(coords)
            pyautogui.leftClick(x, y)

            nickname = self.get_nickname()
            if nickname:
                logger.info('successfully logon, nickname is' + nickname)
                break
            logger.debug('login failed,please try again after 5 seconds')
            time.sleep(5)

    def get_nickname(self):
        self.browser.get(self.domain)
        time.sleep(0.5)
        try:
            return self.browser.find_element_by_class_name('site-nav-user').text
        except NoSuchElementException:
            return ''


if __name__ == '__main__':
    # Input your TAOBAO username and password
    username = 'username'
    password = 'password'
    tb = taobao()
    tb.login(username, password)

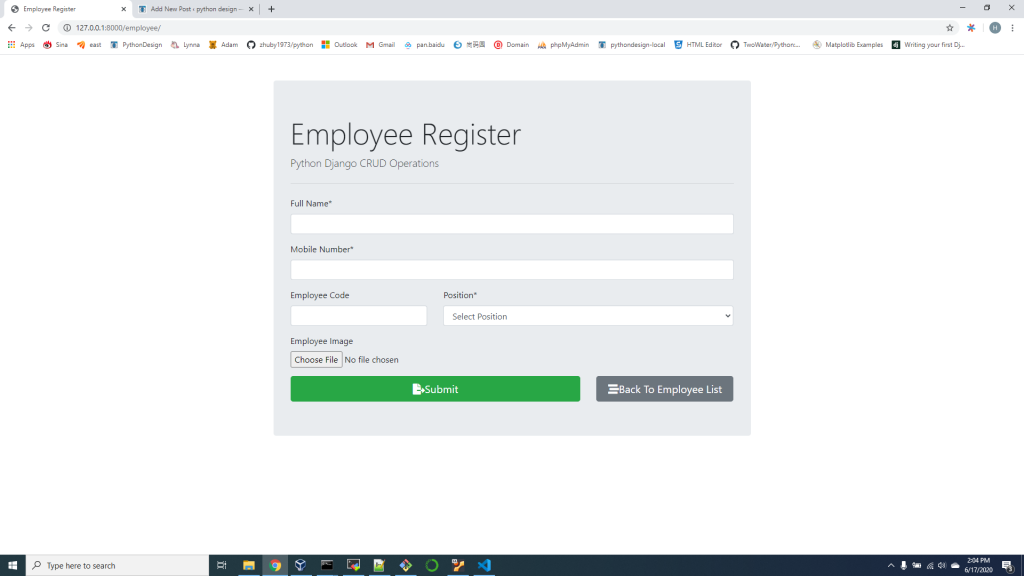
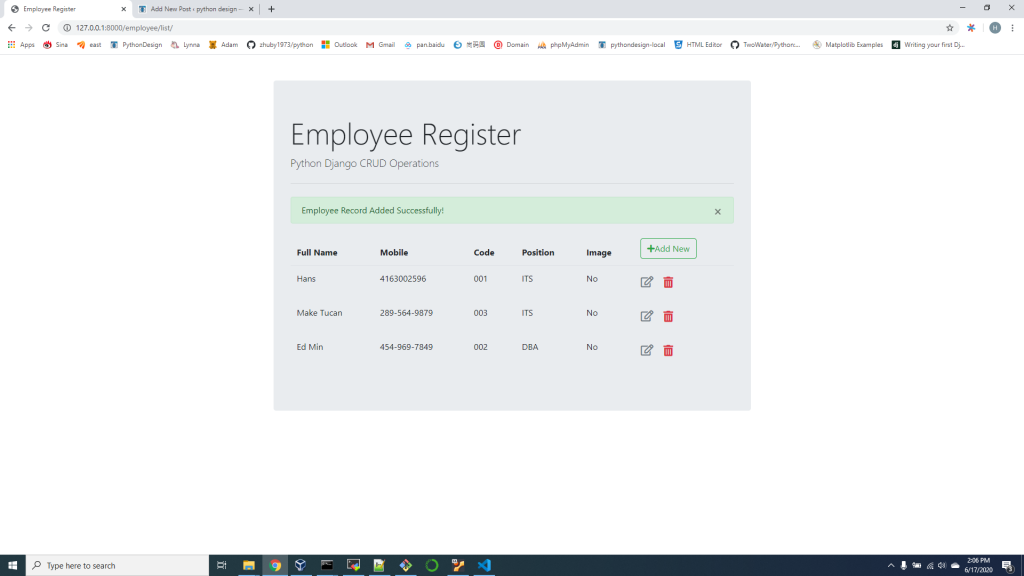
Complete Django/MySQL CRUD Operations

Learned from CodAffection online course, code has been staged on github:
https://github.com/zhuby1973/python/tree/master/employee_project

we need pip install django-crispy-forms for this project.
1. django-admin startproject employee_project
2. python manage.py runserver
3. python manage.py startapp employee_register
edit settings.py, urls.py, views.py and models.py, then run migrate command to create tables:
python manage.py migrate
python manage.py makemigrations employee_register
python manage.py sqlmigrate employee_register 0001
python manage.py sqlmigrate employee_register 0002
python manage.py migrate
python manage.py createsuperuser (create admin user and verify in admin page)
you can verify the tables in MySQL.

# this is employee_register/views.py:
from django.shortcuts import render,redirect
from .forms import EmployeeForm, RegisterForm
from .models import Employee
import os
from django.conf import settings
from django.contrib import messages
#from django.contrib.auth import login, authenticate
#from django.contrib.auth.forms import UserCreationForm

# Create your views here.
def register(request):
    registerForm = RegisterForm(request.POST or None)
    if request.method == "POST":
        if registerForm.is_valid():
            registerForm.is_staff = True
            registerForm.save()

    return render(request, "registration/register.html", {"form": registerForm})

def employee_list(request):
    print (settings.BASE_DIR)
    context = {'employee_list':Employee.objects.all()}
    return render(request,"employee_register/employee_list.html",context)

def employee_form(request, id=0):
    if request.method == "GET":
        if id == 0:
            form = EmployeeForm()
        else:
            employee = Employee.objects.get(id=id)
            form = EmployeeForm(instance=employee)
        return render(request,"employee_register/employee_form.html",{'form':form})
    else:
        if id == 0:
            form = EmployeeForm(request.POST or None, request.FILES or None)
        else:
            employee = Employee.objects.get(id=id)
            employee.image.delete()
            form = EmployeeForm(request.POST or None, request.FILES or None, instance = employee)

        if form.is_valid():
            form.save()
            if id == 0:
                messages.success(request, "Employee Record Added Successfully!")
            else:
                messages.info(request,"Employee Record Updated Successfully!")

        return redirect("/employee/list")


def employee_delete(request,id):
    employee = Employee.objects.get(id=id)
    employee.delete()
    messages.error(request, 'Employee Record Deleted Successfully!')

    return redirect('/employee/list')

create Web Service with FastAPI and uvicorn

  1. pip install fastapi
  2. pip install uvicorn
    code main.py:
from fastapi import FastAPI
from pydantic import BaseModel
app = FastAPI()
class People(BaseModel):
    name: str
    age: int
    address: str = None
@app.post('/insert')
def insert(people: People):
    age_after_10_years = people.age + 10
    msg = f'Name: {people.name},age after ten years:{age_after_10_years}'
    return {'success': True, 'msg': msg}
@app.get('/')
def index():
    return {'message': 'Hi, this is your FastApi service!'}

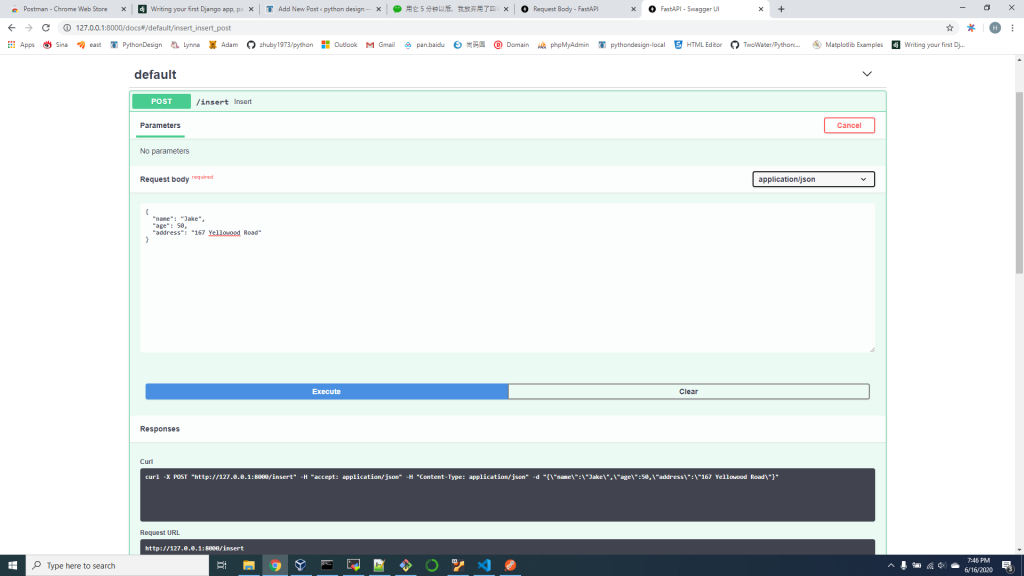
run command: uvicorn main:app --reload, then you can access docs
http://127.0.0.1:8000/docs, you can test POST/GET as below or test it with Postman.

create Django web app with MySQL

read https://docs.djangoproject.com/en/3.0/intro/tutorial01/, you can start a new project and app:
1. django-admin startproject mysite
2. python manage.py runserver
3. python manage.py startapp polls
4. edit polls/views.py and urls.py
5. edit mysite/urls.py and settings.py to include MySQL db info:

DATABASES = {
    'default': {
        'ENGINE': 'django.db.backends.mysql',
        'NAME': 'EmployeeDB',
        'USER': 'monty',
        'PASSWORD': 'somIUpass#98',
        'HOST': '192.168.0.28'
    }
}

polls/models.py:
from django.db import models
class Question(models.Model):
    question_text = models.CharField(max_length=200)
    pub_date = models.DateTimeField('date published')
class Choice(models.Model):
    question = models.ForeignKey(Question, on_delete=models.CASCADE)
    choice_text = models.CharField(max_length=200)
    votes = models.IntegerField(default=0)
PS C:\Users\zhuby\mysite>  python manage.py migrate
Operations to perform:
  Apply all migrations: admin, auth, contenttypes, sessions
Running migrations:
  Applying contenttypes.0001_initial... OK
  Applying auth.0001_initial... OK
  Applying admin.0001_initial... OK
  Applying admin.0002_logentry_remove_auto_add... OK
  Applying admin.0003_logentry_add_action_flag_choices... OK
  Applying auth.0002_alter_permission_name_max_length... OK
  Applying auth.0003_alter_user_email_max_length... OK
  Applying auth.0004_alter_user_username_opts... OK
  Applying auth.0005_alter_user_last_login_null... OK
  Applying auth.0007_alter_validators_add_error_messages... OK
  Applying auth.0008_alter_user_username_max_length... OK
  Applying auth.0009_alter_user_last_name_max_length... OK
  Applying auth.0010_alter_group_name_max_length... OK
  Applying auth.0011_update_proxy_permissions... OK
  Applying sessions.0001_initial... OK
PS C:\Users\zhuby\mysite> python manage.py makemigrations polls
Migrations for 'polls':
  polls\migrations\0001_initial.py
    - Create model Choice
PS C:\Users\zhuby\mysite> python manage.py sqlmigrate polls 0001
--
-- Create model Question
CREATE TABLE `polls_question` (`id` integer AUTO_INCREMENT NOT NULL PRIMARY KEY, `question_text` varchar(200) NOT NULL, `pub_date` datetime(6) NOT NULL);
--
-- Create model Choice
--
CREATE TABLE `polls_choice` (`id` integer AUTO_INCREMENT NOT NULL PRIMARY KEY, `choice_text` varchar(200) NOT NULL, `votes` integer NOT NULL, `question_id` integer NOT NULL);
ALTER TABLE `polls_choice` ADD CONSTRAINT `polls_choice_question_id_c5b4b260_fk_polls_question_id` FOREIGN KEY (`question_id`) REFERENCES `polls_question` (`id`);
PS C:\Users\zhuby\mysite> python manage.py migrate
Operations to perform:
  Apply all migrations: admin, auth, contenttypes, polls, sessions
Running migrations:
  Applying polls.0001_initial... OK

You can check the code from https://github.com/zhuby1973/python/tree/master/mysite with "git checkout part2"

few examples from matplotlib

# sphinx_gallery_thumbnail_number = 2
import numpy as np
import matplotlib.pyplot as plt
N = 21
x = np.linspace(0, 10, 11)
y = [3.9, 4.4, 10.8, 10.3, 11.2, 13.1, 14.1,  9.9, 13.9, 15.1, 12.5]

# fit a linear curve an estimate its y-values and their error.
a, b = np.polyfit(x, y, deg=1)
y_est = a * x + b
y_err = x.std() * np.sqrt(1/len(x) +
                          (x - x.mean())**2 / np.sum((x - x.mean())**2))

fig, ax = plt.subplots()
ax.plot(x, y_est, '-')
ax.fill_between(x, y_est - y_err, y_est + y_err, alpha=0.2)
ax.plot(x, y, 'o', color='tab:brown')
plt.savefig('confidence.jpg')
plt.show()
"""
============
MRI With EEG
============

Displays a set of subplots with an MRI image, its intensity
histogram and some EEG traces.
"""

import numpy as np
import matplotlib.pyplot as plt
import matplotlib.cbook as cbook
import matplotlib.cm as cm

from matplotlib.collections import LineCollection
from matplotlib.ticker import MultipleLocator

fig = plt.figure("MRI_with_EEG")

# Load the MRI data (256x256 16 bit integers)
with cbook.get_sample_data('s1045.ima.gz') as dfile:
    im = np.frombuffer(dfile.read(), np.uint16).reshape((256, 256))

# Plot the MRI image
ax0 = fig.add_subplot(2, 2, 1)
ax0.imshow(im, cmap=cm.gray)
ax0.axis('off')

# Plot the histogram of MRI intensity
ax1 = fig.add_subplot(2, 2, 2)
im = np.ravel(im)
im = im[np.nonzero(im)]  # Ignore the background
im = im / (2**16 - 1)  # Normalize
ax1.hist(im, bins=100)
ax1.xaxis.set_major_locator(MultipleLocator(0.4))
ax1.minorticks_on()
ax1.set_yticks([])
ax1.set_xlabel('Intensity (a.u.)')
ax1.set_ylabel('MRI density')

# Load the EEG data
n_samples, n_rows = 800, 4
with cbook.get_sample_data('eeg.dat') as eegfile:
    data = np.fromfile(eegfile, dtype=float).reshape((n_samples, n_rows))
t = 10 * np.arange(n_samples) / n_samples

# Plot the EEG
ticklocs = []
ax2 = fig.add_subplot(2, 1, 2)
ax2.set_xlim(0, 10)
ax2.set_xticks(np.arange(10))
dmin = data.min()
dmax = data.max()
dr = (dmax - dmin) * 0.7  # Crowd them a bit.
y0 = dmin
y1 = (n_rows - 1) * dr + dmax
ax2.set_ylim(y0, y1)

segs = []
for i in range(n_rows):
    segs.append(np.column_stack((t, data[:, i])))
    ticklocs.append(i * dr)

offsets = np.zeros((n_rows, 2), dtype=float)
offsets[:, 1] = ticklocs

lines = LineCollection(segs, offsets=offsets, transOffset=None)
ax2.add_collection(lines)

# Set the yticks to use axes coordinates on the y axis
ax2.set_yticks(ticklocs)
ax2.set_yticklabels(['PG3', 'PG5', 'PG7', 'PG9'])

ax2.set_xlabel('Time (s)')


plt.tight_layout()
plt.show()
"""
===============
Watermark image
===============

Using a PNG file as a watermark.
"""

import numpy as np
import matplotlib.cbook as cbook
import matplotlib.image as image
import matplotlib.pyplot as plt


with cbook.get_sample_data('logo2.png') as file:
    im = image.imread(file)

fig, ax = plt.subplots()

ax.plot(np.sin(10 * np.linspace(0, 1)), '-o', ms=20, alpha=0.7, mfc='orange')
ax.grid()
fig.figimage(im, 10, 10, zorder=3, alpha=.5)
plt.savefig('watermark.jpg')
plt.show()

#############################################################################
#
# ------------
#
# References
# """"""""""
#
# The use of the following functions, methods, classes and modules is shown
# in this example:

import matplotlib
matplotlib.image
matplotlib.image.imread
matplotlib.pyplot.imread
matplotlib.figure.Figure.figimage
"""
======================
Whats New 0.99 Mplot3d
======================

Create a 3D surface plot.
"""
import numpy as np
import matplotlib.pyplot as plt
from matplotlib import cm
from mpl_toolkits.mplot3d import Axes3D

X = np.arange(-5, 5, 0.25)
Y = np.arange(-5, 5, 0.25)
X, Y = np.meshgrid(X, Y)
R = np.sqrt(X**2 + Y**2)
Z = np.sin(R)

fig = plt.figure()
ax = Axes3D(fig)
ax.plot_surface(X, Y, Z, rstride=1, cstride=1, cmap=cm.viridis)
plt.savefig('Axes3D.jpg')
plt.show()

#############################################################################
#
# ------------
#
# References
# """"""""""
#
# The use of the following functions, methods, classes and modules is shown
# in this example:

import mpl_toolkits
mpl_toolkits.mplot3d.Axes3D
mpl_toolkits.mplot3d.Axes3D.plot_surface

data visualization for US firearm background checks

we can download nics-firearm-background-checks.csv from https://github.com/BuzzFeedNews/nics-firearm-background-checks/tree/master/data
and put it in same folder with firearm_background.py:

#!/usr/bin/env python
import sys, os
import pandas as pd
import numpy as np
import matplotlib.pyplot as plt
import seaborn as sb
sb.set()

checks = pd.read_csv('nics-firearm-background-checks.csv')

checks["year_int"] = checks["month"].apply(lambda x: int(x.split("-")[0]))
checks["month_int"] = checks["month"].apply(lambda x: int(x.split("-")[1]))

latest_month_count = checks.iloc[0]["month_int"] + (checks.iloc[0]["year_int"] * 12)

totals = checks[
    (checks["month_int"] + (checks["year_int"] * 12)) > (latest_month_count - 12*3)
].groupby("month")["totals"].sum()
tick_placement = np.arange(len(totals) - 1, 0, -3)

ax = totals.plot(kind="area", figsize=(12, 8), color="#000000", alpha=0.5)
ax.figure.set_facecolor("#FFFFFF")
ax.set_title("NICS Background Check Totals — Past 36 Months", fontsize=24)
ax.set_yticklabels([ "{0:,.0f}".format(y) for y in ax.get_yticks() ], fontsize=12)
ax.set_xticks(tick_placement)
ax.set_xticklabels([ totals.index[i] for i in tick_placement ])
ax.set_xlim(0, len(totals) - 1)
plt.setp(ax.get_xticklabels(), rotation=0, fontsize=12)
ax.set_xlabel("")

plt.savefig('image.jpg')
plt.show()

run the firearm_background.py, you will get image.jpg(default is png format, you need pip install pillow for saving as jpg format) saved and displayed: